Process Lens PL Service Manual_EN.pdf - 第138页
4 Machine - Calibrations 13 8 Se rv ic e Ma nu al P ro ce ss L en s PL - 0 3/ 20 25 Step 2 Fig.193: Placing the target ► Place the 2D and 3D target onto the inlet section in the orientation shown below. The 2D target sh…
4 Machine - Calibrations
Service Manual Process Lens PL - 03/2025 137
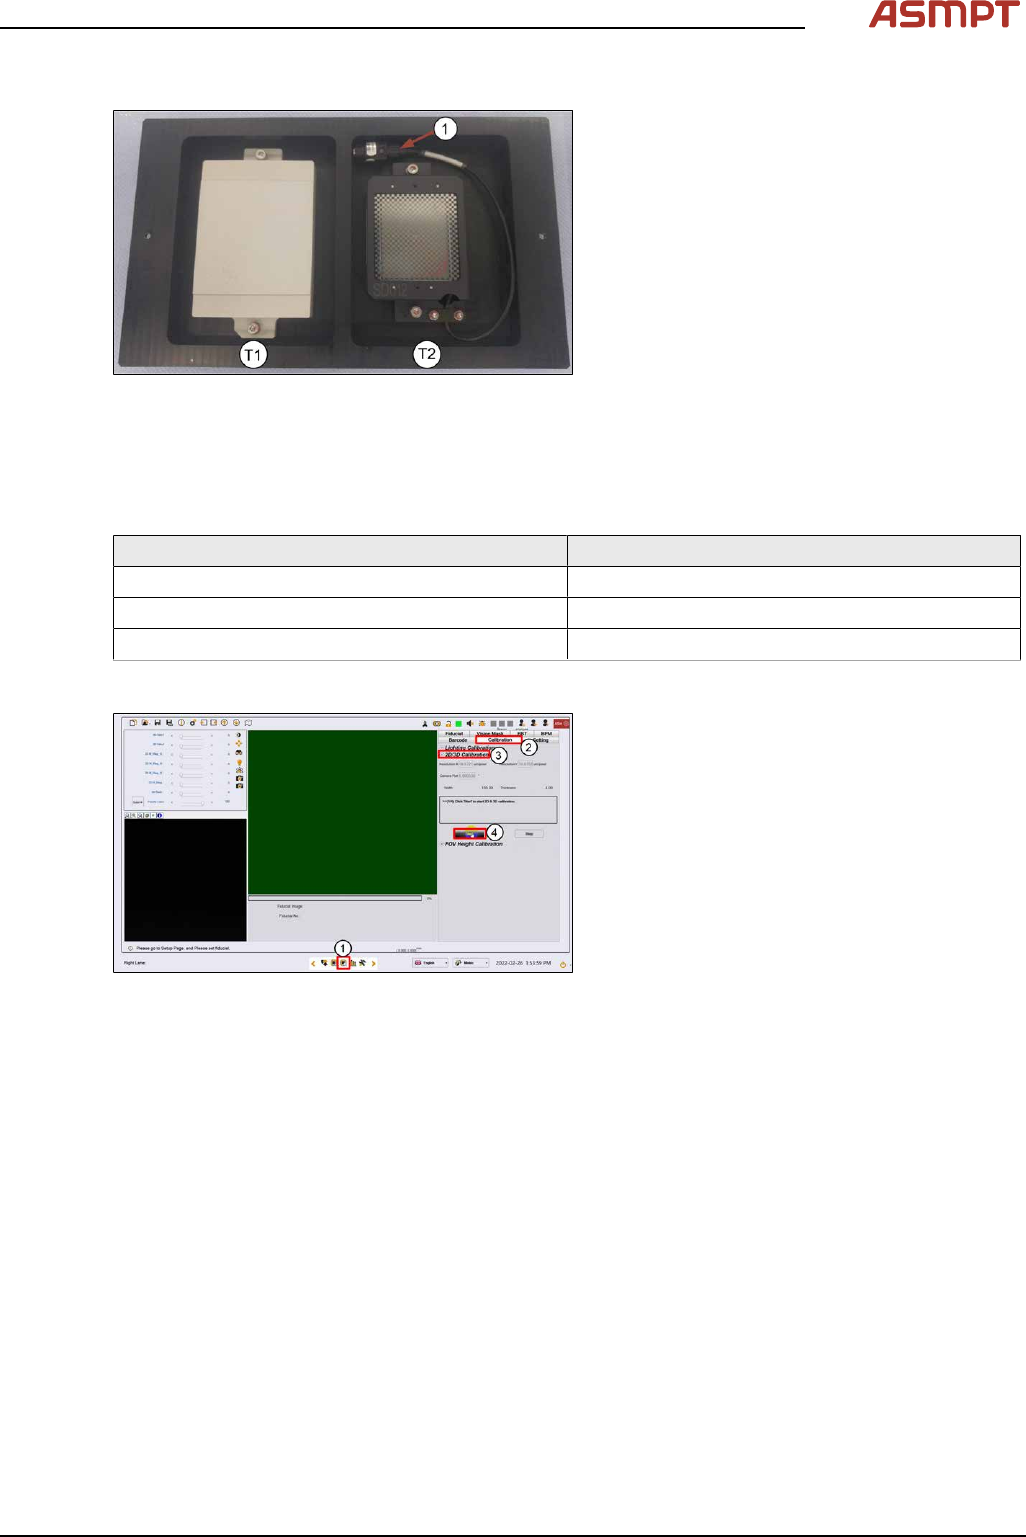
2D and 3D Calibration tool
Fig.191: 3D Calibration Target – 2D Calibration Target
1. 2D back light cable and connector.
► Check the calibration tool. Clean with a lint free cloth if necessary.
► Coil the 2D light cable into the cavity as shown.
2D and 3D cal fixture info
Mechanical feature Dimension
Length: 260 mm
Width: 154 mm
Hight: 4 mm
Step 1
Fig.192: Vision page
► Go to Vision Page(1).
► Click Calibration(2).
► Choose 2D/3D Calibration(3).
► Click Start to continue(4).
4 Machine - Calibrations
138 Service Manual Process Lens PL - 03/2025
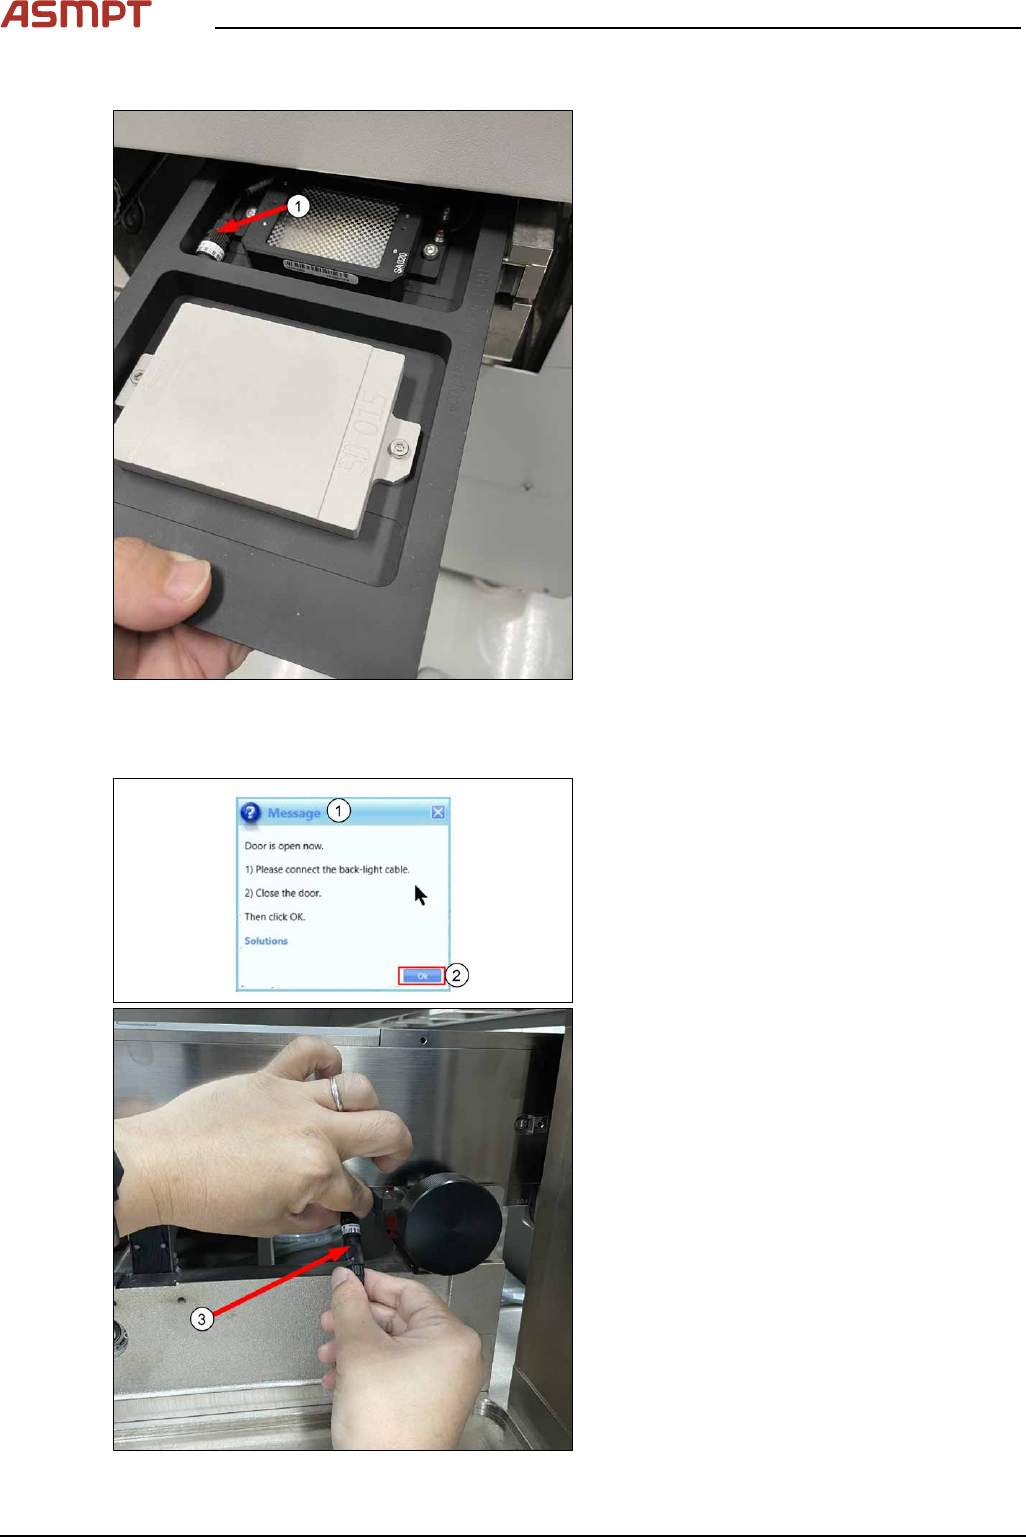
Step 2
Fig.193: Placing the target
► Place the 2D and 3D target onto the inlet
section in the orientation shown below.
The 2D target should be loaded head in
first. Ensure the 2D lighting cable (1) is in
the cavity.
► Click Continue to transport target into in-
spection location.
Step 3
Fig.194: Door
► Open door.
ð Message shows that the door is
open(1).
► Connect the back-light cable as shown(3).
► Close door.
► Click Ok(2) to continue.

4 Machine - Calibrations
Service Manual Process Lens PL - 03/2025 139
Step 4
Fig.195: Lighting box
► Click on the tip of the inverted triange of
the 2D target (2) to centre the FOV.
► At the Lighting Box menu, adjust the
Back light (1) if necessary. 15 is default. A
value of 10 to 20 is good to use. There
should be good contrast between the
black patterns and the white background.
Set all other lighting values at0.
Fig.196: Corners
When perform 2D calibration, user can zoom in
the image to check if the lighting is too bright
and the image saturated.
As you can see from left image, the corners
should be connected and the “White regions”
are not totally white but have lower gray level
value.
Fig.197: Optimizing lighting
During 2D/3D calibration, You can choose to
perform auto-lighting or manually set the light-
ing for each calibration. Note that for auto light-
ing there may be occasion where the auto light-
ing returns non optimized value, i.e., too bright
(3), or too dark (1). In this case, you may adjust
to achieve optimal lighting value (2) manually
based on experience.
To improve the lighting calibration result and
provide additional guidance to you, the software
performs image lighting check and prompt error
prior to 2D and 3D calibration.
► Click Continue.