Process Lens PL Service Manual_EN.pdf - 第157页
4 Machine - Calibrations Se rv ic e Ma nu al P ro ce ss L en s PL - 0 3/ 20 25 15 7 Fig.242: Certificate ► Input the target´s Certified height refer- ence (1) to certificate. ► Click Start . Step 2 Fig.243: Input sect…
4 Machine - Calibrations
156 Service Manual Process Lens PL - 03/2025
Target Information
Mechanical feature Dimension Mechanical feature Dimension
Fixture overall length 155mm Target shape Circle
Fixture overall width 122mm Target diameter 2mm
Fixture edge thickness 4mm Target thickness 123µm (in the range
of 120µm)
Target area (standard):
H15
HD10/HD20
4mm x 4mm
6mm x 6mm
WARNING
DO NOT TOUCH THE TARGET
Maintain the target area free from dirt and contamination.
Teach and Verify Sequences:
The camera moves over the target and captures the target at 9 different positions of the FOV (Field of
View). In each FOV position, the camera measures the Golden target 50 times to determine the aver-
age value, calibrate the height measurements across the FOV, and determine the repeatability for
each position.
Before running this calibration it is assumed:
●
The 2D and 3D calibration procedure is performed again. See calibration flow.
●
Correct top.dev file is installed.
Run times:
●
The calibration run will take approximately 18 minutes.
●
The verification run will take approximately 15 minutes
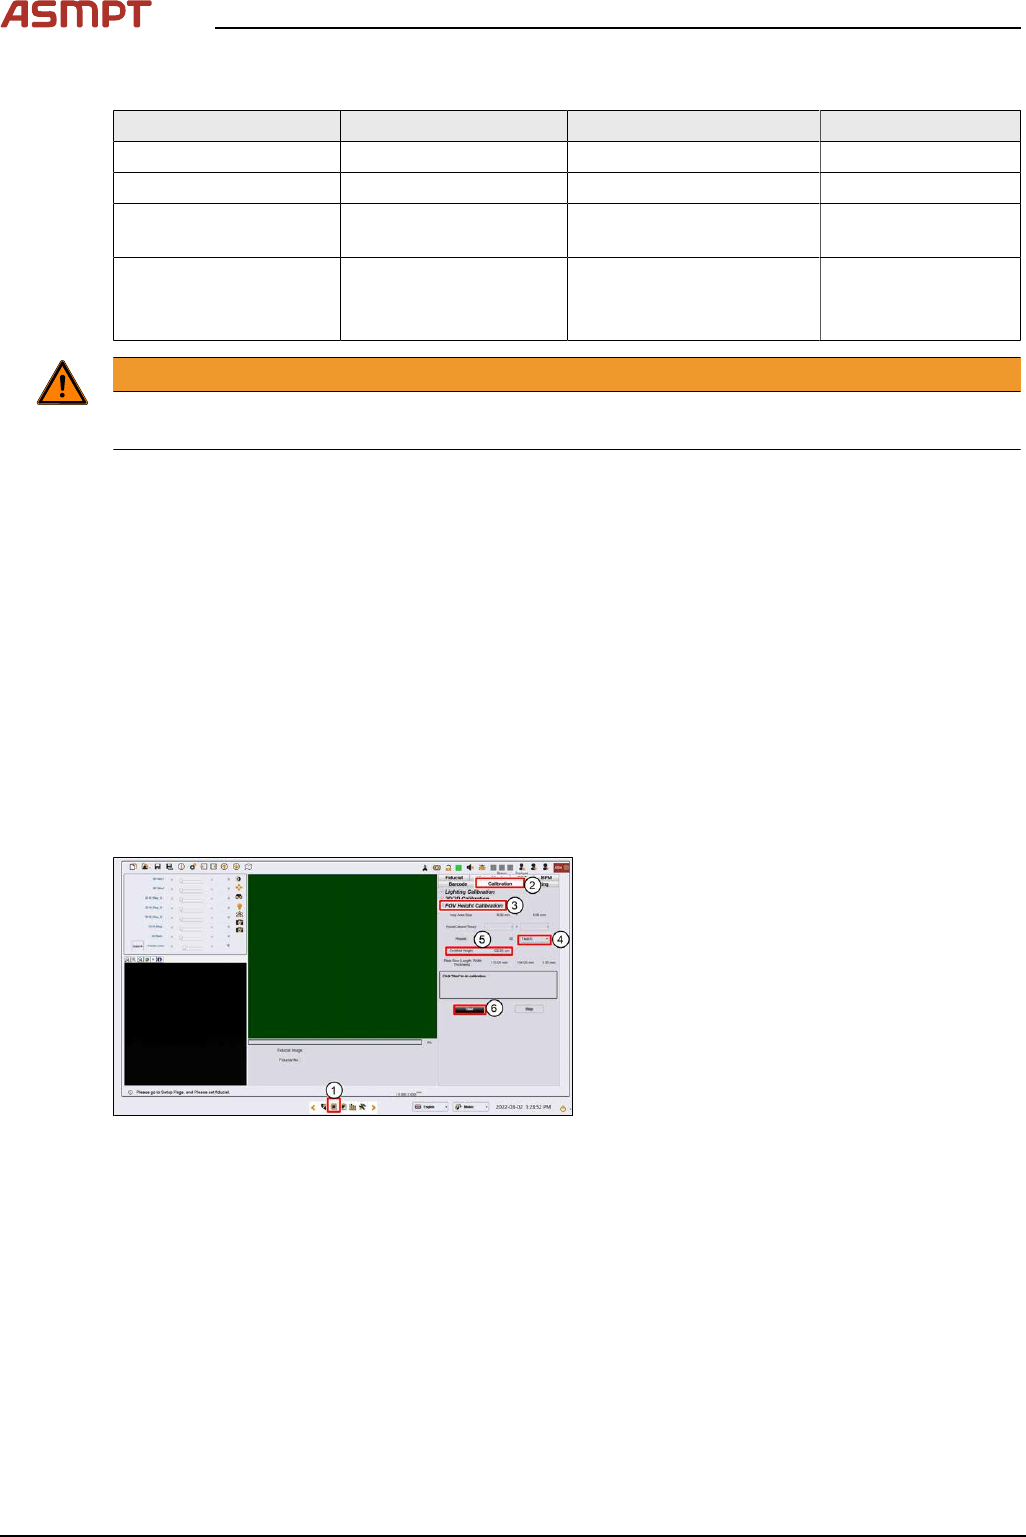
Step 1
Fig.241: Vision page
► Click on the Vision page(1).
► Click on Calibration(2).
► Click on FOV Height Calibration(3).
► Select Teach(4).
4 Machine - Calibrations
Service Manual Process Lens PL - 03/2025 157
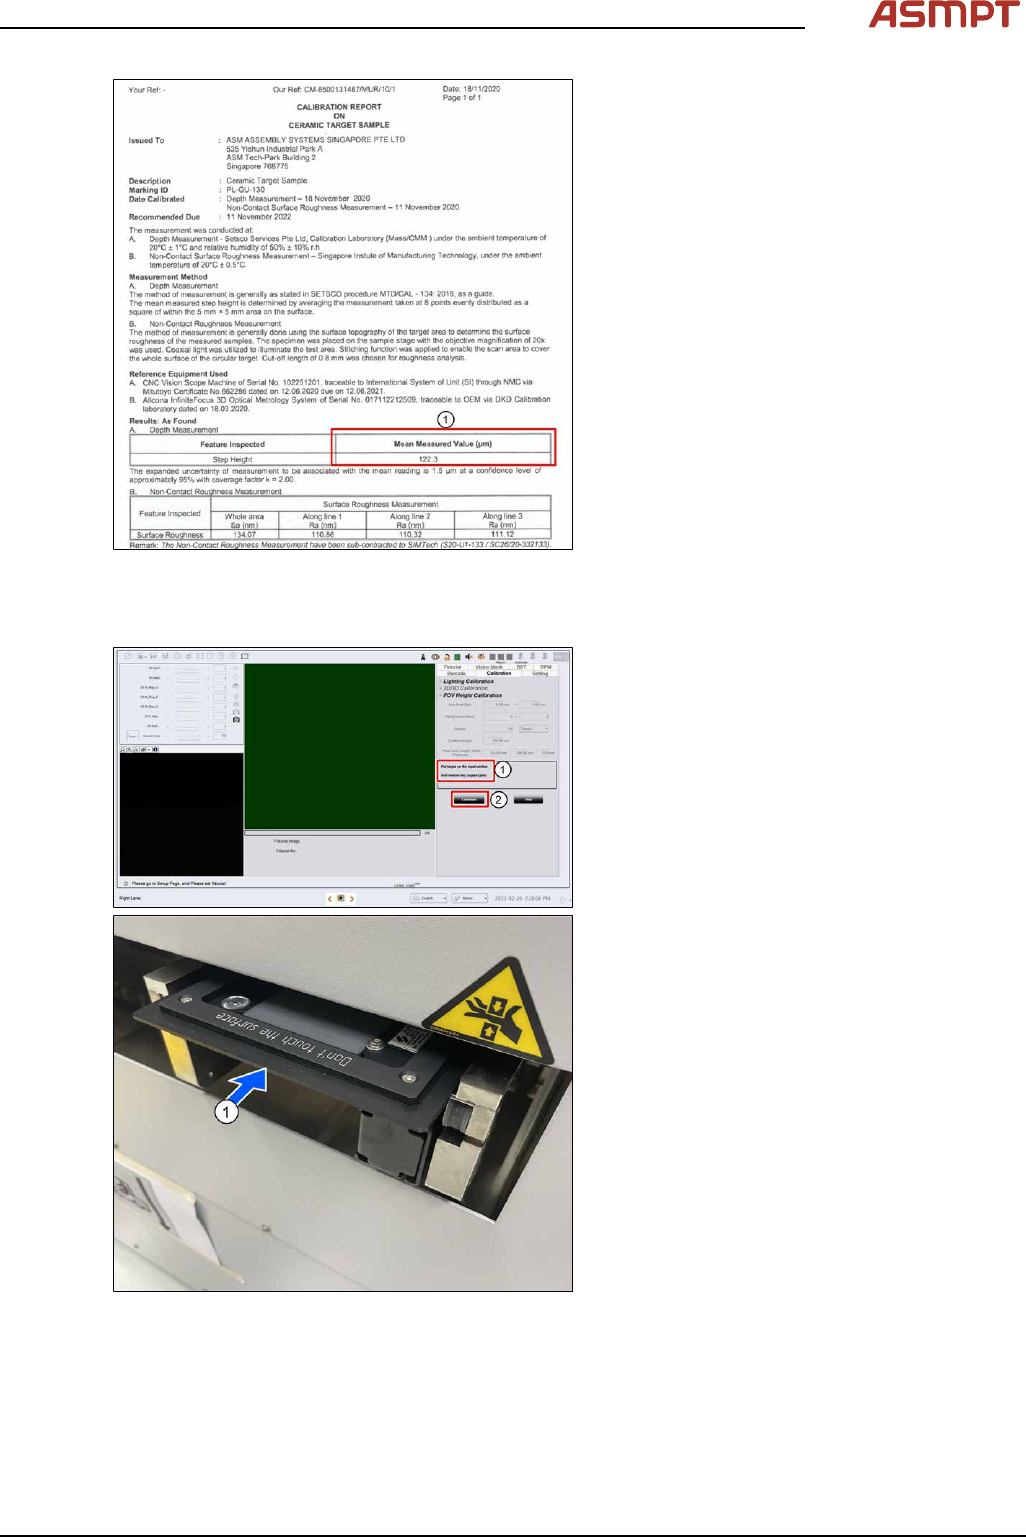
Fig.242: Certificate
► Input the target´s Certified height refer-
ence(1) to certificate.
► Click Start.
Step 2
Fig.243: Input section
●
The conveyor adjusts to the width of the
target fixture.
●
Place the target on the input section(1). (If
there are support pins on the conveyor,
open the cover and remove them now.)
●
Click Continue(2), target will convey into
inspection area. The target loads to the in-
spection section and the camera moves to
the centre of the target.
4 Machine - Calibrations
158 Service Manual Process Lens PL - 03/2025
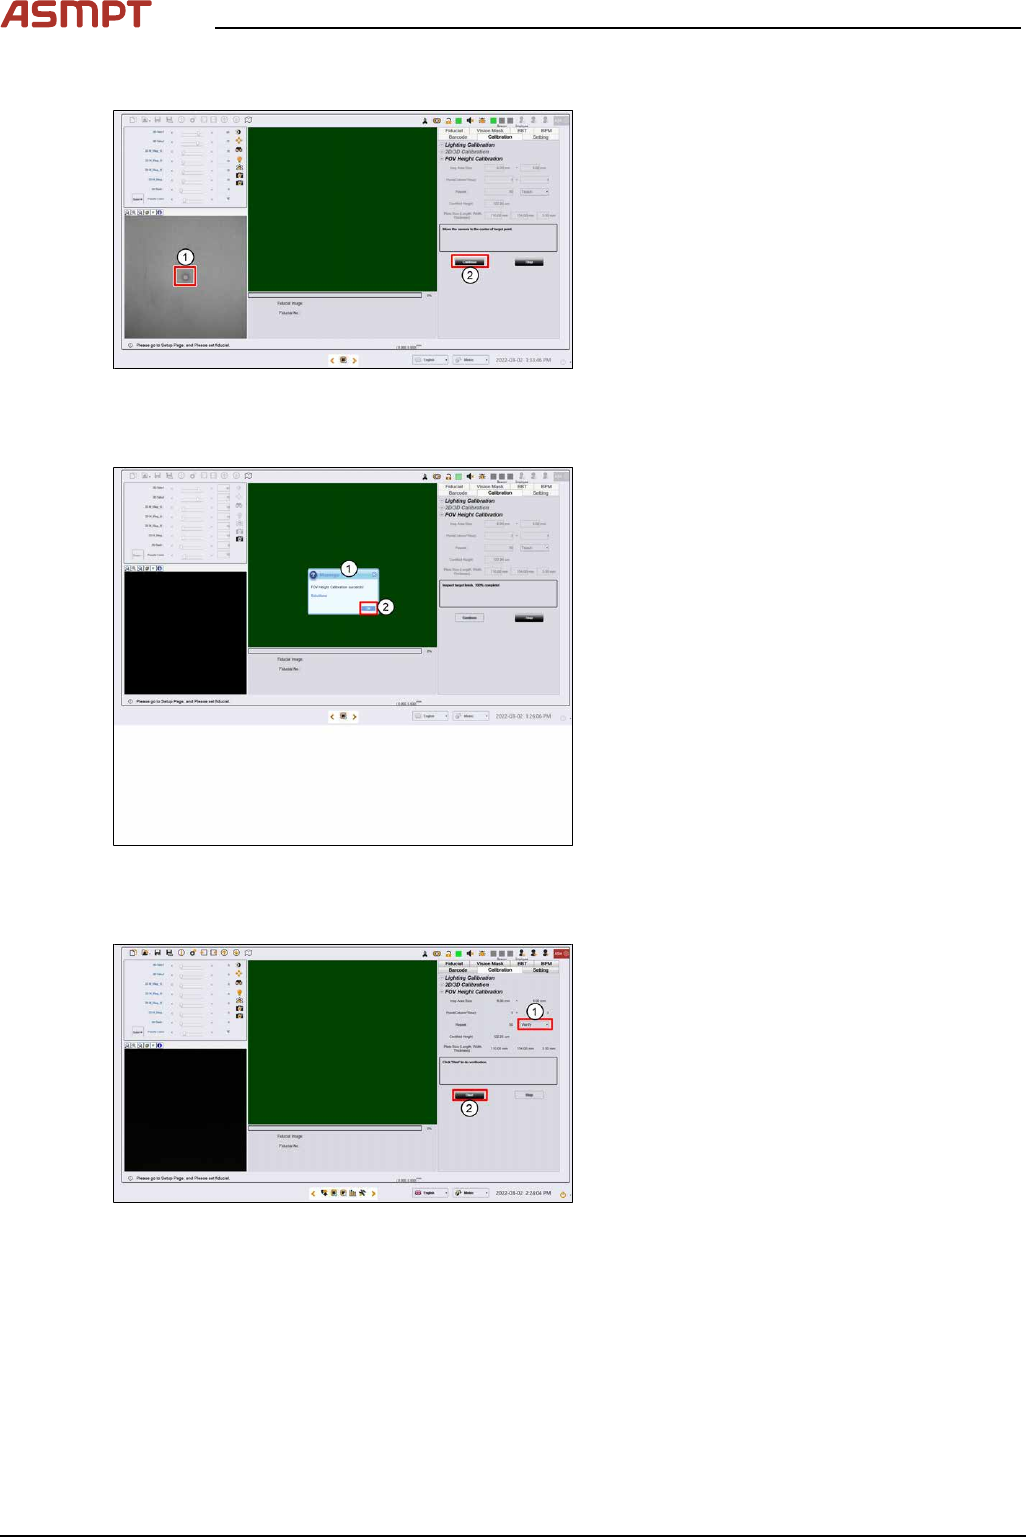
Step 3
Fig.244: Target centre
► Click on the centre of the target. The FOV
centres to the target.
► Click Continue. Process Lens PL adjusts
the lighting, then starts the teach process.
Step 4
Fig.245: Success message
► A "FOV Height Calibration succeeds!"
message pops up (1).
► Click OK (2).
Step 5
Fig.246: Clicking start
► Select Verify (1).
► Click Start (2).