Process Lens PL Service Manual_EN.pdf - 第159页
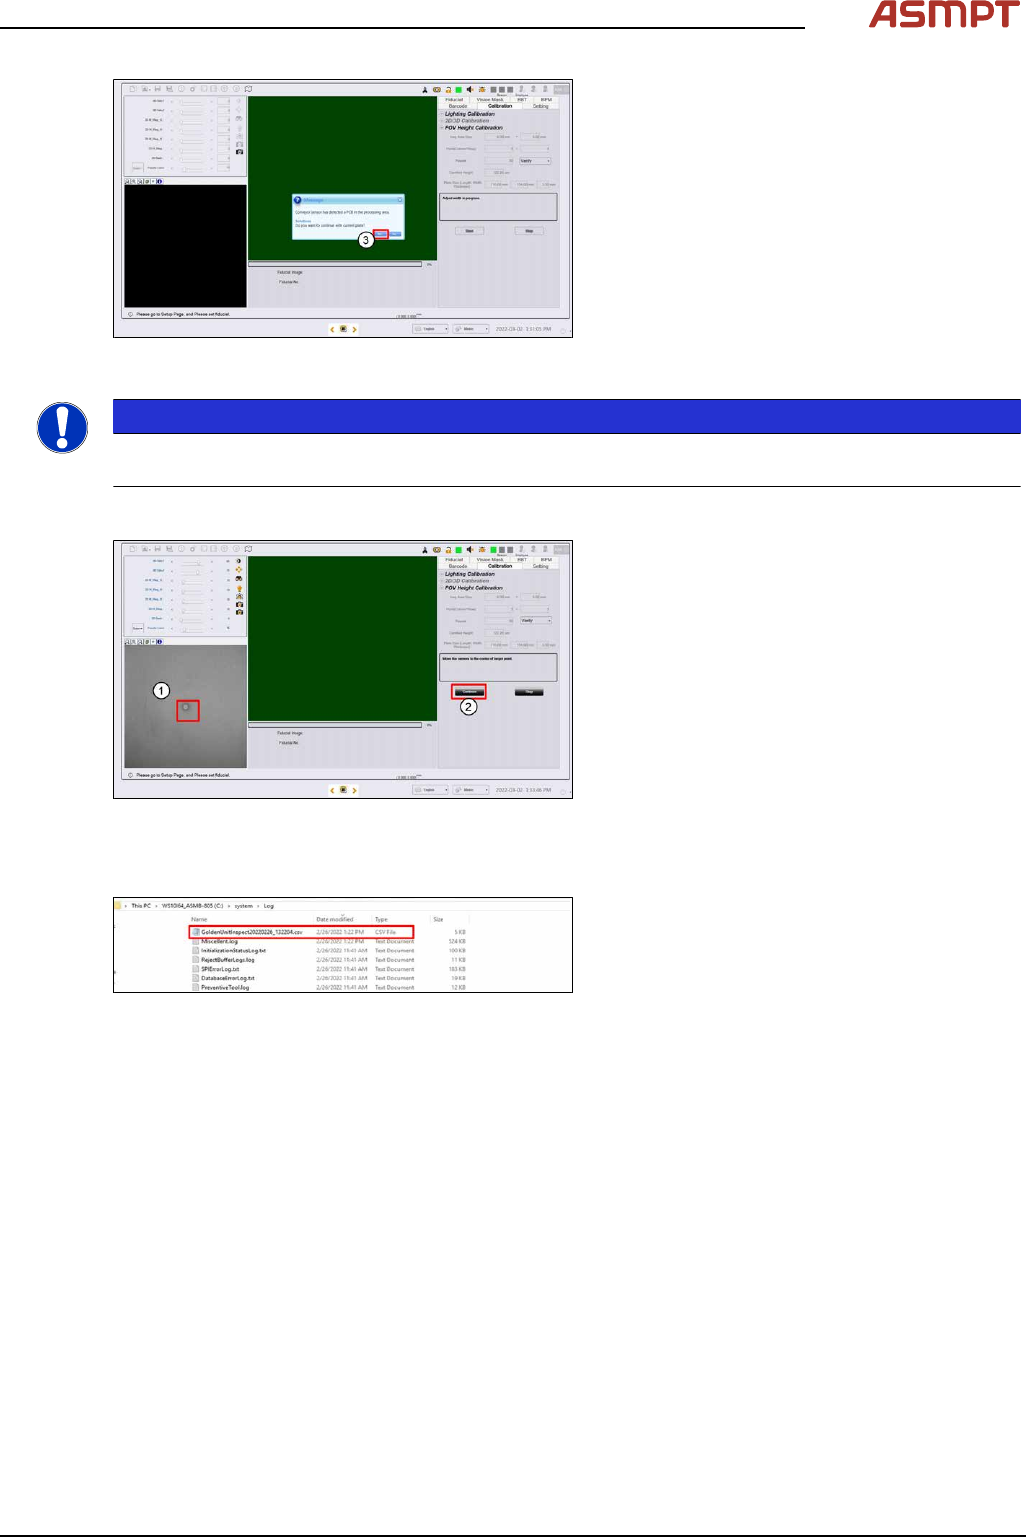
4 Machine - Calibrations Se rv ic e Ma nu al P ro ce ss L en s PL - 0 3/ 20 25 15 9 Fig.247: Message ► Click Yes (3) to the next message as the target is still on the conveyor. NOTICE If the calibration fails, stop the …
4 Machine - Calibrations
158 Service Manual Process Lens PL - 03/2025
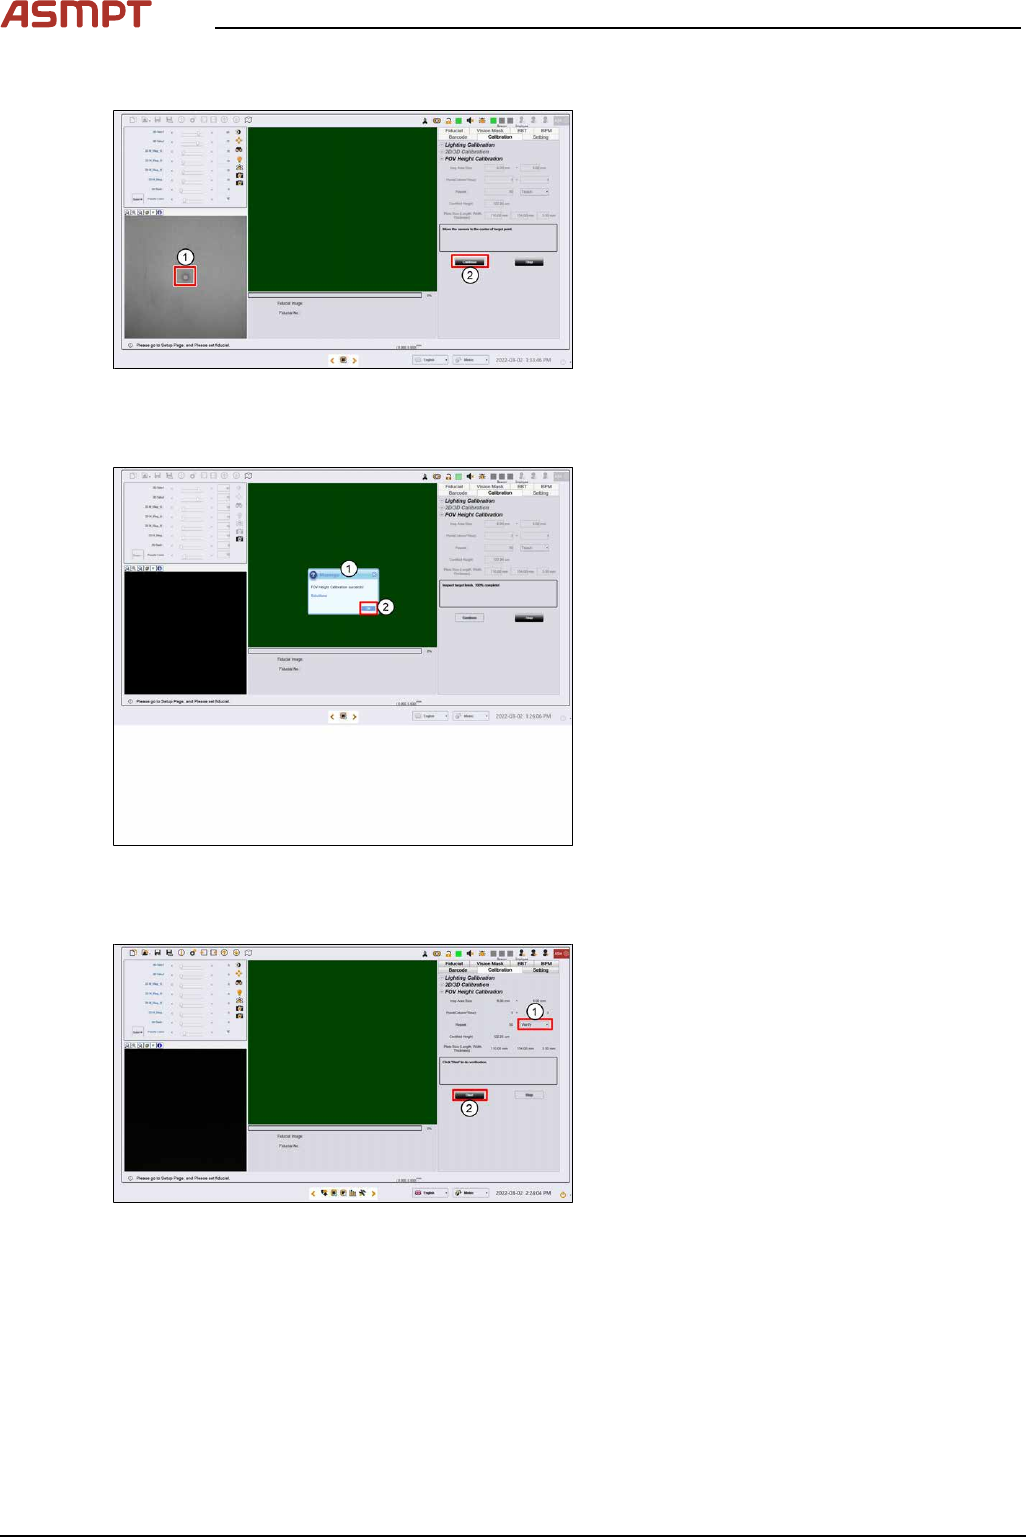
Step 3
Fig.244: Target centre
► Click on the centre of the target. The FOV
centres to the target.
► Click Continue. Process Lens PL adjusts
the lighting, then starts the teach process.
Step 4
Fig.245: Success message
► A "FOV Height Calibration succeeds!"
message pops up (1).
► Click OK (2).
Step 5
Fig.246: Clicking start
► Select Verify (1).
► Click Start (2).
4 Machine - Calibrations
Service Manual Process Lens PL - 03/2025 159
Fig.247: Message
► Click Yes (3) to the next message as the
target is still on the conveyor.
NOTICE
If the calibration fails, stop the process. Remove the target and inspect the target under a microscope
for foreign material. Remove any foreign material with a clean, dry, soft hair brush.
Step 6
Fig.248: Centre of the target
► Click on the center of the target (1). The
FOV center’s to the target.
► Click Continue. Process Lens PL adjusts
the lighting, and then starts the verification
process. (2)
► A "FOV Height Verification succeeds!"
message pops up. Click OK.
Step 7
Fig.249: Results
► The results of the FOV Height calibration
test can be found in an output file in the
path C:\system\
log\GoldenUnitInspect
***timestamp***.csv where timestamp is
the time the calibration was completed.
4 Machine - Calibrations
160 Service Manual Process Lens PL - 03/2025
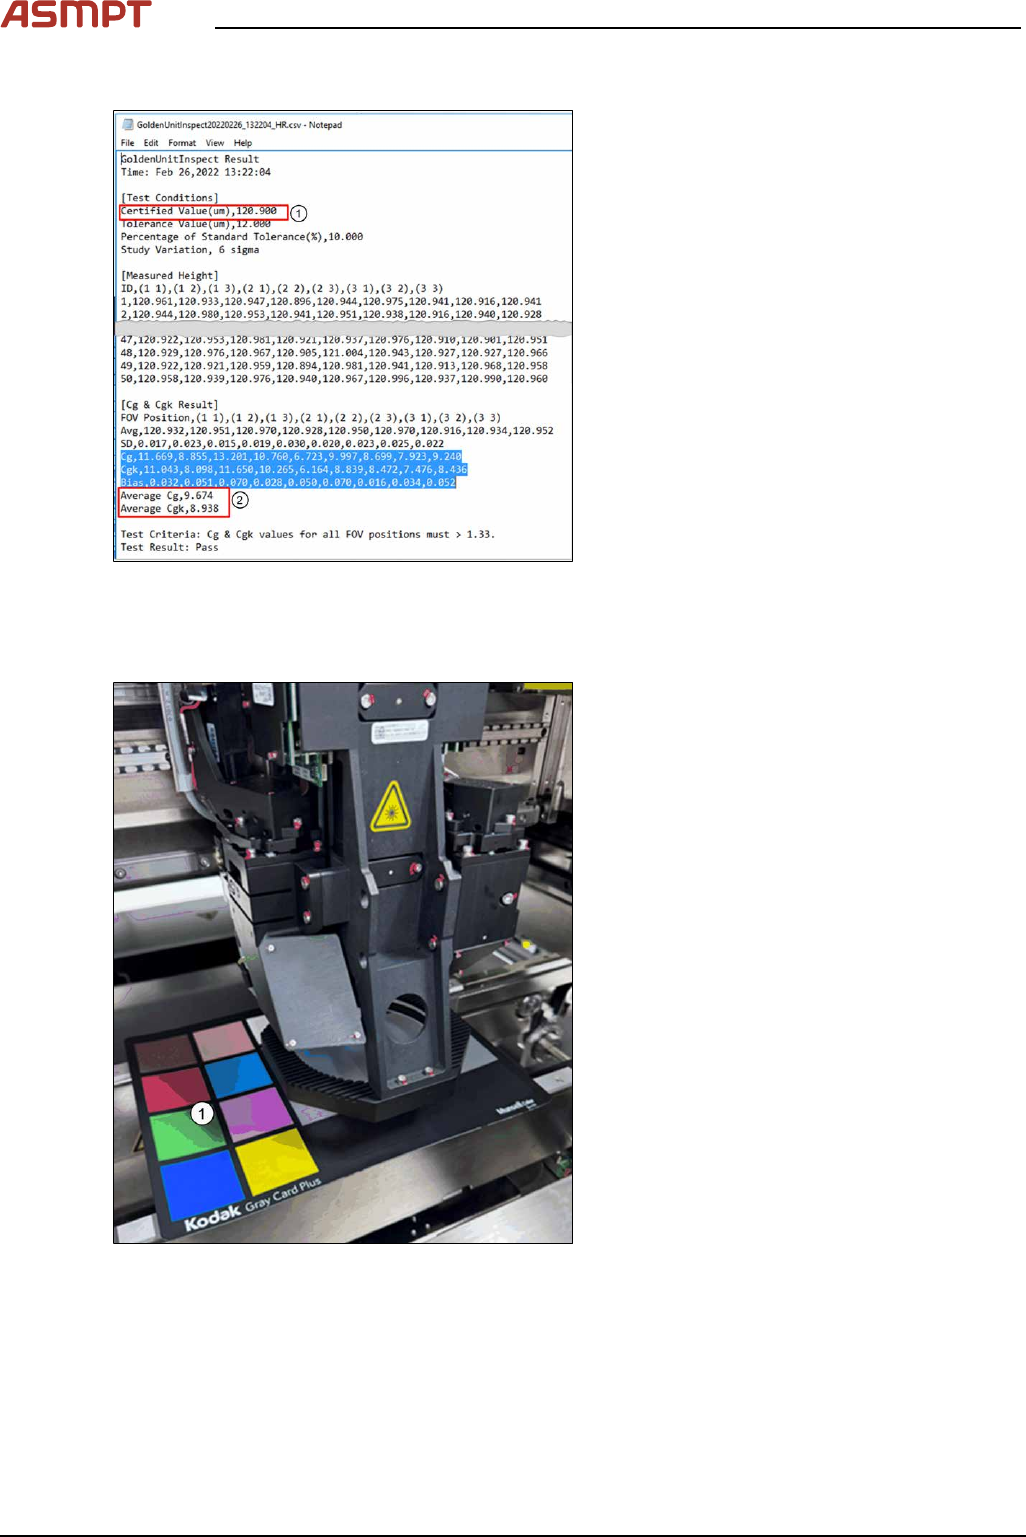
Step 8
Fig.250: Text file
► Open the file with a text editor or MS Ex-
cel.
ð At the bottom rows, the calculated Cg
and Cgk values are listed (2).
Example of a GoldenUnitInspect
***timestamp***.csv output file using a
target of height 123µm.
4.6 Calibrations - Lighting Calibration (Pseudocolor)
Fig.251: Kodak card
► Open the machine cover.
► Place the Kodak Card(1)[03234864‑xx] /
[03254631‑xx] on the conveyor.