Process Lens PL Service Manual_EN.pdf - 第89页
3 Replacing spare parts Se rv ic e Ma nu al P ro ce ss L en s PL - 0 3/ 20 25 89 Equipment and tools 00386253‑xx Torque screwdriver ESD 0.4 - 1.0Nm 03078706‑xx Bit holder for screwdriver TorqueVario 00326015‑xx Belt ten…
3 Replacing spare parts
88 Service Manual Process Lens PL - 03/2025
CAUTION
Spacer
The fastening screw for some idler pulleys also holds the spacers in place.
► Make sure that you do not loose these.
► Unthread the deflection pulley from the conveyor toothed belt and remove it.
Installation
► Follow the removal instructions in reverse order for installation. Also observe the following
instructions:
CAUTION
Installation instructions
► Tighten the fixing screw with a torque of 0.58Nm. Make sure that you do not tighten the screws
too much. This could cause irreparable damage to the conveyor!
The corresponding threads are only in 1.5 to 2mm thick plates and could be damaged if you use
a torque which is too high.
For this reason, avoid using screws which are too short. Use a measuring scale to check, if
needed!
► Use any spacers available.
► Do not bend or damage the toothed belt.
► Make sure that the toothed belt is positioned accurately in the guidance on the motor shaft or in
the belt drive.
► Remove the adhesive tape, if necessary.
► While you tighten the idler pulley, set the tension of the toothed belt correctly (see Setting the
tension of the conveyor toothed belt).
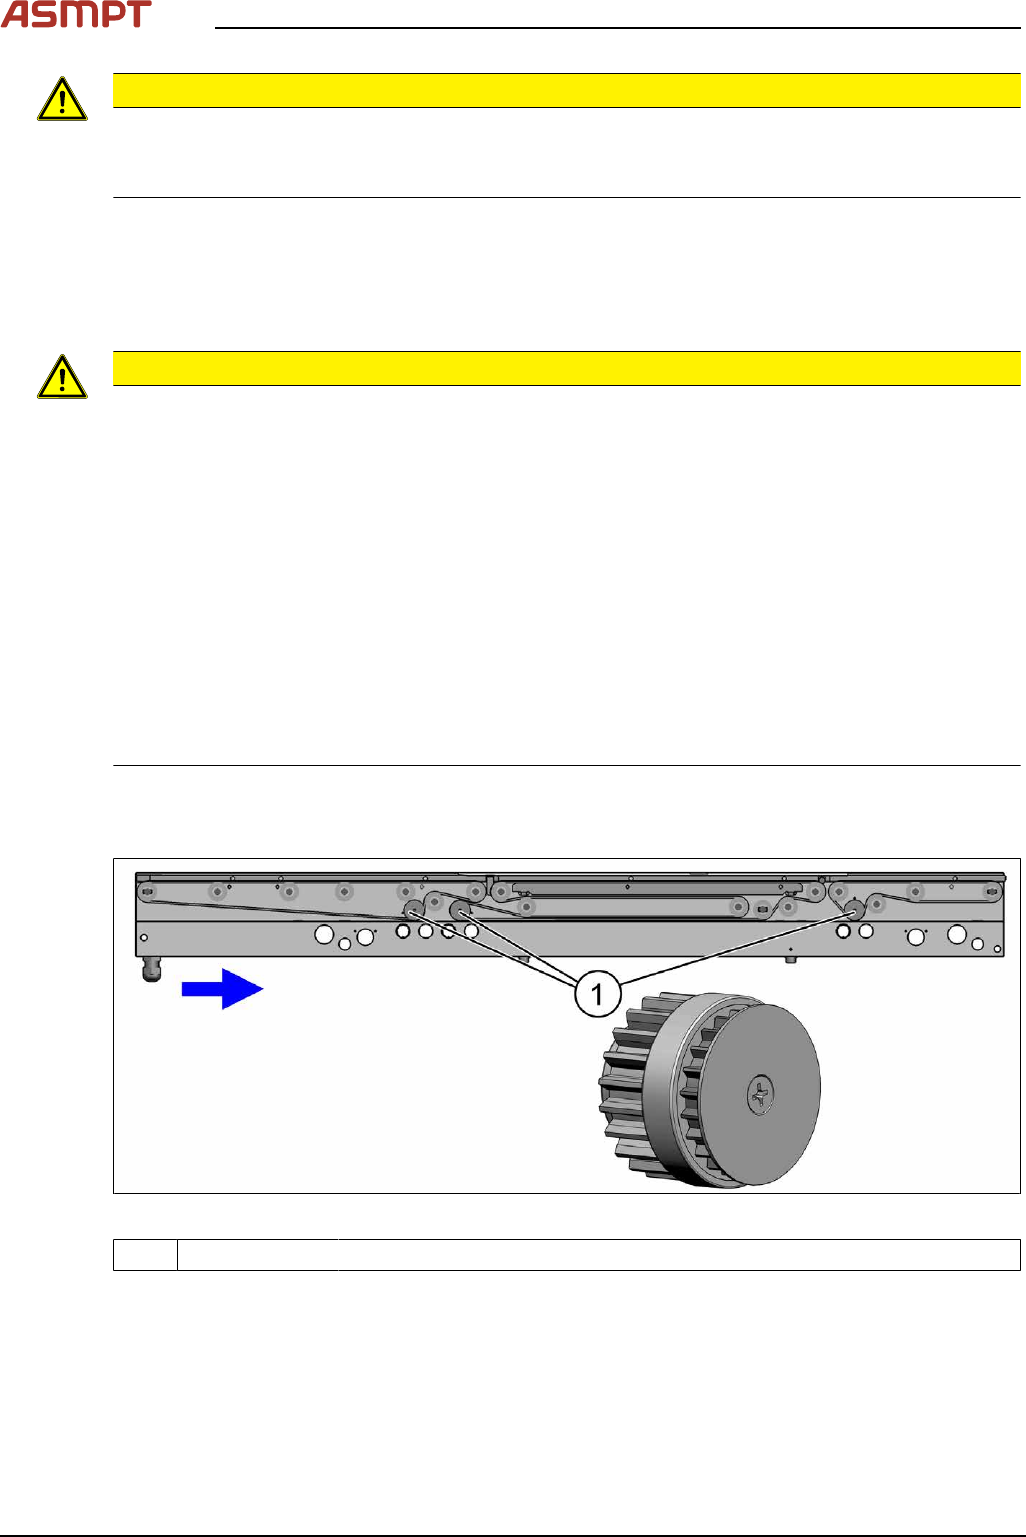
Replacing the pinion gear drive
Parts
Fig.115: Pinion gear drive
1 03112876‑xx Drive pinion cpl. M-C
See also Replacing the idler pulley (conveyor belt)
3 Replacing spare parts
Service Manual Process Lens PL - 03/2025 89
Equipment and tools
00386253‑xx Torque screwdriver ESD 0.4 - 1.0Nm
03078706‑xx Bit holder for screwdriver TorqueVario
00326015‑xx Belt tension measuring device
00353832-xx Allen key set
Bit, size 4
If required:
Magnet lifter or tweezers and adhesive tape
Measuring scale
Removal
CAUTION
Toothed belt
► Make sure that the toothed belt is not folded or otherwise damaged.
► Use the software or manually move the conveyor rail into a position which allows you best
access.
– To move the conveyor rail manually, pull the toothed belt of the width adjustment unit.
– Make sure that the rear side of the conveyor rail is also accessible.
► Switch off the machine, disconnect it from the power supply and secure it to prevent unauthorized
reactivation.
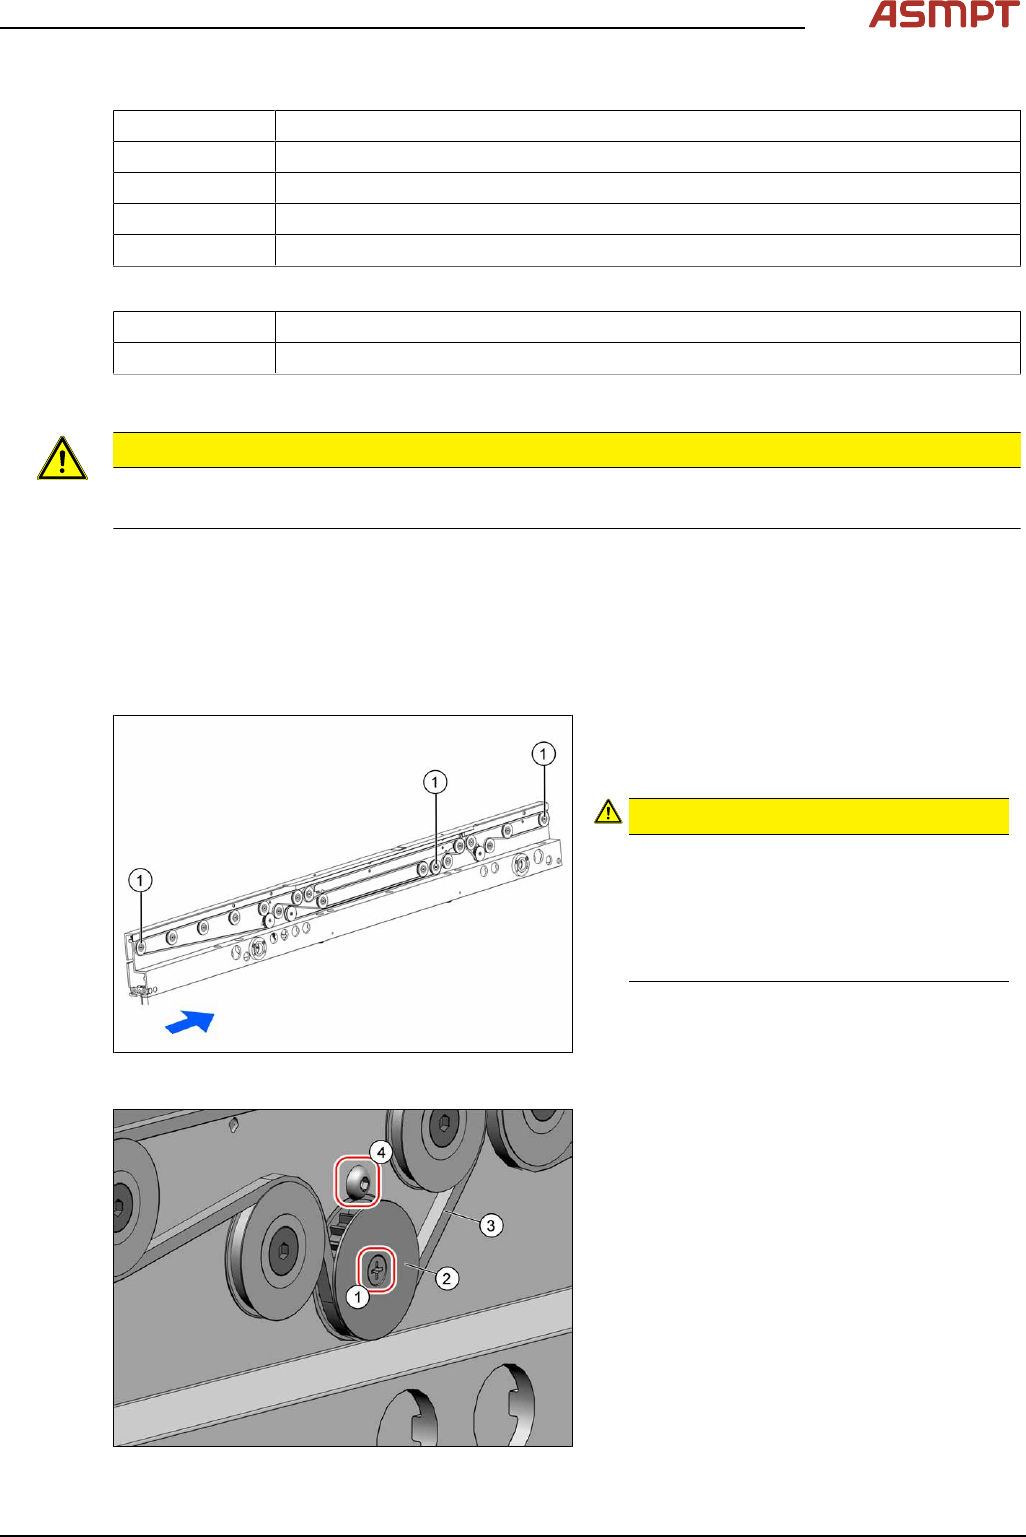
Fig.116: Movable idler pulleys
► Loosen the fixing screw of the relevant
movable idler pulley(1) to release the ten-
sion of the belt.
CAUTION!
Loosen the movable idler pulley only
as far as necessary!
Do not remove the movable idler pulley
(unless you explicitly need to remove it).
Otherwise the T slot nut on the inner side
fall into the conveyor rail.
.
See also Replacing the idler pulley (conveyor
belt)
Fig.117: Washer
► Remove the fixing screw(1) (cross head)
and take off the washer(2).
► Remove the toothed belt(3).
► Remove the fastening screw(4) (Allen).
3 Replacing spare parts
90 Service Manual Process Lens PL - 03/2025
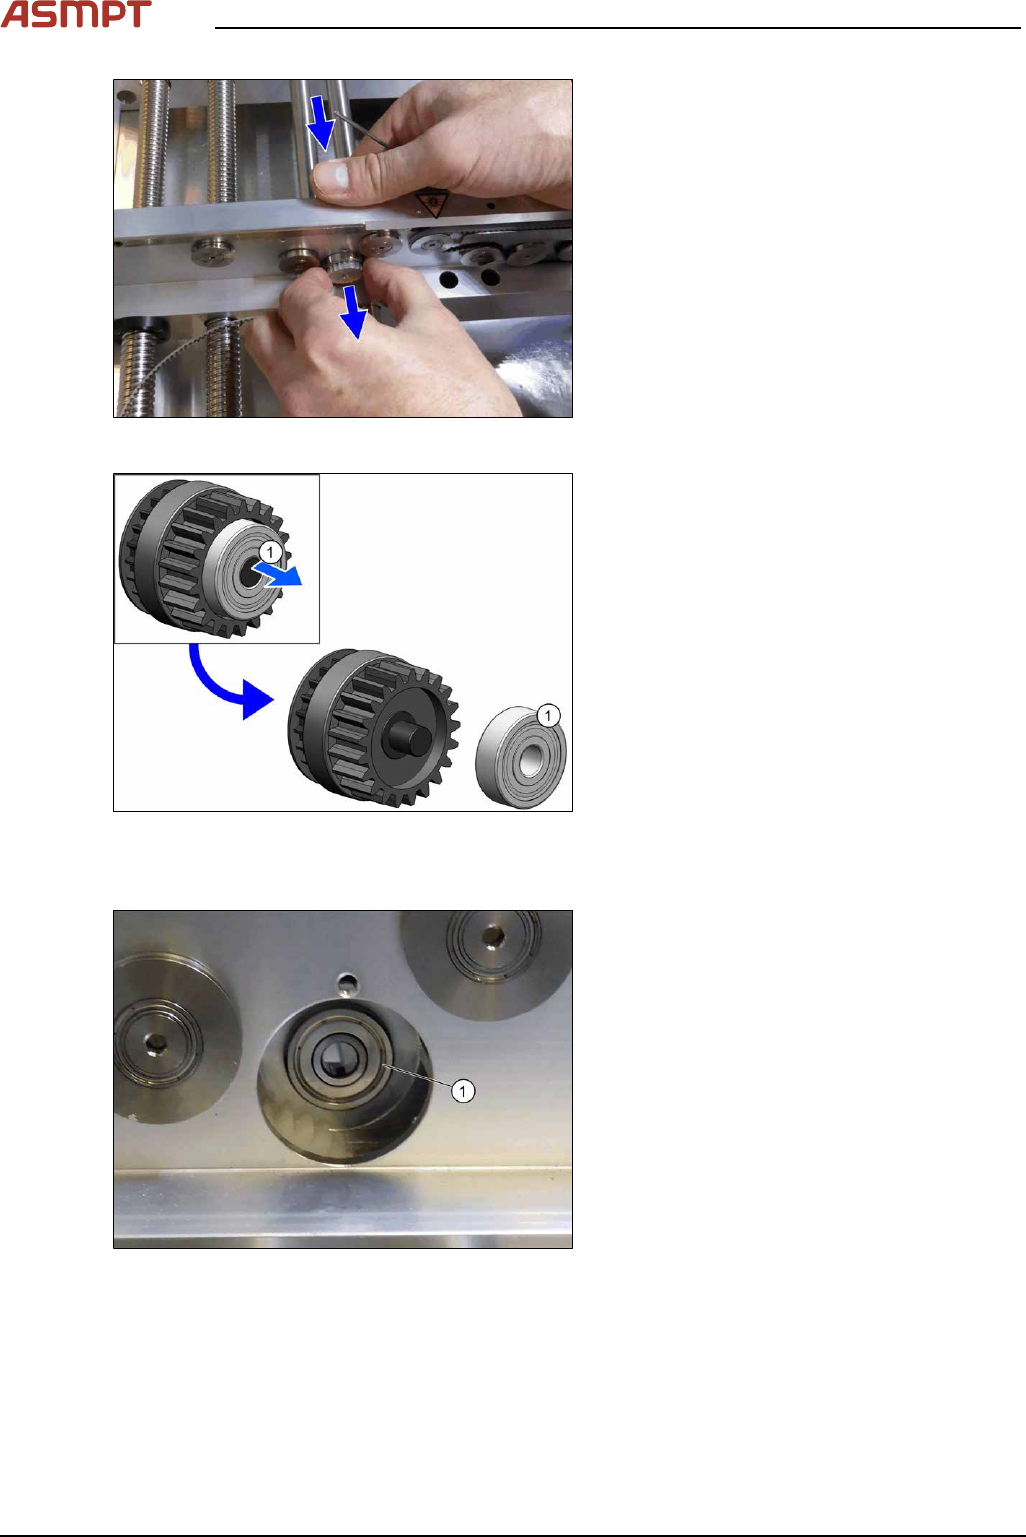
Fig.118: Pulling out the pinion gear drive
► From the rear of the rail, push the pinion
gear drive out.
Fig.119: Pulling off the bearing
► Pull the bearing(1) off the pinion gear
drive.
Installation
Fig.120: Inserting the bearing
► Insert the bearing(1) into the rail.
Make sure that the bearing does not fall
into the rail.