00197463-03_SM_CPP_Customer_EN.pdf - 第41页
5 Front plate, star, Z axis and smoothed distributor disc 5.1 Replacing the front plate [03061102-xx] Service Manual SIPLACE Multistar (CPP / CPP M) 02/2018 41 Fig.49: Version with screw Fig.50: Version without screw T…
5 Front plate, star, Z axis and smoothed distributor disc
5.1 Replacing the front plate [03061102-xx]
40 Service Manual SIPLACE Multistar (CPP / CPP M) 02/2018
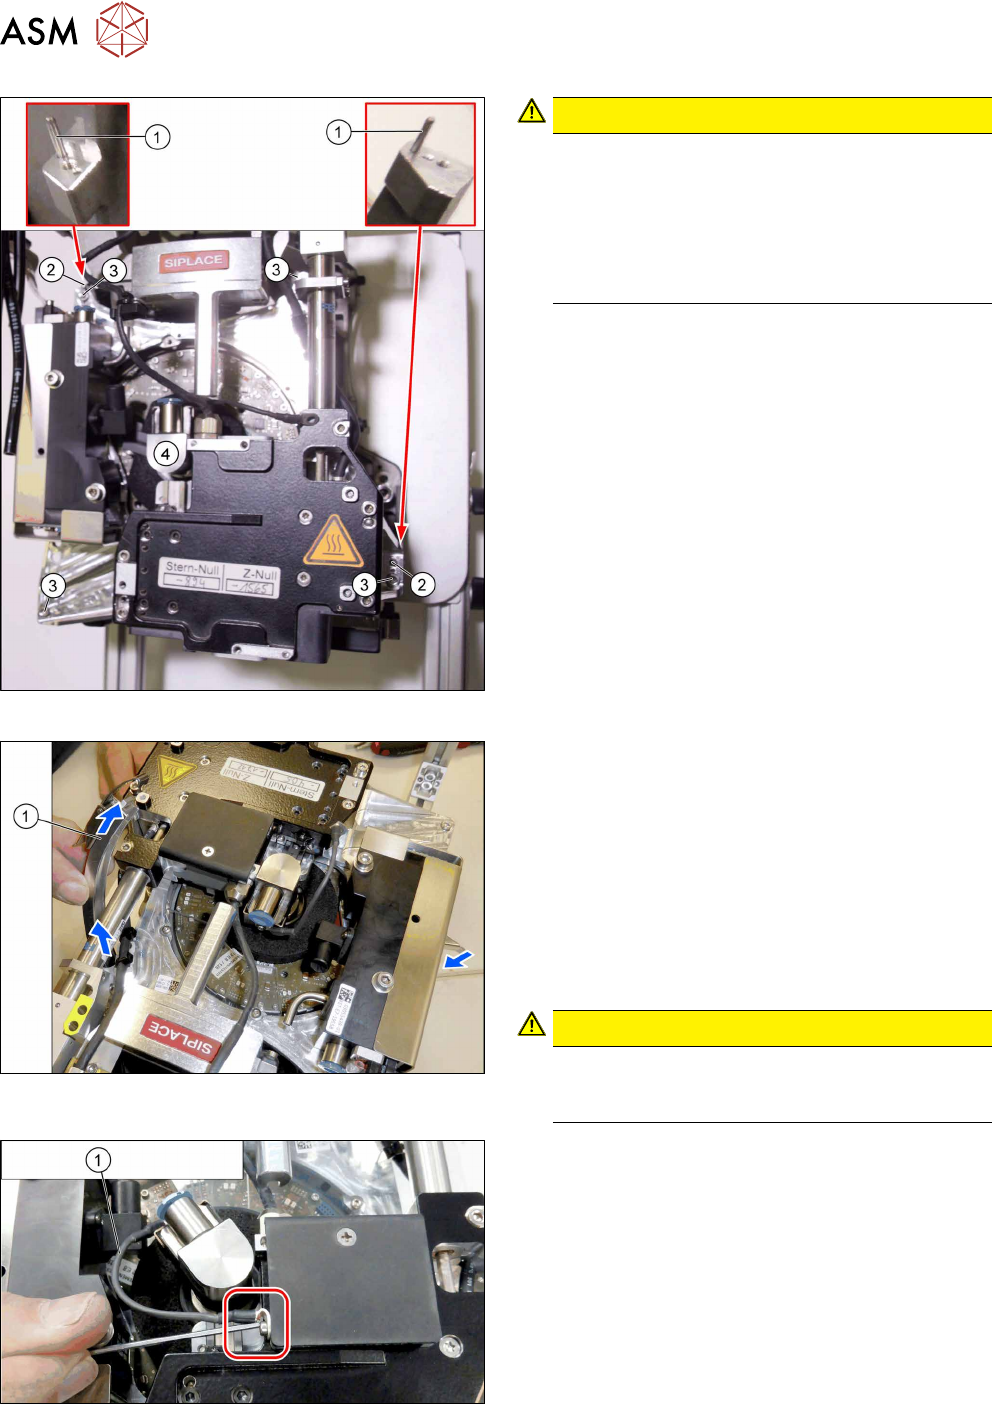
Fig.46: Fitting the front plate
CAUTION!
Do not press!
Do not apply pressure to the front plate. As soon
as the driver bearing is correctly positioned, the
front plate should slide without effort onto the
centering pins (watch the screwed joint, see be-
low). The driver bearing could be damaged oth-
erwise.
.
► First place the front plate loosely on the head.
The two holes(2) in the front plate must be posi-
tioned over the two centering pins(1) for the
head.
► Now thread in the front plate. Observe the follow-
ing points:
– First turn the screwed joint to the left and
thread the front plate in as far as possible.
Then turn the screwed joint upwards to the
handle and fully insert the front plate.
– Carefully move the DP clamping ring back
and forth, until the front plate drops down-
wards.
► Tighten the four screws(2) fastening the front
plate cross-wise and evenly with a torque of
0.85Nm.
Fig.47: Removing the DP clamping ring
► Open the turnbuckles for the DP clamping ring.
► Carefully unthread the two parts of the DP clamp-
ing ring from the head, one after the other. To do
so, proceed as follows:
– Take hold of the DP clamping ring by its turn-
buckle.
– Turn the DP clamping ring by about 60 to 70
degrees (until almost vertical to the star).
– Carefully pull the DP clamping ring out of the
head.
CAUTION!
Always pull from the side with the turn-
buckle. Do not pull the turnbuckle through
the head.
.
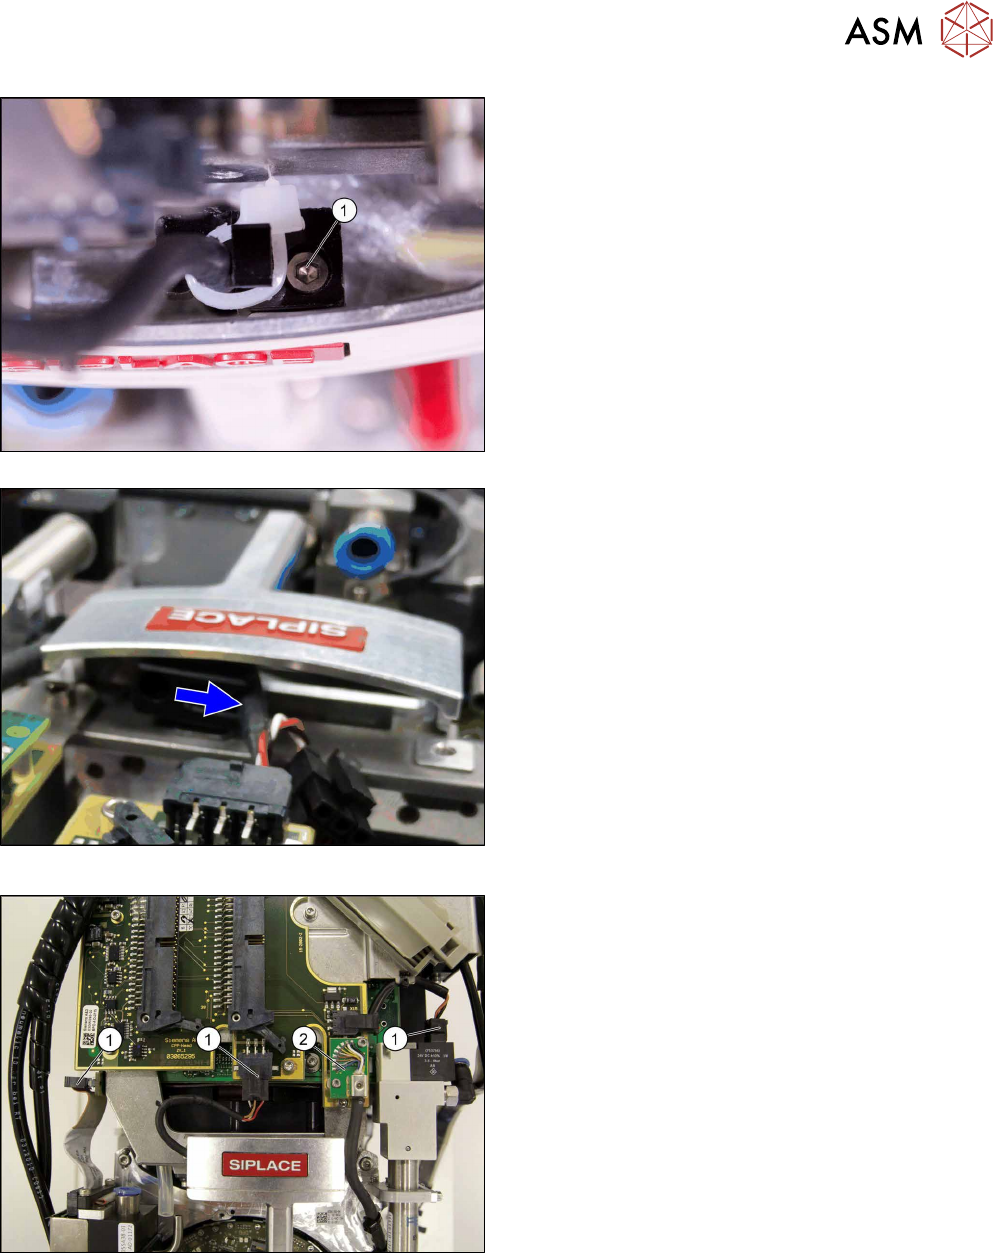
Fig.48: Fastening the ground connection for the screwed joint
► Fasten the ground connection(1) to the screwed
joint.
5 Front plate, star, Z axis and smoothed distributor disc
5.1 Replacing the front plate [03061102-xx]
Service Manual SIPLACE Multistar (CPP / CPP M) 02/2018 41
Fig.49: Version with screw
Fig.50: Version without screw
There are two version of fastening the cables to
the handle. Select the appropriate version:
► Version with screw: Replace the cable tie and
fasten the cable with the screw (1).
► Version without screw: Press the cable into the
clamp.
Fig.51: Plugging in the connector
► Plug in the connector(1).
► Plug in the connector (2) and fix the connector
into place with the two fastening screws.
5 Front plate, star, Z axis and smoothed distributor disc
5.1 Replacing the front plate [03061102-xx]
42 Service Manual SIPLACE Multistar (CPP / CPP M) 02/2018
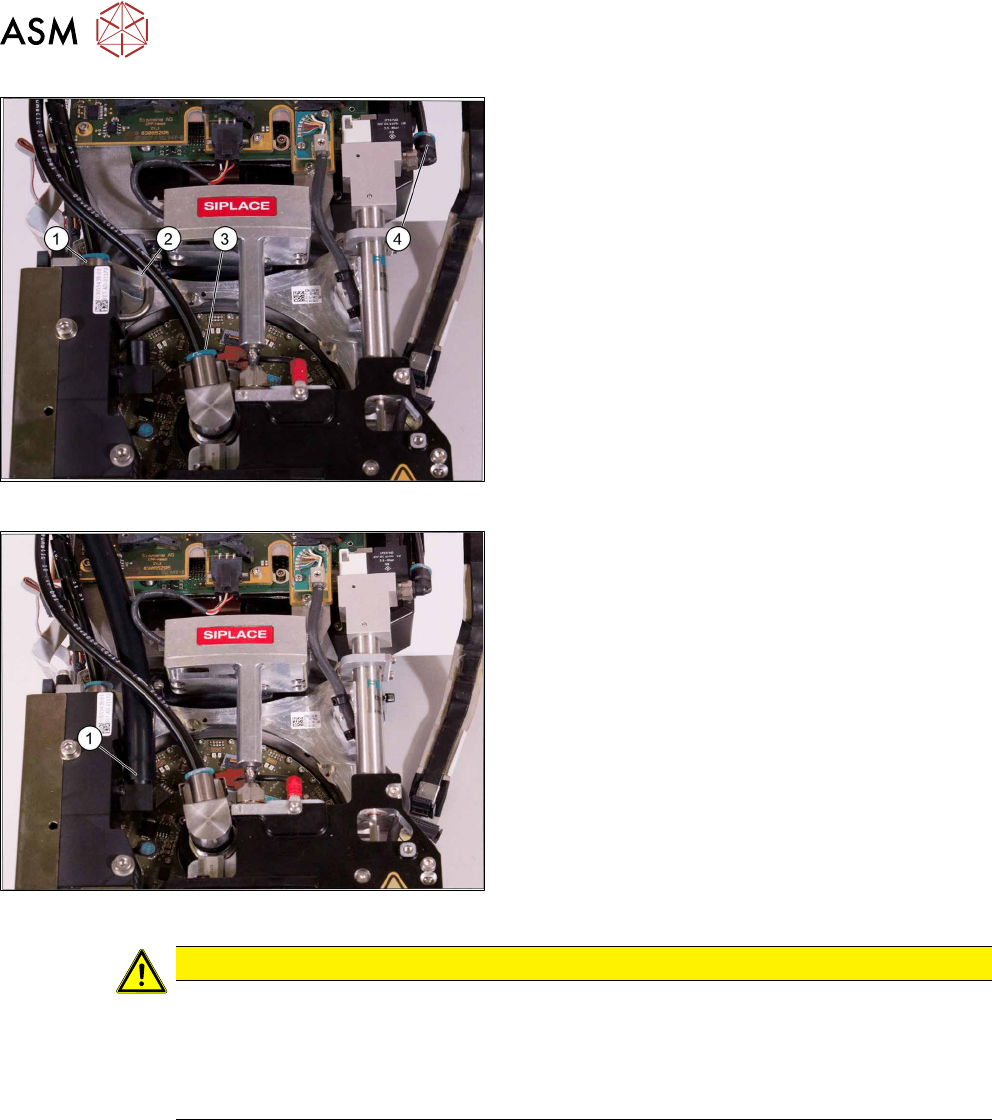
Fig.52: Connecting the air hoses
► Attach the air hoses(1) to(4) for the return unit,
the screwed joint and the pressure control valve.
Pay attention to the correct installation position of
all air hoses.
Fig.53: Connecting the hose to the PRV
► Fit the air hose (1) to the pressure control valve.
CAUTION
Other installation instructions
► After performing installation, start the station software and check the zero point correc-
tion value for the Z axis.
► In the event of problems or if the data is not automatically applied, import the zero
point correction data from the head EEPROM into the machine data.