00197463-03_SM_CPP_Customer_EN.pdf - 第54页
5 Front plate, star, Z axis and smoothed distributor disc 5.5 Replacing the Single Core Solution (SCS)[03054790Sxx] (only for heads fromFS05) 54 Service Manual SIPLACE Multistar (CPP / CPP M) 02/2018 Removal ► If requir…
5 Front plate, star, Z axis and smoothed distributor disc
5.5 Replacing the Single Core Solution (SCS)[03054790Sxx] (only for heads fromFS05)
Service Manual SIPLACE Multistar (CPP / CPP M) 02/2018 53
5.5 Replacing the Single Core Solution (SCS)[03054790Sxx]
(only for heads fromFS05)
Parts, equipment and tools
●
SCS assembly CPP [03054790Sxx]
Overview
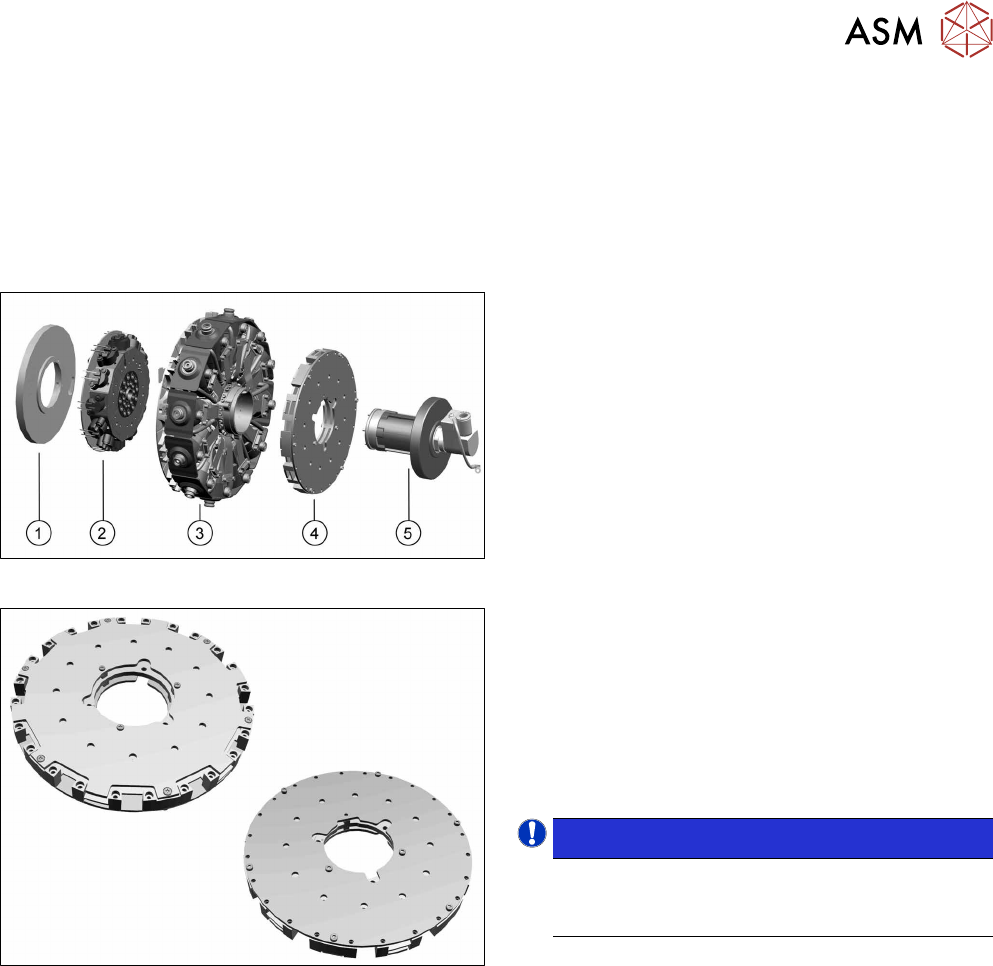
Fig.77: Star structure
1. Energy transmission for rotor
2. Valve terminal
3. Star carrier with DP drives
4. Single Core Solution (SCS).
5. Holding circuit with screwed joint
Fig.78: SCS
The SCS consists of two boards, the power and the
control module.
See also:
5.5.1 "Power module for 12 DP drives
[03054771‑xx]" [}58]
5.5.2 "Control module for 12 DP drives
[03054784‑xx]" [}60]
NOTICE!
Heads up to FS04
The SCS is not replaced in heads up to and in-
cluding FS04.
.
Preparation
► Remove the head from the machine. For details about removing and fitting the placement
head, refer to the service manual for your machine.
fit the head on the head mount [03056231‑xx].
► Make sure that the component sensor protective cap is fitted.
1.1.3 "Protecting the component sensor" [}8]
5 Front plate, star, Z axis and smoothed distributor disc
5.5 Replacing the Single Core Solution (SCS)[03054790Sxx] (only for heads fromFS05)
54 Service Manual SIPLACE Multistar (CPP / CPP M) 02/2018
Removal
► If required, dismantle the front plate.
5.1 "Replacing the front plate [03061102-xx]" [}35]
► Remove the star.
5.2 "Removing and fitting the star (only for heads from FS05 upwards)" [}43]
► Remove the holding circuit.
8.4 "Replacing the holding circuit" [}101]
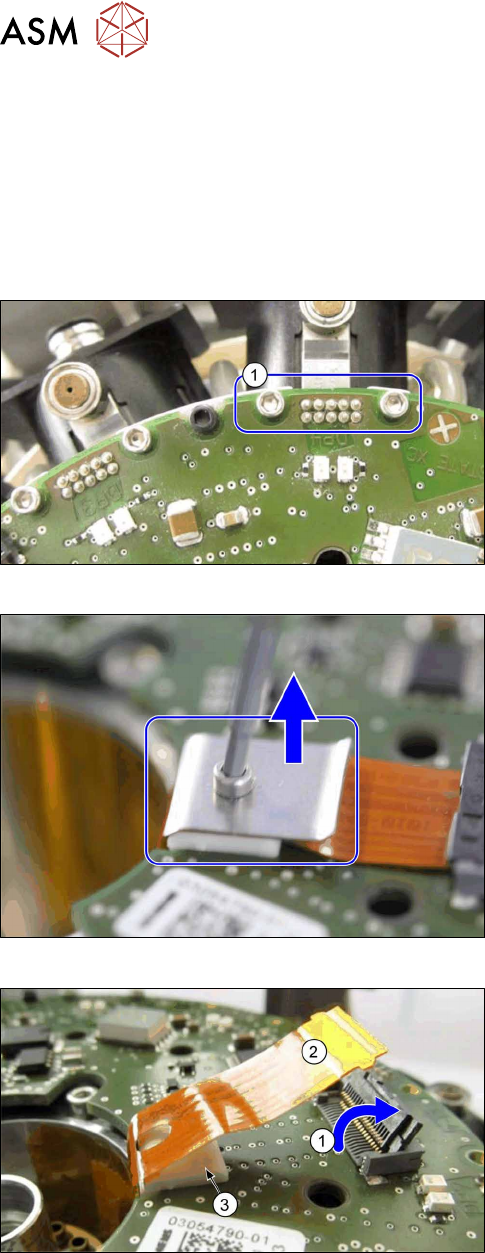
Fig.79: Removing the fastening screws for the connector
► For all twelve DP drives: remove both screws (1),
which fasten the connector to the Flexprint cables
on the SCS.
Fig.80: Removing the strain relief
► Remove the screw on the strain relief for the
Flexprint cable and remove the cover plate.
Fig.81: Removing the Flexprint cable
► Open the connector (1) on the Flexprint cable.
► Remove the Flexprint cable(2).
► Remove the white support(3).
5 Front plate, star, Z axis and smoothed distributor disc
5.5 Replacing the Single Core Solution (SCS)[03054790Sxx] (only for heads fromFS05)
Service Manual SIPLACE Multistar (CPP / CPP M) 02/2018 55
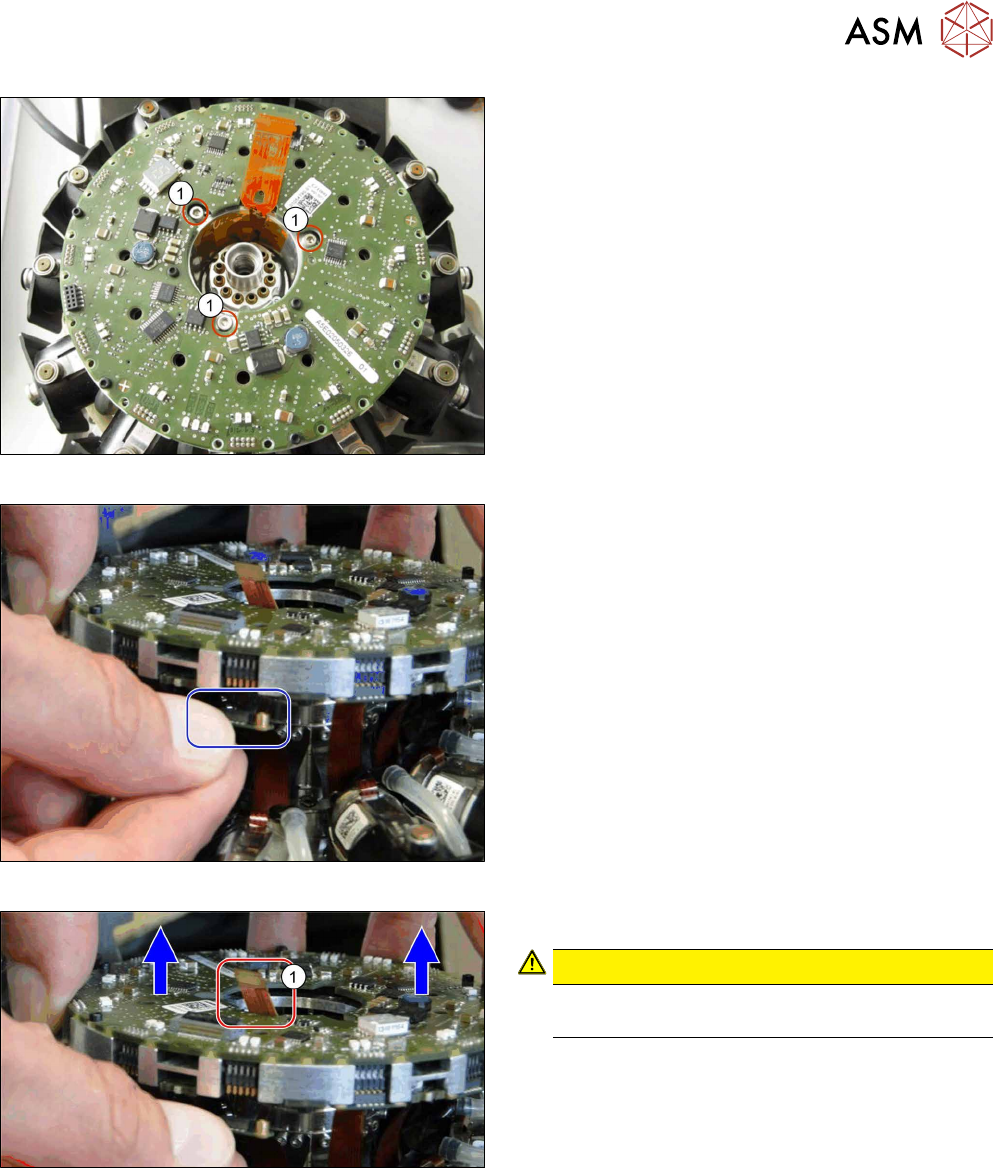
Fig.82: Removing the screws fastening the SCS
► Remove the three screws(1) fastening the SCS.
Fig.83: Unplug the connector
► Unplug the connectors from all twelve DP drives.
You can lift the SCS slightly, if needed.
Fig.84: Lifting out the SCS
► Carefully lift the SCS up and out of the head.
CAUTION!
Take care not to damage the Flexprint
cable(1) in the middle.
.