00197463-03_SM_CPP_Customer_EN.pdf - 第75页
6 DP drives 6.3 Replacing the DP Drive Hose [03015920Sxx] Service Manual SIPLACE Multistar (CPP / CPP M) 02/2018 75 6.3 Replacing the DP Drive Hose [03015920Sxx] NOTICE Replace all hoses Although it is possible to replac…
6 DP drives
6.2 Replacing the DP linear guide (segment guide) [03039099‑xx]
74 Service Manual SIPLACE Multistar (CPP / CPP M) 02/2018
6.2 Replacing the DP linear guide (segment guide)
[03039099‑xx]
Parts, equipment and tools
●
DP linear guide (segment guide) CPP [03039099‑xx]
Preparation
► Remove the head from the machine. For details about removing and fitting the placement
head, refer to the service manual for your machine.
fit the head on the head mount [03056231‑xx].
► Make sure that the component sensor protective cap is fitted.
1.1.3 "Protecting the component sensor" [}8]
Removal
► If required, dismantle the front plate.
5.1 "Replacing the front plate [03061102-xx]" [}35]
► Remove the DP drive.
6.1 "Replacing the DP drives" [}71]
NOTICE
You do not needto unplug the Flexprint cable from the SCS when replacing the DP linear
guide.
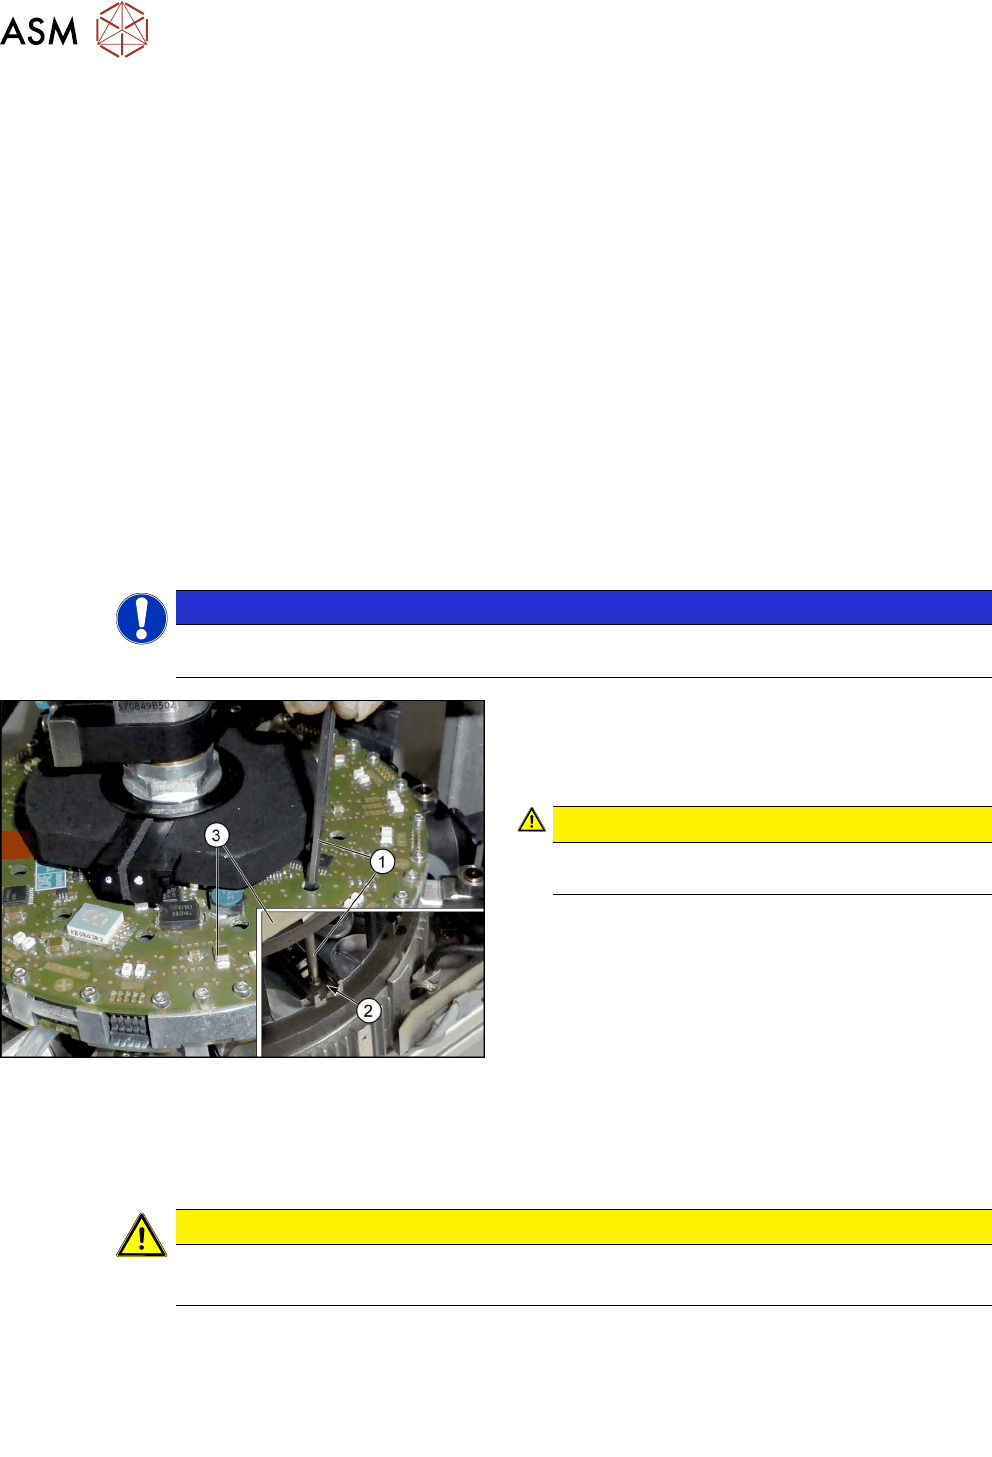
Fig.115: Fastening screws
► Remove the two screws fastening the DP linear
guide(2). You can reach the back screw with the
attached extension(1) through the relevant open-
ing in the SCS(3).
CAUTION!
Take care not to damage the surface of the
SCS.
.
► Remove the DP linear guide.
Installation
► Follow the removal instructions in reverse order for installation. Also observe the following in-
structions:
CAUTION
Installation instructions
► Tighten the DP linear guide fastening screws with a torque of 0.2Nm.
► Observe the installation instructions in the following sections:
6.3 "Replacing the DP Drive Hose [03015920Sxx]" [}75]
6.1 "Replacing the DP drives" [}71]
5.1 "Replacing the front plate [03061102-xx]" [}35]
► Observe in particular the torques specified!
6 DP drives
6.3 Replacing the DP Drive Hose [03015920Sxx]
Service Manual SIPLACE Multistar (CPP / CPP M) 02/2018 75
6.3 Replacing the DP Drive Hose [03015920Sxx]
NOTICE
Replace all hoses
Although it is possible to replace individual hoses, we recommend that you always replace
all hoses at once.
Parts, equipment and tools
●
Hose DP/CPP [03015920Sxx]
Preparation
► Remove the head from the machine. For details about removing and fitting the placement
head, refer to the service manual for your machine.
fit the head on the head mount [03056231‑xx].
► Make sure that the component sensor protective cap is fitted.
1.1.3 "Protecting the component sensor" [}8]
Removal
► If required, dismantle the front plate.
5.1 "Replacing the front plate [03061102-xx]" [}35]
► If you do not replace all hoses: perform a sight check of each vacuum hose.
Perform the following steps for each hose to be replaced:
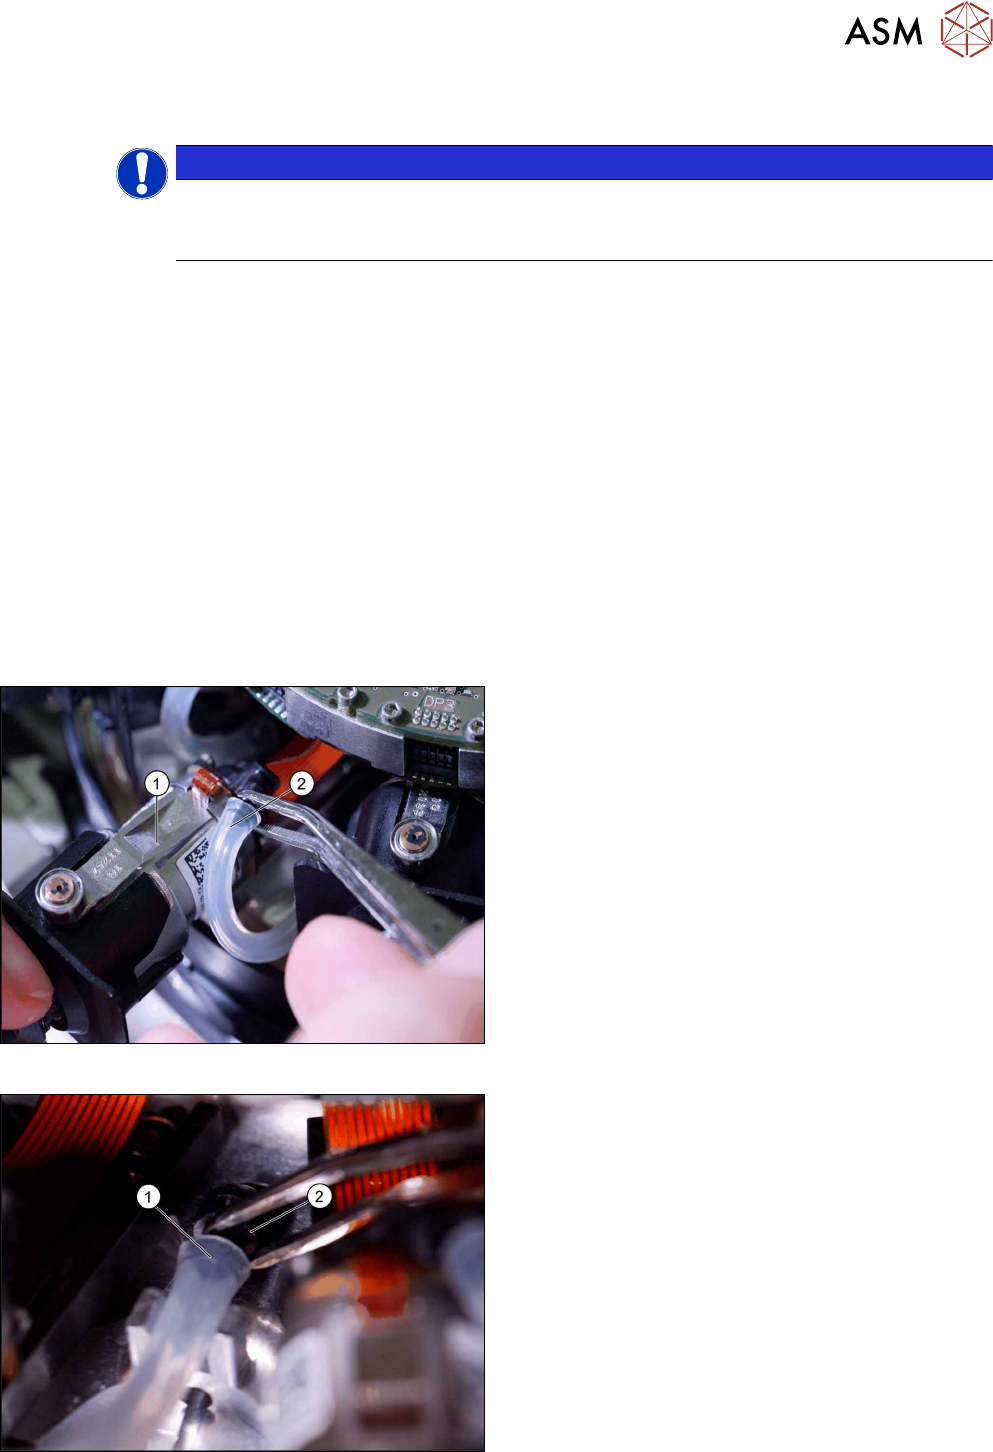
Fig.116: Pulling the hose off the DP drive
► Pull the DP drive (1) out of the head.
► Pull the hose (2) off the DP drive.
Fig.117: Pulling the hose off the star carrier
► Pull the hose(1) off the hose connection(2) on
the star carrier.
6 DP drives
6.3 Replacing the DP Drive Hose [03015920Sxx]
76 Service Manual SIPLACE Multistar (CPP / CPP M) 02/2018
Installation
► Follow the removal instructions in reverse order for installation. Also observe the following in-
structions:
CAUTION
Installation instructions
► Take particular care when replacing the vacuum hoses and check how the hoses are
run after they have been replaced.
► Connect the hose first to the star carrier and then to the DP drive.
Use the tweezers to push the hose onto the connections.
Take care not to damage the hose!
You can coat the hose with a little ethanol or isopropyl so that it can be pushed more
easily onto the connections.
► Pay attention to how the hoses are run and to any potential points at which rubbing
could occur (see following diagrams).
► Observe the installation instructions in the following section:
5.1 "Replacing the front plate [03061102-xx]" [}35]
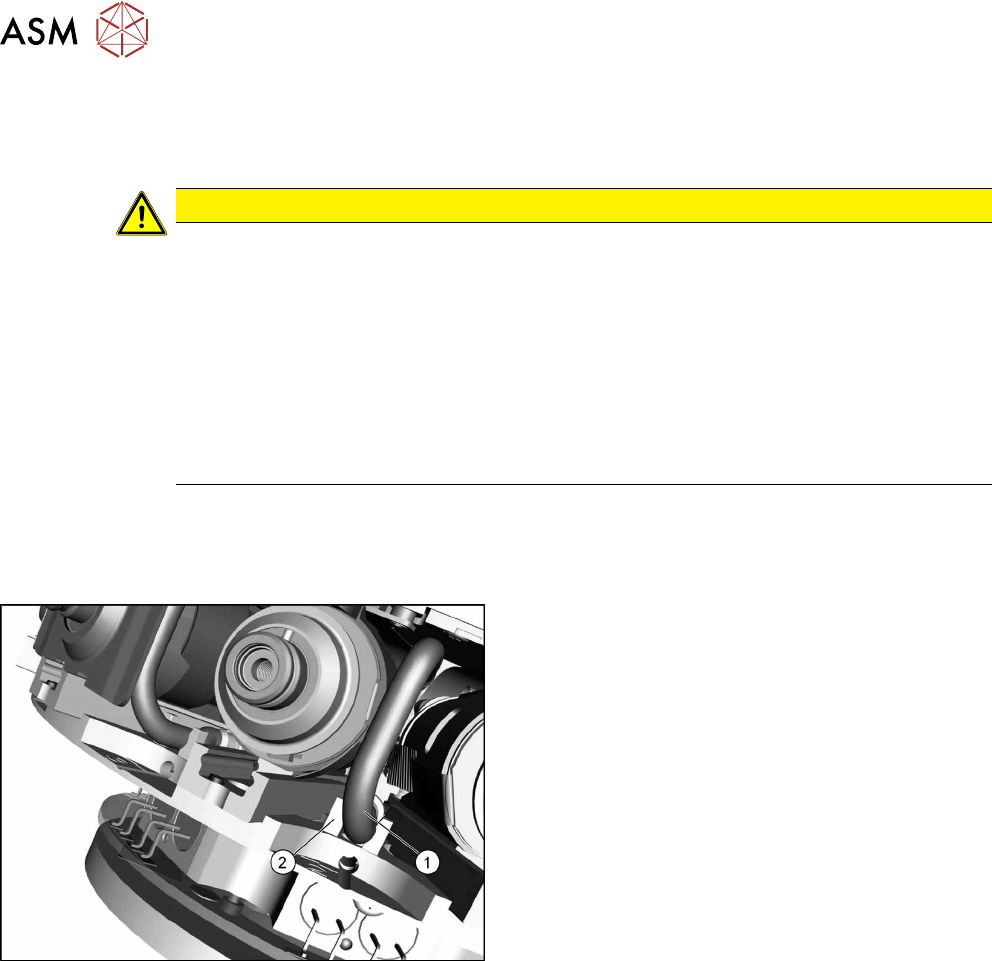
Hose guide
Fig.118: Guidance
1. Hose
2. Guidance
► Press the hose into the guide (if present).