00197463-03_SM_CPP_Customer_EN.pdf - 第85页
7 Pressure control valve (PRV) 7.4 Replacing small parts on the PRV Service Manual SIPLACE Multistar (CPP / CPP M) 02/2018 85 Fig.130: Distance sleeve 1. Distance sleeve VADI-MPPE-QS6-24VDC–SA [03119674‑xx] NOTICE! Ne…
7 Pressure control valve (PRV)
7.4 Replacing small parts on the PRV
84 Service Manual SIPLACE Multistar (CPP / CPP M) 02/2018
7.4 Replacing small parts on the PRV
NOTICE
Example
The replacement is illustrated with the example of the pressure control valve (PRV) for the
SIPLACE Twin Head. The procedure is the same for other PRVs.
Parts, equipment and tools
Select the required spare part:
●
Self-tapping screws:
Fig.128: Screws
1. Self-tapping screw PT-WN1442-2.5X6-PT10
[03119666‑xx]
Self-tapping screw PT-WN1413-2.5X6-PT10
[03119678‑xx]
2. Self-tapping screw PT-WN1442-2.5X8-PT10
[03119677‑xx]
3. Self-tapping screw PT-WN1412-2.5X14-PT10
[03119676‑xx]
●
O-ring / centering ring:
Fig.129: O-ring / centering ring:
1. O-ring I3601 B-1.5X1.08-N-NBR70
[03119672‑xx]
2. Centering ring VADI-MPPE-QS6-24VDC–SA
[03119675‑xx]
●
Distance sleeve:
7 Pressure control valve (PRV)
7.4 Replacing small parts on the PRV
Service Manual SIPLACE Multistar (CPP / CPP M) 02/2018 85
Fig.130: Distance sleeve
1. Distance sleeve VADI-MPPE-QS6-24VDC–SA
[03119674‑xx]
NOTICE!
Newer versions of the PRV do not have these
distance sleeves anymore.
.
Preparation
► Remove the head from the machine. For details about removing and fitting the placement
head, refer to the service manual for your machine.
fit the head on the head mount [03056231‑xx].
► Make sure that the component sensor protective cap is fitted.
1.1.3 "Protecting the component sensor" [}8]
Removal
Fig.131: PRV parts
CAUTION!
Do not mix up the parts
The PRV parts are aligned and are not to be
mixed with the parts of other PRVs.
.
► Remove the pressure control valve.
7.1 "Replacing the PRV [03072785‑xx]" [}79]
NOTICE
Depending on the spare part to be replaced, you may not need to do all the following re-
moval steps.
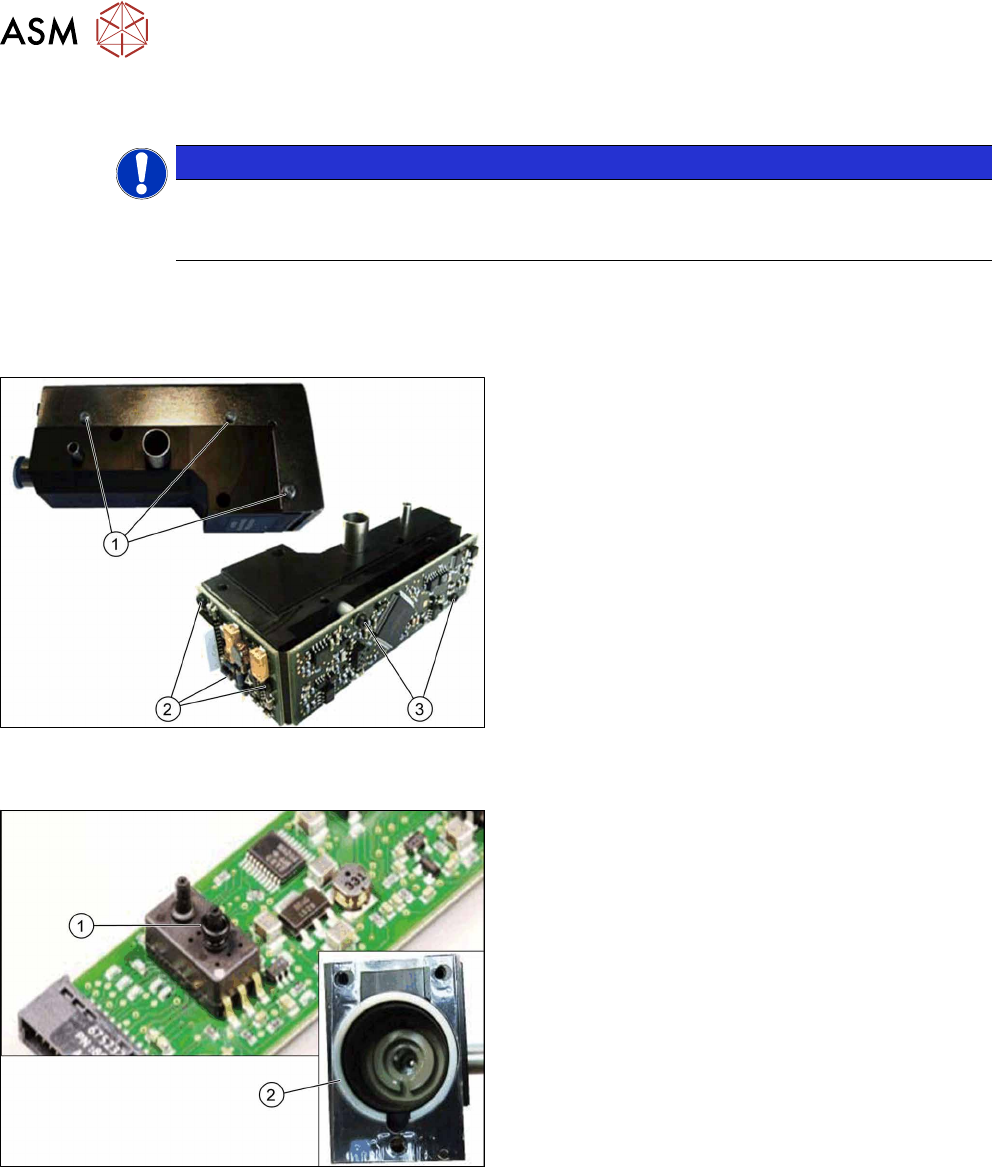
Fig.132: Removing the cover plate
► Remove the three screws fastening the cover
plate and remove the cover plate.
7 Pressure control valve (PRV)
7.4 Replacing small parts on the PRV
86 Service Manual SIPLACE Multistar (CPP / CPP M) 02/2018
Fig.133: Top board
► Remove the two screws and swing the board up-
wards.
CAUTION!
Take care not to damage the sensor O-ring.
.
Fig.134: Side board
► Remove the three screws and then remove the
board.
CAUTION!
Never loosen or remove the screw in the
middle!
.
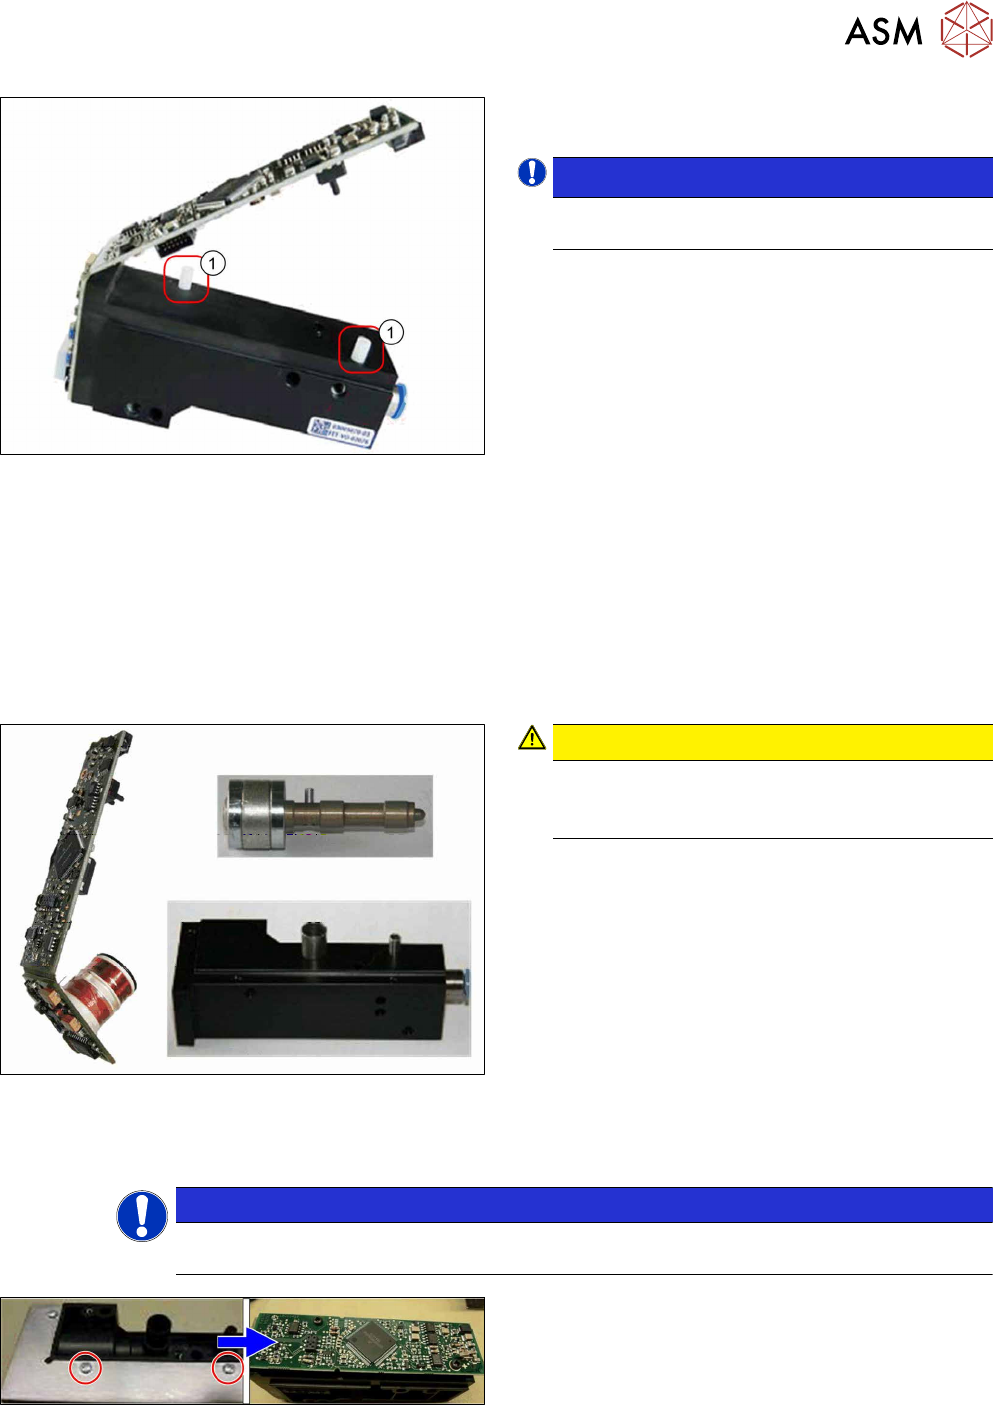
Fig.135: O-ring on vacuum sensor
► Remove the vacuum sensor O-ring.
Fig.136: Plastic ring
► Remove the white plastic ring.
Fig.137: Remove the plunger
► Remove the plunger with the help of a size 10
wrench.