00197463-03_SM_CPP_Customer_EN.pdf - 第86页
7 Pressure control valve (PRV) 7.4 Replacing small parts on the PRV 86 Service Manual SIPLACE Multistar (CPP / CPP M) 02/2018 Fig.133: Top board ► Remove the two screws and swing the board up- wards. CAUTION! Take car…
7 Pressure control valve (PRV)
7.4 Replacing small parts on the PRV
Service Manual SIPLACE Multistar (CPP / CPP M) 02/2018 85
Fig.130: Distance sleeve
1. Distance sleeve VADI-MPPE-QS6-24VDC–SA
[03119674‑xx]
NOTICE!
Newer versions of the PRV do not have these
distance sleeves anymore.
.
Preparation
► Remove the head from the machine. For details about removing and fitting the placement
head, refer to the service manual for your machine.
fit the head on the head mount [03056231‑xx].
► Make sure that the component sensor protective cap is fitted.
1.1.3 "Protecting the component sensor" [}8]
Removal
Fig.131: PRV parts
CAUTION!
Do not mix up the parts
The PRV parts are aligned and are not to be
mixed with the parts of other PRVs.
.
► Remove the pressure control valve.
7.1 "Replacing the PRV [03072785‑xx]" [}79]
NOTICE
Depending on the spare part to be replaced, you may not need to do all the following re-
moval steps.
Fig.132: Removing the cover plate
► Remove the three screws fastening the cover
plate and remove the cover plate.
7 Pressure control valve (PRV)
7.4 Replacing small parts on the PRV
86 Service Manual SIPLACE Multistar (CPP / CPP M) 02/2018
Fig.133: Top board
► Remove the two screws and swing the board up-
wards.
CAUTION!
Take care not to damage the sensor O-ring.
.
Fig.134: Side board
► Remove the three screws and then remove the
board.
CAUTION!
Never loosen or remove the screw in the
middle!
.
Fig.135: O-ring on vacuum sensor
► Remove the vacuum sensor O-ring.
Fig.136: Plastic ring
► Remove the white plastic ring.
Fig.137: Remove the plunger
► Remove the plunger with the help of a size 10
wrench.
7 Pressure control valve (PRV)
7.4 Replacing small parts on the PRV
Service Manual SIPLACE Multistar (CPP / CPP M) 02/2018 87
Installation
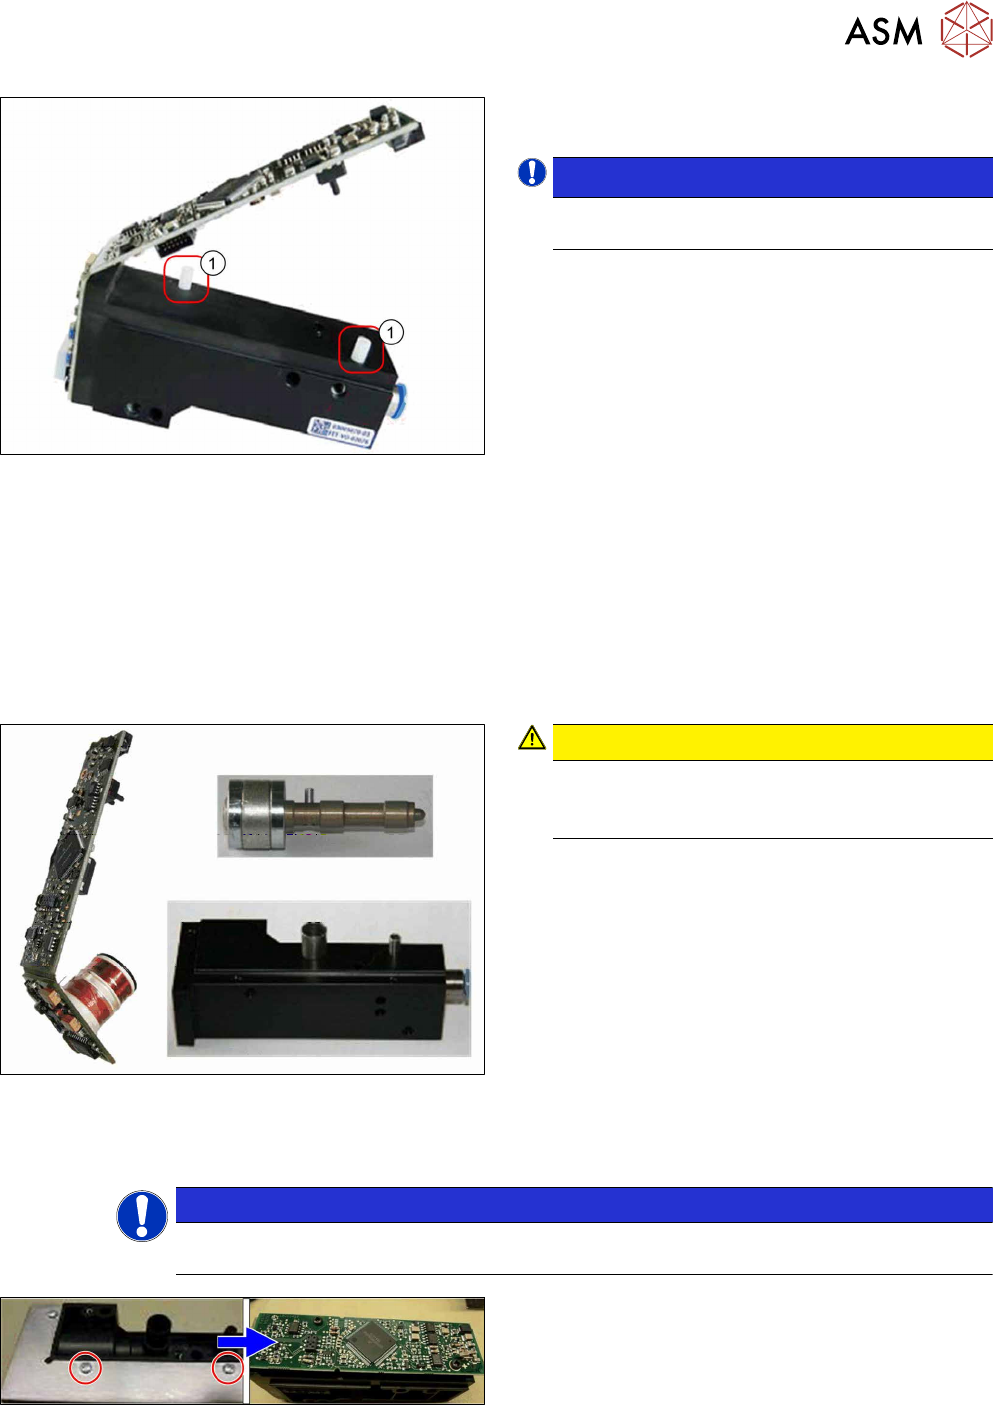
Fig.138: Removing the elbow pipe connector
► Remove the elbow pipe connector.
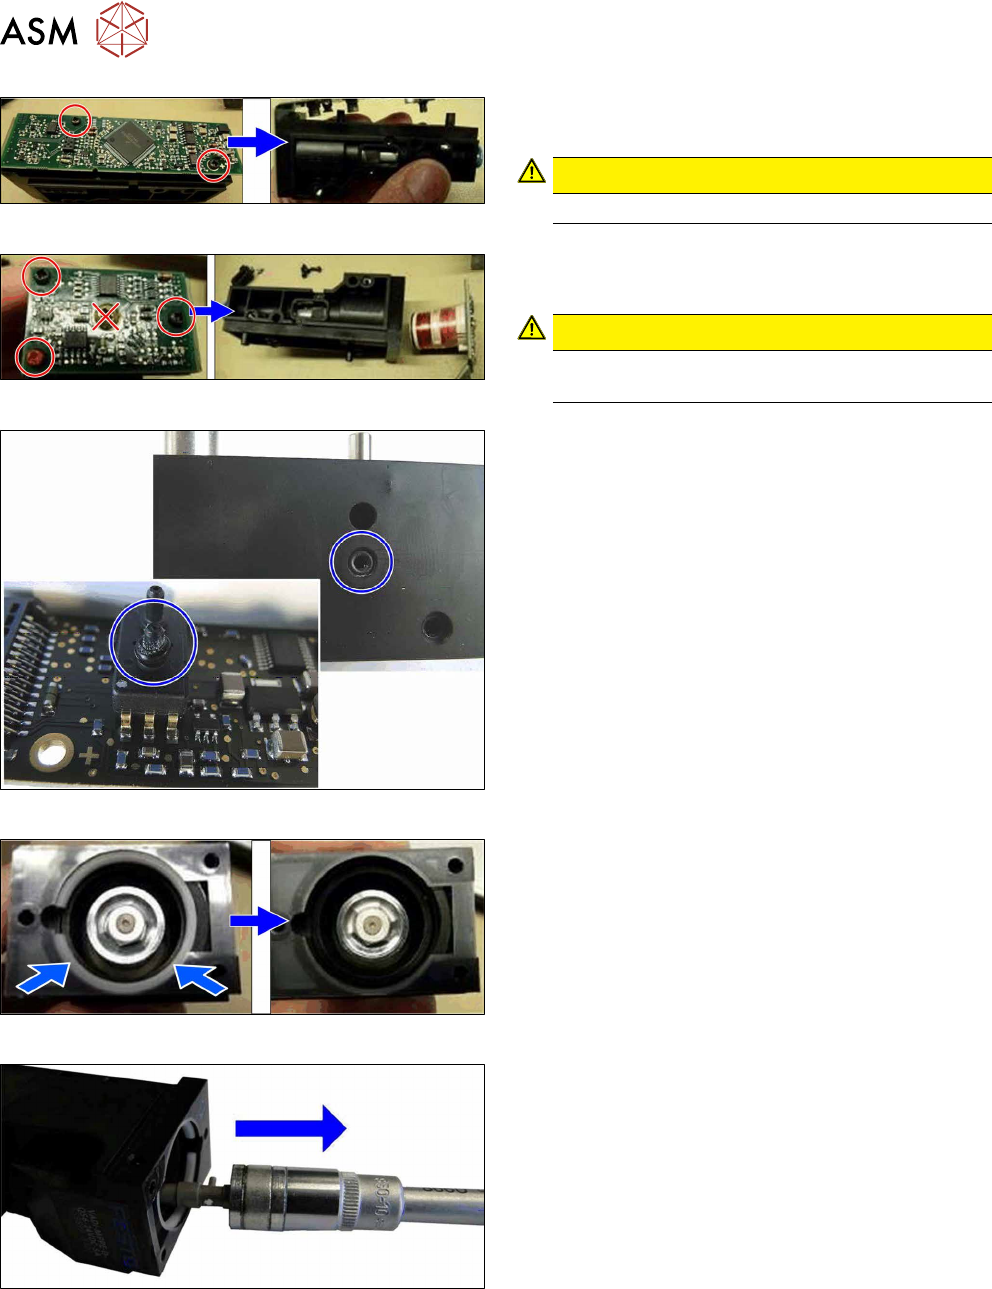
Fig.139: Check the plunger
► Check the plunger for damage.
► If the plunger is damaged, replace the whole
PRV.
► If the plunger is ok, proceed with the next step.