00197463-03_SM_CPP_Customer_EN.pdf - 第87页
7 Pressure control valve (PRV) 7.4 Replacing small parts on the PRV Service Manual SIPLACE Multistar (CPP / CPP M) 02/2018 87 Installation Fig.138: Removing the elbow pipe connector ► Remove the elbow pipe connector. Fi…
7 Pressure control valve (PRV)
7.4 Replacing small parts on the PRV
86 Service Manual SIPLACE Multistar (CPP / CPP M) 02/2018
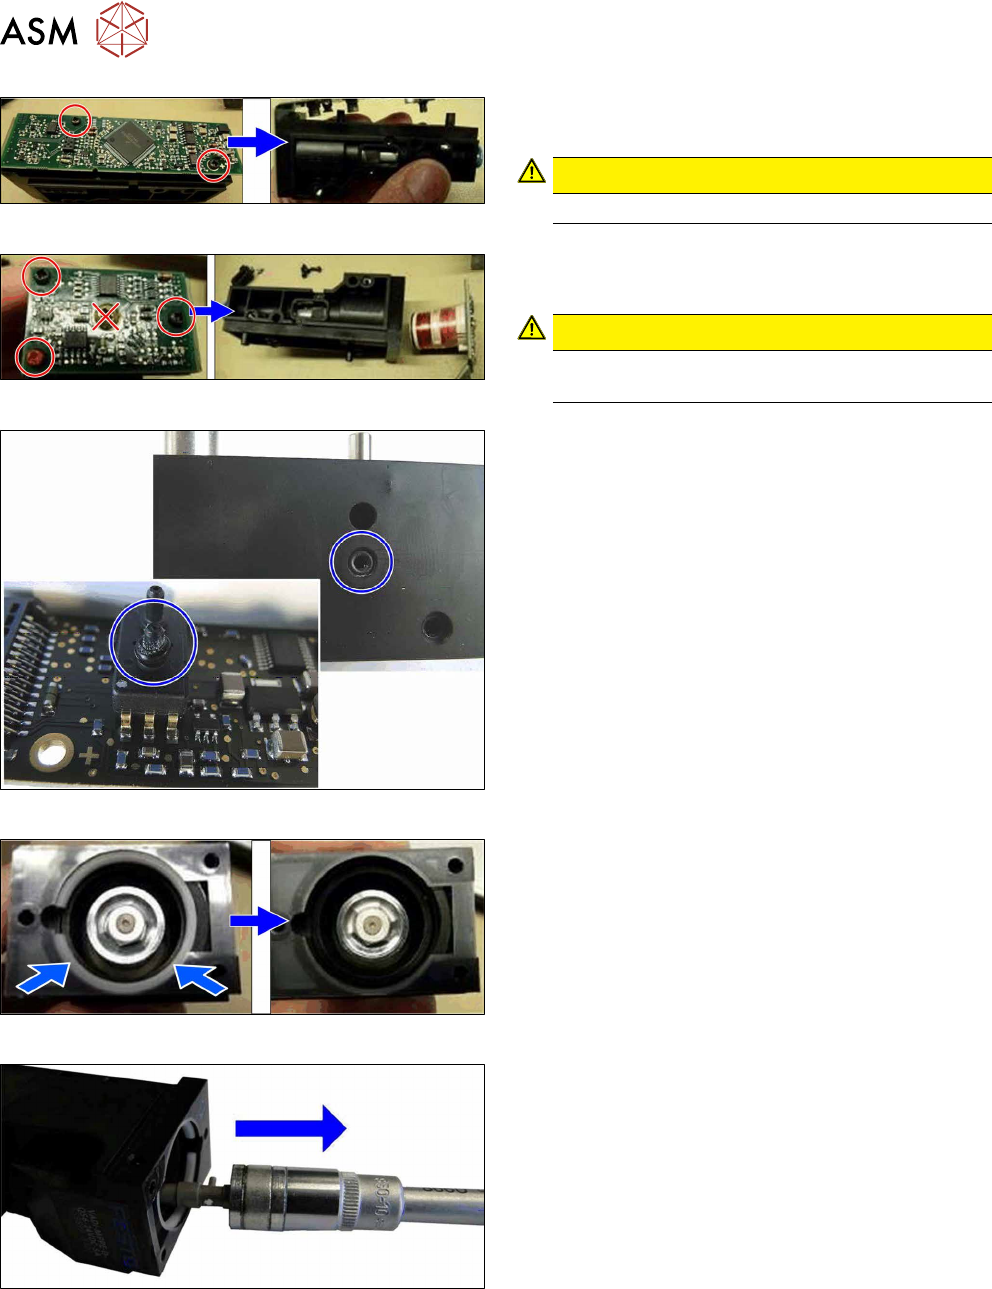
Fig.133: Top board
► Remove the two screws and swing the board up-
wards.
CAUTION!
Take care not to damage the sensor O-ring.
.
Fig.134: Side board
► Remove the three screws and then remove the
board.
CAUTION!
Never loosen or remove the screw in the
middle!
.
Fig.135: O-ring on vacuum sensor
► Remove the vacuum sensor O-ring.
Fig.136: Plastic ring
► Remove the white plastic ring.
Fig.137: Remove the plunger
► Remove the plunger with the help of a size 10
wrench.
7 Pressure control valve (PRV)
7.4 Replacing small parts on the PRV
Service Manual SIPLACE Multistar (CPP / CPP M) 02/2018 87
Installation
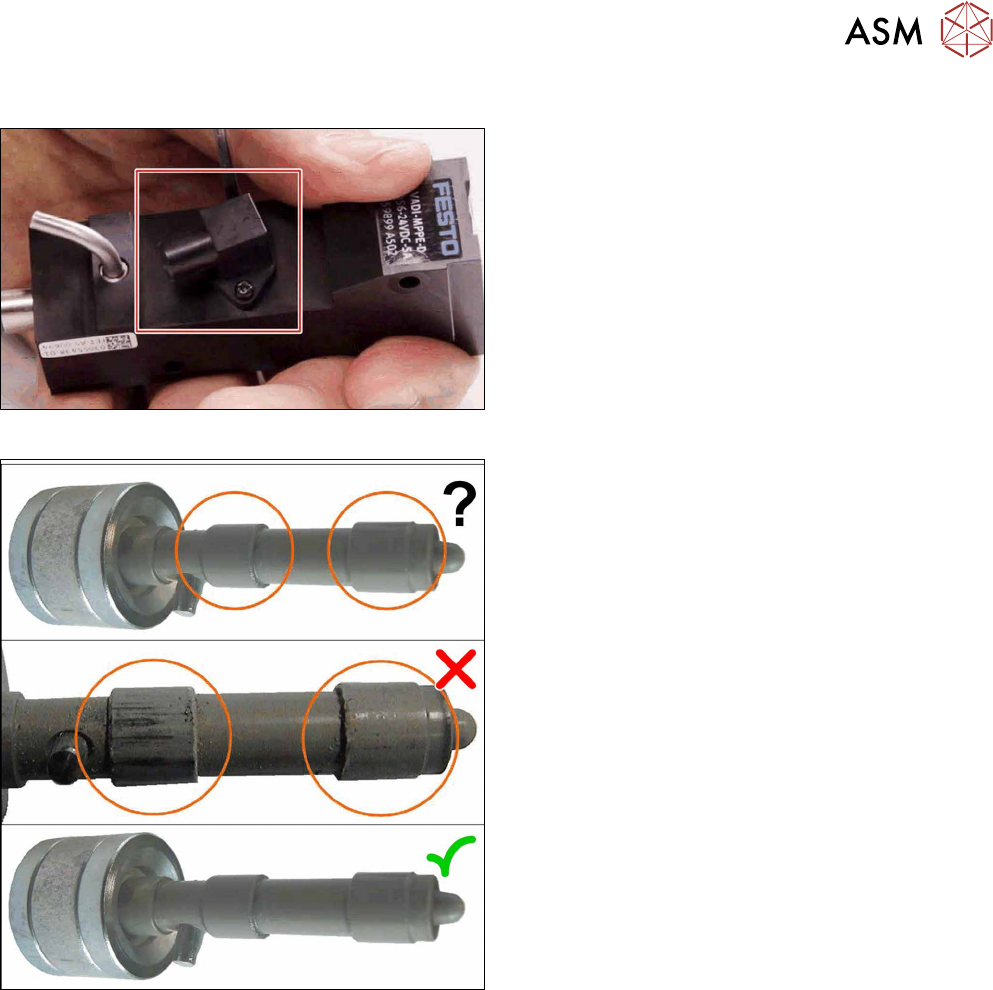
Fig.138: Removing the elbow pipe connector
► Remove the elbow pipe connector.
Fig.139: Check the plunger
► Check the plunger for damage.
► If the plunger is damaged, replace the whole
PRV.
► If the plunger is ok, proceed with the next step.
7 Pressure control valve (PRV)
7.4 Replacing small parts on the PRV
88 Service Manual SIPLACE Multistar (CPP / CPP M) 02/2018
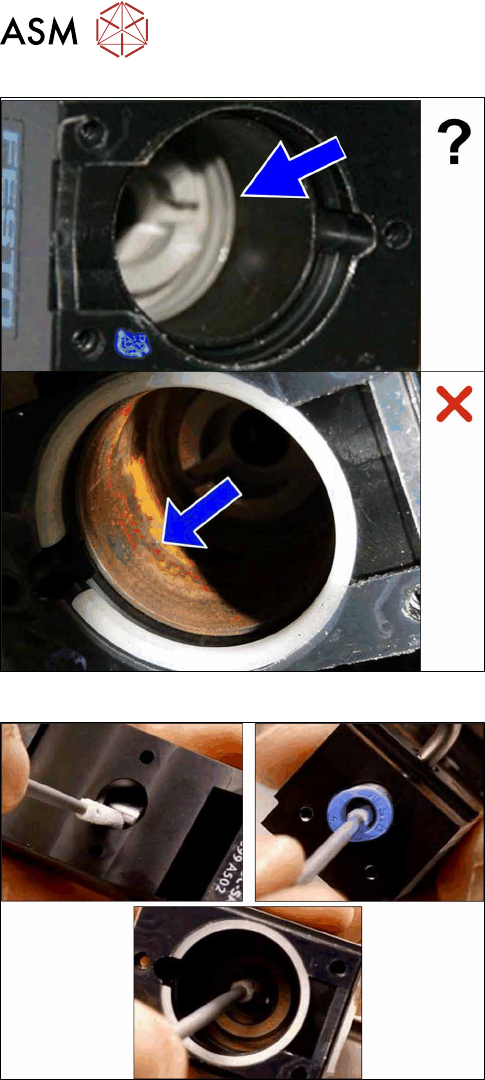
Fig.140: Checking the PRV inside
► Check the inside of the PRV for damage.
► If the inside of the PRV is damaged, replace the
whole PRV.
► If the inside is not damaged, proceed with the
next step.
Fig.141: Cleaning
► Clean the seat of the plunger tip and the venturi
nozzle until the cotton swab is no longer dirty
when it comes out.
Use a cotton swab coated with isopropyl.