00198764-01_IM_SIPLACE_Pro_17.0_R19-2_EN - 第29页
SIPLACE Pro 17.0 (R19-2) / Installation Manual 11/2019 Edition 29 The installation continues with t he configuration of SIPLACE Pro Server as described in Figure 6-6 ff . NOTICE After installation, the remot e server mus…
SIPLACE Pro 17.0 (R19-2) / Installation Manual 11/2019 Edition
28
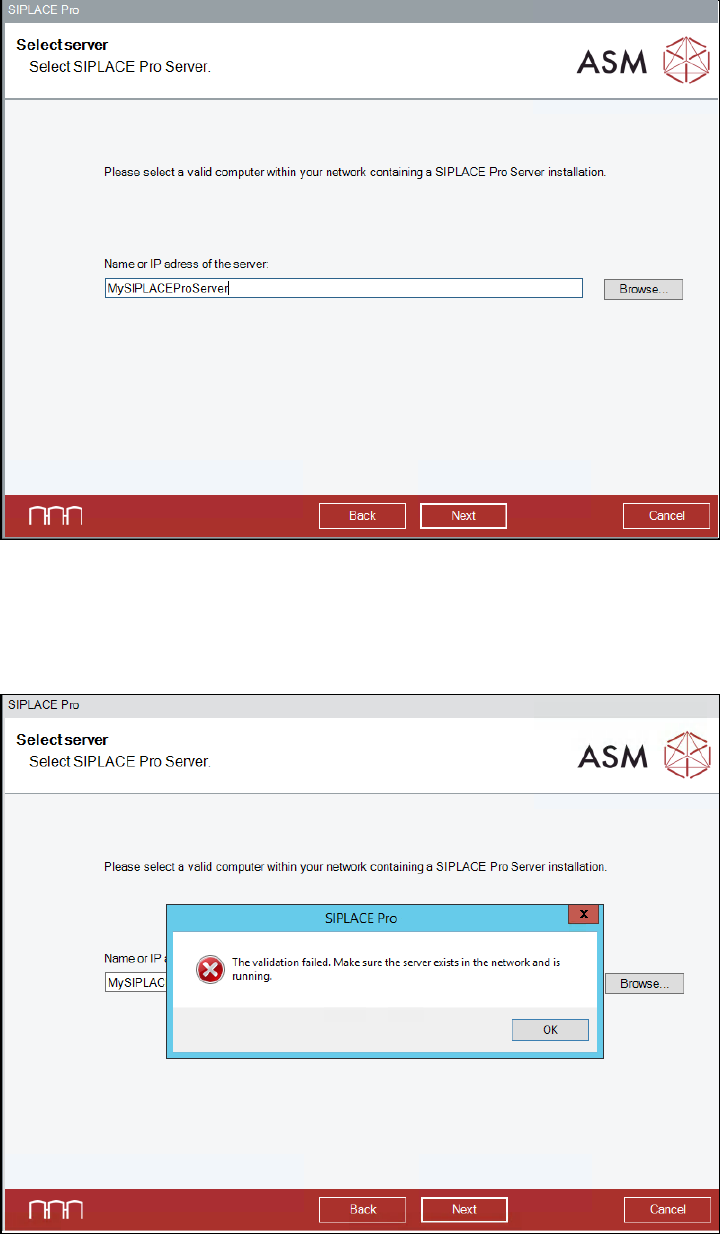
The Select Server dialog is displayed.
Figure 6-22: Selecting SIPLACE Pro Server
► Enter the server name of the remote computer on which SIPLACE Pro Server is installed.
► Click the Next button.
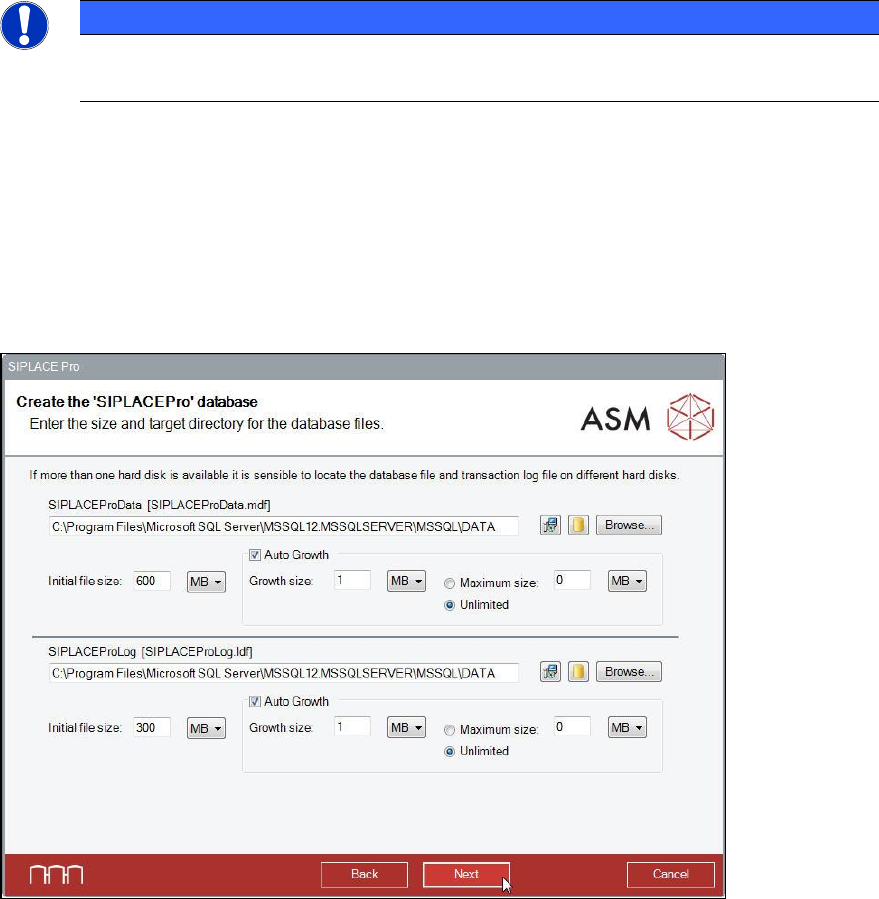
The following message is displayed if the remote computer is unavailable.
Figure 6-23: Validation failed
► In this case, click the OK button and solve the problem.
► Click the Next button.
SIPLACE Pro 17.0 (R19-2) / Installation Manual 11/2019 Edition
29
The installation continues with the configuration of SIPLACE Pro Server as described in
Figure 6-6ff.
NOTICE
After installation, the remote server must be running. Otherwise, the required
configuration steps cannot be done and, as a consequence, the product will not work!
6.2.3 Changing Default Database Settings
The default database settings can be changed in the SQL Server Login dialog.
If you have selected the Show dialogs to change the default database settings option, the
following dialogs will be displayed.
If the setup needs to create a new database for SIPLACE Pro, the following dialog will be
displayed.
Figure 6-24: Creating new database
In this dialog you can specify the location of the database files, and their initial size, growth size
and maximum size.
► Modify the default settings for database creation as required.
You may switch between different suggestions for the directories of the database files by
clicking one of the two buttons between the text field and the Browse... button. The left button
suggests the default directory as given by the setup. The right button suggests the default
directory for databases as defined in your SQL installation.
You may also click the Browse... button to select an already existing local folder.
► After you have modified the settings as required, click the Next button to continue.
The setup will now ask for the passwords for the SQL users.
SIPLACE Pro 17.0 (R19-2) / Installation Manual 11/2019 Edition
30
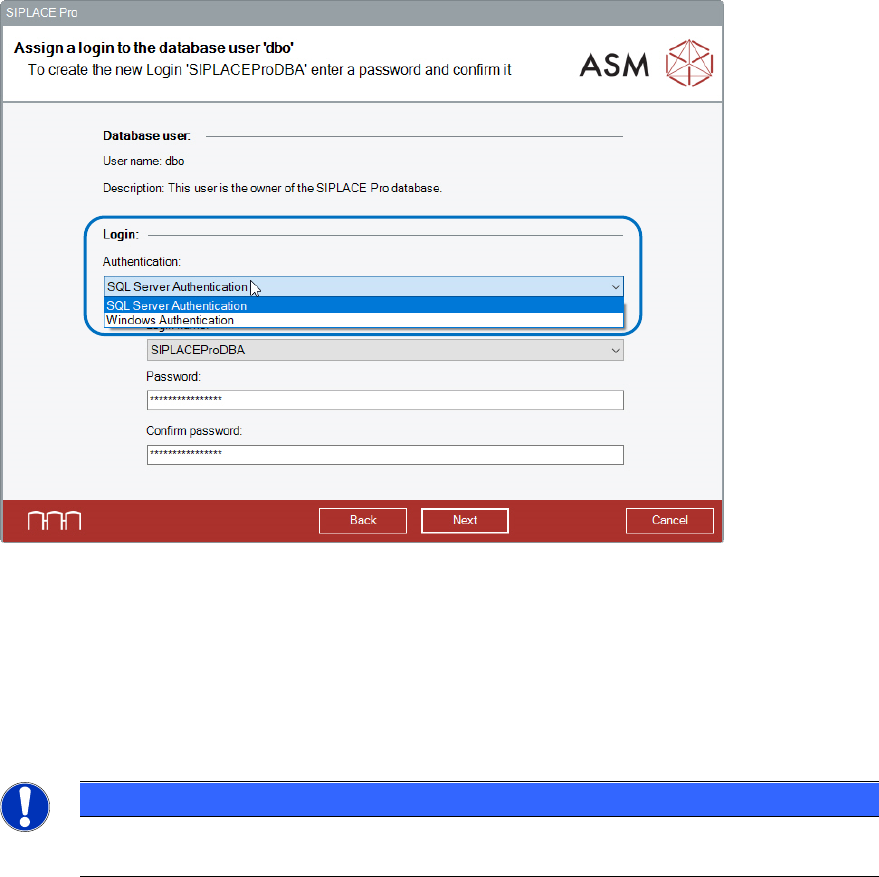
6.2.4 Setting Up the Database Users
If several database users are defined in an installation, the Assign a login to the database user
dialog is displayed for each SQL login. In SIPLACE Pro, two database users are available:
● SIPLACEProDBA
– This user is the owner of the database.
● SIPLACEProUSR
– This user is used by SIPLACE Pro for reading and writing operations on the database.
Figure 6-25: Assign a login to the database user dialog – Authentication Variants
Two authentication options are available for the login that is assigned to the database user:
● SQL Server Authentication
● Windows Authentication
Once all logins (DBA and USR) are validated accordingly, the Backup directory dialog is
displayed.
NOTICE
Depending on the selected authentication option, different options are displayed in the
Assign a login to the database user dialog.