00198764-01_IM_SIPLACE_Pro_17.0_R19-2_EN - 第37页
SIPLACE Pro 17.0 (R19-2) / Installation Manual 11/2019 Edition 37 The default database settings can be changed in the SQL Server Login dialog. Figure 6- 32 : Selecting databas e instance ► Click on <Browse fo r more…&…
SIPLACE Pro 17.0 (R19-2) / Installation Manual 11/2019 Edition
36
6.2.5 Installing Database on a Remote Computer
Optionally, the SIPLACE Pro database can be installed on another computer as SIPLACE Pro
Server. In this case the following requirements must be met.
Requirements:
– Only one SIPLACE Pro Server per SIPLACE Pro database is allowed.
– The SQL installation on the remote computer must be an SQL Server edition. SQL Express
editions are not supported.
– The installation has to be performed from the computer on which SIPLACE Pro Server is
installed.
– After SIPLACE Pro database has been installed, Support Media has to be executed on the
remote computer with the ASM Net – SQL Server Prerequisites – Apply ASM SQL settings
profile.
– The directories in which the database files shall be stored must exist on the remote computer.
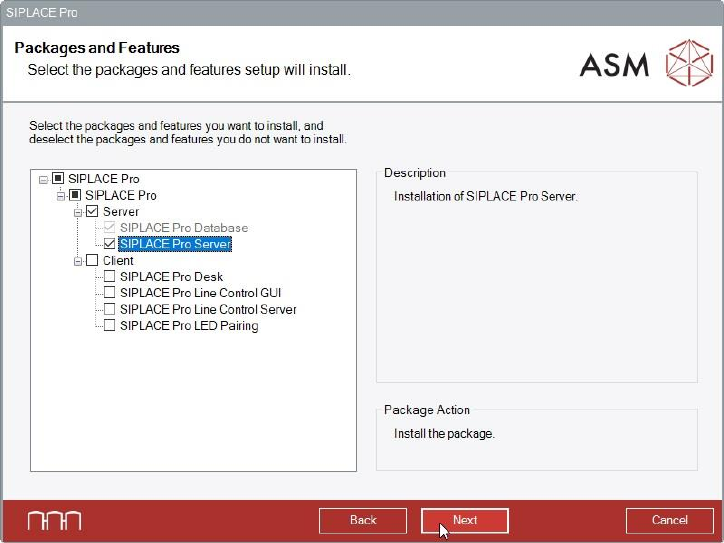
► Start the installation as described in section 6.2 and follow the instructions until the Packages
and Features dialog is displayed.
Figure 6-31: Selecting SIPLACE Pro Server feature
► Select the SIPLACE Pro Server feature.
The SIPLACE Pro Database feature is then automatically selected by the setup.
► Click the Next button.
SIPLACE Pro 17.0 (R19-2) / Installation Manual 11/2019 Edition
37
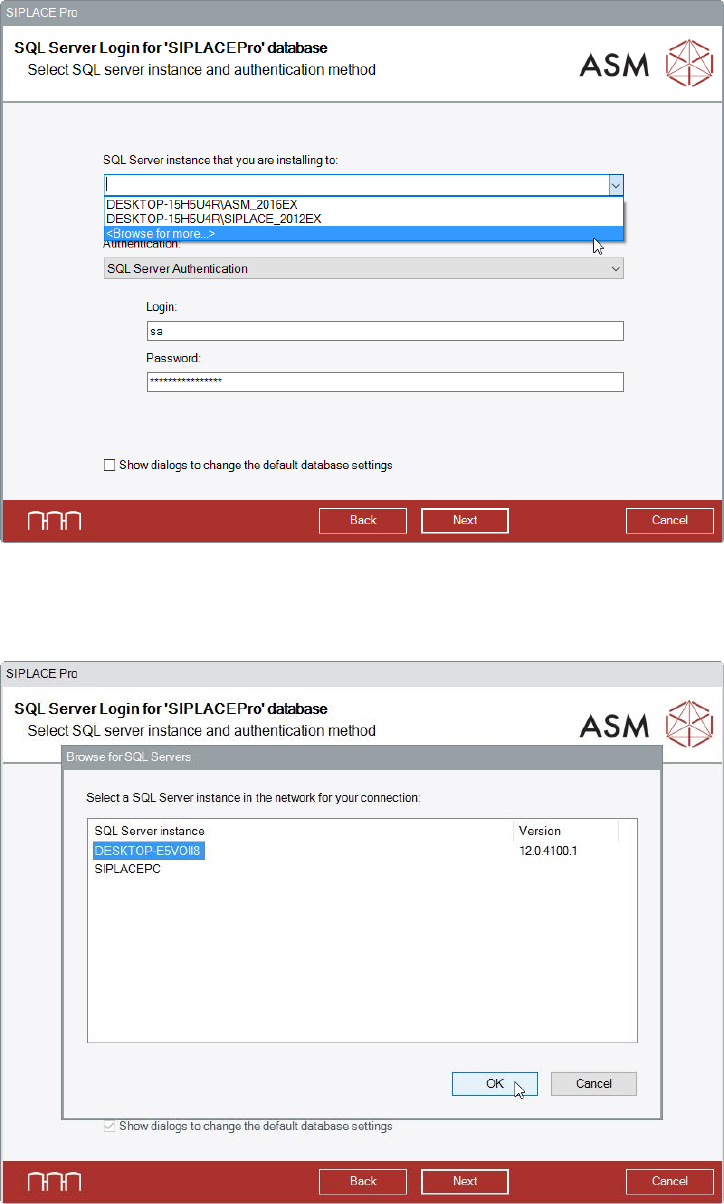
The default database settings can be changed in the SQL Server Login dialog.
Figure 6-32: Selecting database instance
► Click on <Browse for more…> in the dropdown list.
The following dialog displays a selection of the database instances found in the network.
Figure 6-33: Selecting database instance on remote computer
► Select the instance on the remote computer.
If the desired instance is not displayed:
► Click the Cancel button.
► Enter the name of the database instance manually in the dropdown list.
SIPLACE Pro 17.0 (R19-2) / Installation Manual 11/2019 Edition
38
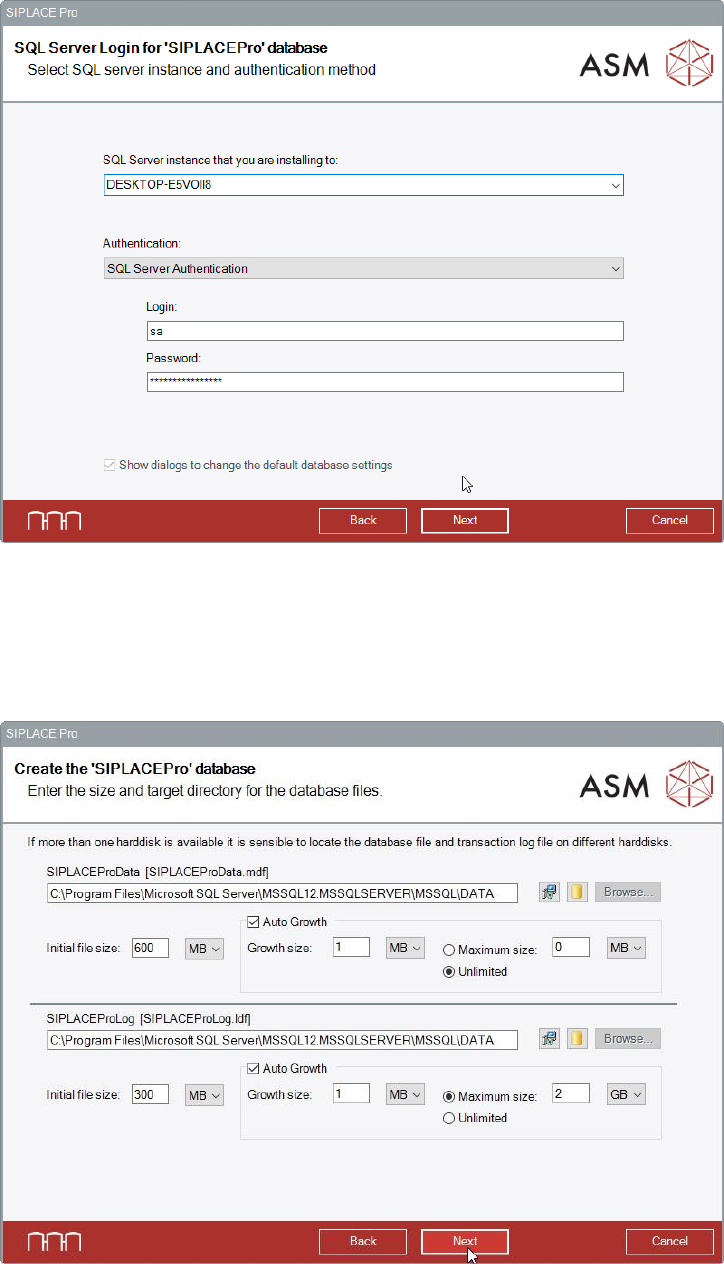
The next dialog displays the selected remote database instance.
Figure 6-34: Selected remote database instance
The Show dialogs to change the default database settings option is grayed out and
automatically selected.
► Click the Next button.
The following dialog is displayed in which a new database can be created for SIPLACE Pro.
Figure 6-35: Creating new database
The paths to the database files will be requested in this dialog. The corresponding directories must
exist on the remote computer!