00198764-01_IM_SIPLACE_Pro_17.0_R19-2_EN - 第64页
SIPLACE Pro 17.0 (R19-2) / Installation Manual 11/2019 Edition 64 SIPLACE Pro is now ready to be removed. The following dialog is di splayed. Figure 9-4: Removing SIPLACE P ro ► Click the Remove butt on to confirm uninst…
SIPLACE Pro 17.0 (R19-2) / Installation Manual 11/2019 Edition
63
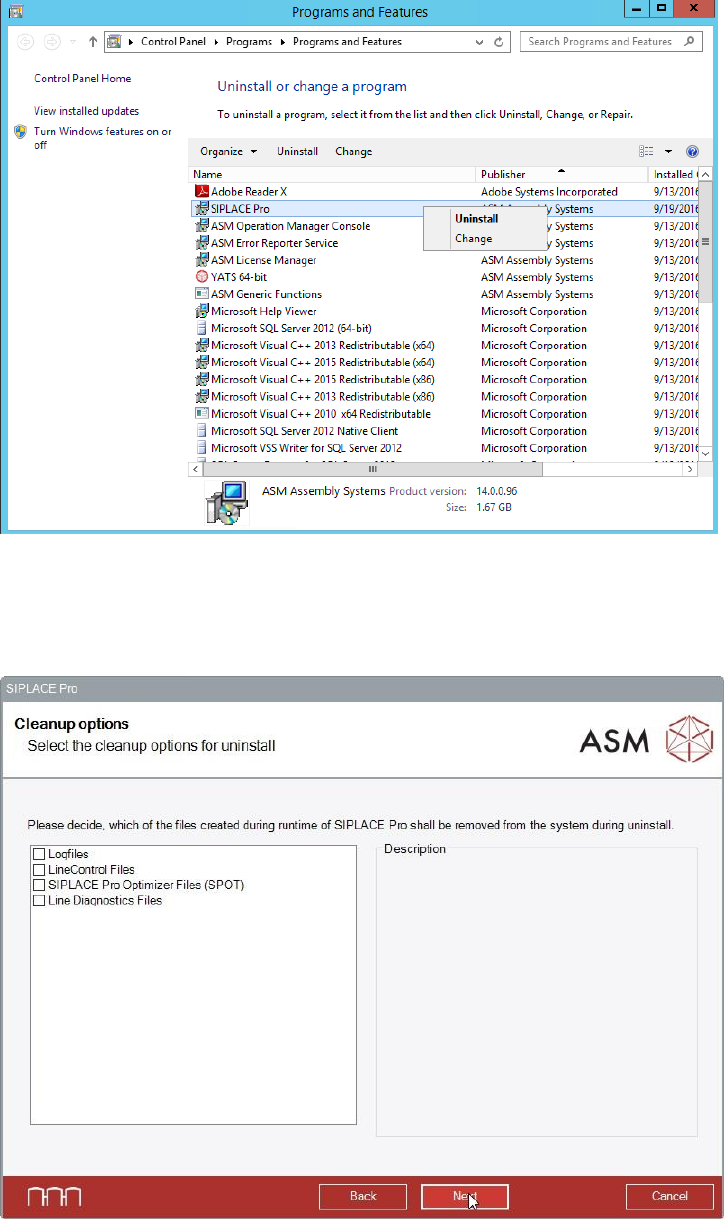
The context menu for SIPLACE Pro is displayed.
Figure 9-2: Selecting Uninstall
► Select Uninstall from the context menu.
In the Cleanup options dialog, a list with the files created during runtime of SIPLACE Pro is
displayed.
Figure 9-3: Selecting files created during runtime
► Select the files you want to uninstall additionally to the files installed by the setup.
► Click the Next button to continue.

SIPLACE Pro 17.0 (R19-2) / Installation Manual 11/2019 Edition
64
SIPLACE Pro is now ready to be removed. The following dialog is displayed.
Figure 9-4: Removing SIPLACE Pro
► Click the Remove button to confirm uninstalling the SIPLACE Pro software.
If User Account Control is enabled on Windows 7 or newer, the following dialog is additionally
displayed before the removal starts.
Figure 9-5: User Account Control
► Click the Yes button to allow the changes to your system.
SIPLACE Pro 17.0 (R19-2) / Installation Manual 11/2019 Edition
65
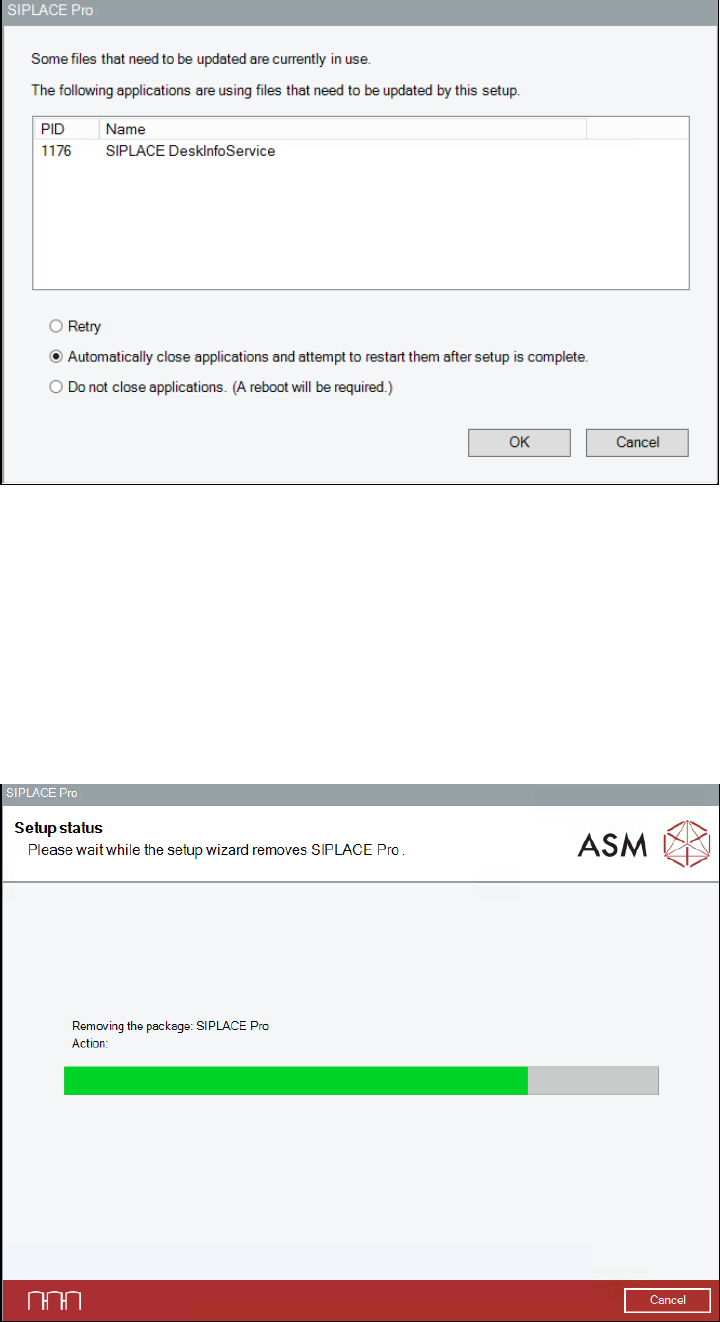
The following window might be displayed, if applications are using files to be replaced.
Figure 9-6: Applications opened
By default, the setup tries to close the conflicting applications automatically.
► To accept this behavior, click the OK button.
You may also close the conflicting applications manually, then select the Retry option and click
the OK button.
► If you do not want to close conflicting applications (not recommended!), select the Do not
close applications option and click the OK button.
In this case, a reboot will be required after the setup has been completed.
The setup status is displayed during removal.
Figure 9-7: Setup status