00196613-0102_AI_LP-Dicke6mmDE+EN.pdf - 第19页
6 mm PCB thickness 2 Assembly instructio ns: 6 mm PCB thickness SIPLACE SX1 / SX2 06/2009 Edition 19 2.6 Setting the PCB thickness : Measure the height as shown in the picture at at least four po ints. Fo r greater accur…
2 Assembly instructions: 6 mm PCB thickness SIPLACE SX1 / SX2 6 mm PCB thickness
06/2009 Edition
18
2.5 Preparatory work
: Undock the component trolley to allow access to the working position.
: Switch the placement machine off at the main switch.
: Open the protective covers.
2
2
6 mm PCB thickness 2 Assembly instructions: 6 mm PCB thickness SIPLACE SX1 / SX2
06/2009 Edition
19
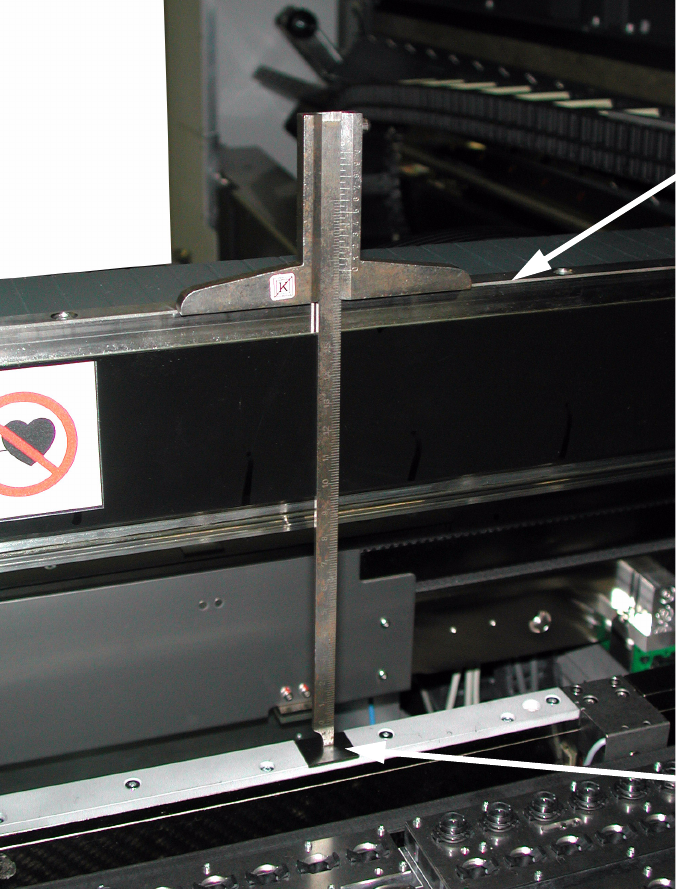
2.6 Setting the PCB thickness
: Measure the height as shown in the picture at at least four points. For greater accuracy, use
the outer side parts as measuring points.
The measured height must be 176.8 +/- 0.2 mm.
2
2
2
2
2
Top edge of
gantry
(runner for
floating bearing)
Measuring point
for height refer-
ence on the
PCB conveyor 2
2 Assembly instructions: 6 mm PCB thickness SIPLACE SX1 / SX2 6 mm PCB thickness
06/2009 Edition
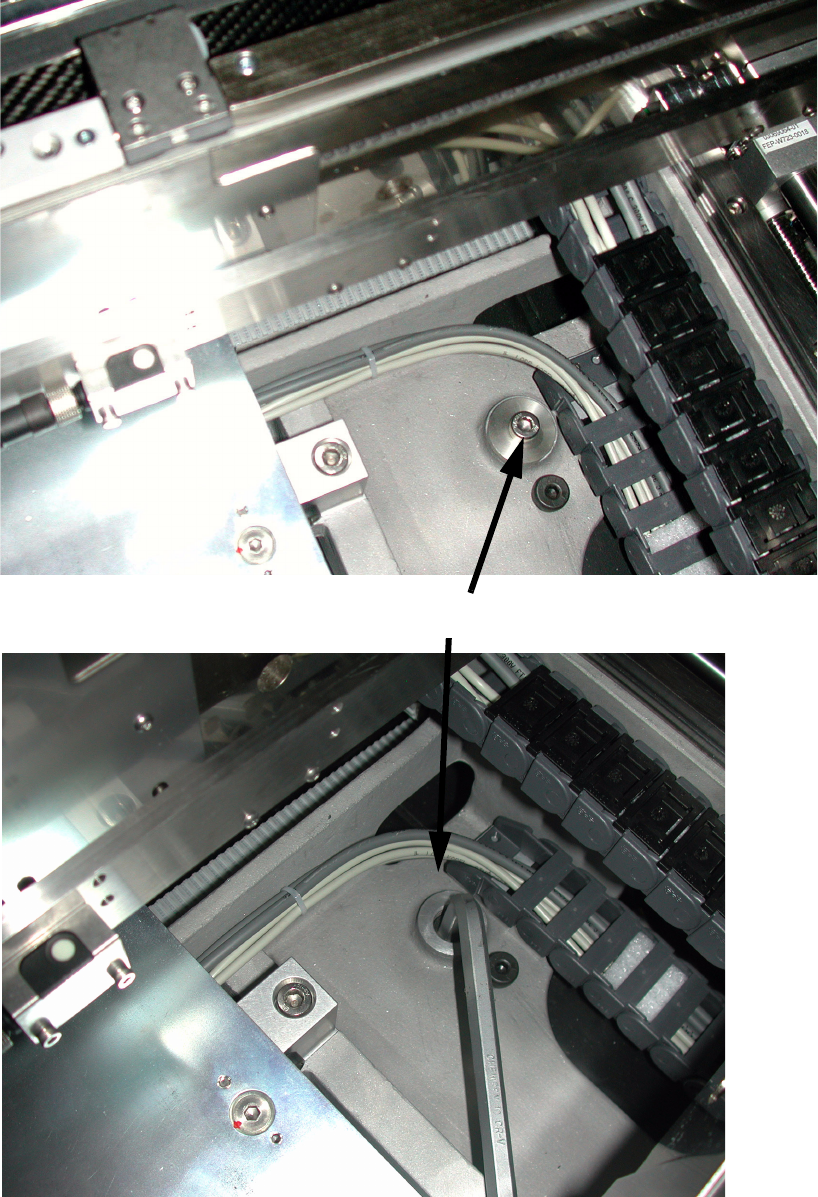
20
: Loosen the fixing bolts (hexagon socket spanner 6 mm).
2
Fixing bolt