Dek-265GSX-User-Manual.pdf.pdf - 第365页
4. Select Load Cassette (F4). Load Cassette The message ‘Has the ProFlow unit’s base cover been removed?’ is displayed. 5. If the ProFlow unit’s base cover is still fitted continue with Step 6. If the ProFlow unit’s base…
PROFLOW
ProFlow Cassette
Change
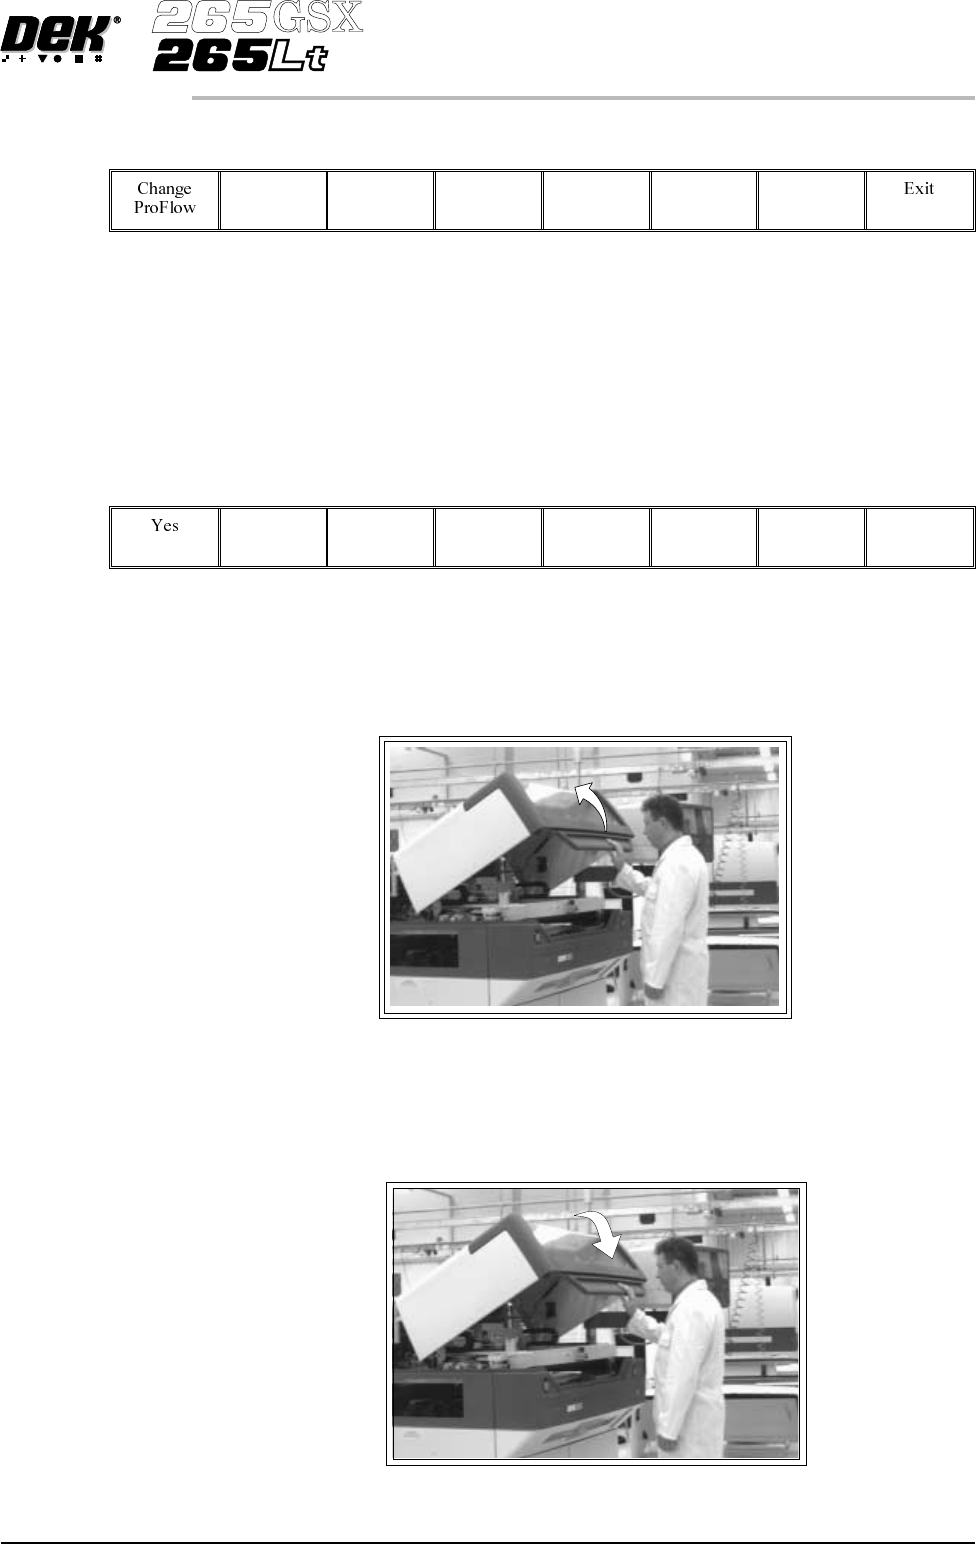
It is necessary at intervals to fit a new ProFlow cassette into the ProFlow transfer
head. If the cassette is empty at the end of a print stroke, the warning window
‘Print Medium Low. Please Replenish.’ is displayed.
NOTE
When using a ProFlow transfer head for the first time or if the transfer head
conditioning chamber has been cleaned, ie free from solder paste. The
conditioning chamber must be primed first with the print medium. Two ProFlow
cassettes are required, the first ProFlow cassette is used to prime the
conditioning chamber. The second ProFlow cassette is fitted ready for machine
operation.
The ProFlow cassette can be fitted or changed prior to and during a print run.
Prior to a Print Run The ProFlow cassette can be fitted or changed prior to selecting Run.
1. If ProFlow is in the home position continue from Step 2. If ProFlow is in the
contact position go to Step 19.
2.
Select Setup (F6).
Setup
3.
Select Setup ProFlow (F4).
Setup
ProFlow
9.50 User Manual Software Version 6
CONSUMABLE REPLENISHMENTS
PROFLOW
WARNING
SOLDERPASTEANDSOLVENTS. WHENUSINGORHANDLINGAN
Y
SOLDER PASTE OR SOLVENT FORMULATION THE
MANUFACTURERS' RECOMMENDED SAFETY PRECAUTIONS
MUSTBESTRICTLYADHEREDTO.
WARNING
PROTECTIVE CLOTHING. APPROVED PROTECTIVE CLOTHIN
G
SHOULD BE WORN BY SOLDER PASTEAND SOLVENT HANDLERS
AT ALL TIMES TO ELIMINATE FUME INHALATION, EYE
CONTACT,SKINCONTACTANDINGESTION.
4.
Select Load Cassette (F4).
Load
Cassette
The message ‘Has the ProFlow unit’s base cover been removed?’ is
displayed.
5. If the ProFlow unit’s base cover is still fitted continue with Step 6. If the
ProFlow unit’s base cover has been removed go to Step 12.
6.
Select Remove Cover (F8).
Remove
Cover
The message ‘Open the printer cover and remove the ProFlow unit’s
base cover’ is displayed.
7. Open the printhead cover.
8. Remove the ProFlow unit’s base cover.
9. Close the front printhead cover.
Software Version 6 User Manual 9.51
CONSUMABLE REPLENISHMENTS
PROFLOW
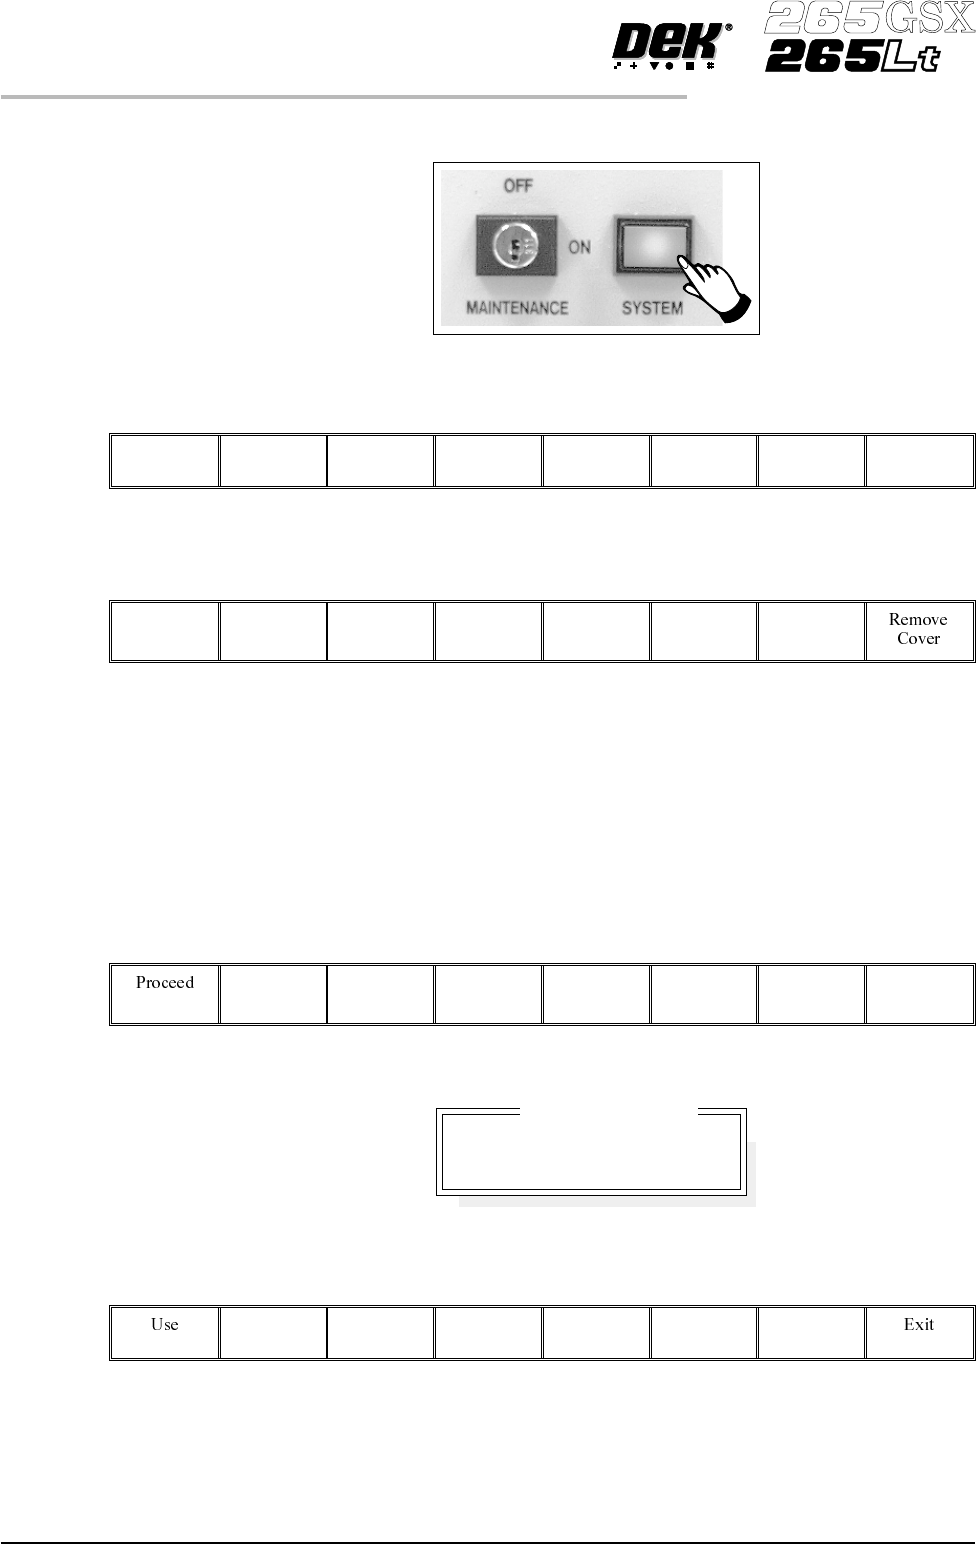
10.
Press the System button.
11.
Select Exit (F8).
Exit
12.
Select Yes (F1).
Yes
The message ‘The ProFlow unit will be placed in the REAR envelope’ is
displayed.
13. Ifthe ProFlow unit is required to be placed in another envelope continue with
Step 14. If the ProFlow unit is required tobe placed inthe machine preferred
envelope go to Step 18.
14.
Select Select Another (F8).
Select
Another
The following window is displayed:
15.
Use the Next or Previous keys (F4 or F5) to highlight Front.
Next Previous
9.52 User Manual Software Version 6
CONSUMABLE REPLENISHMENTS
PROFLOW
Preferred Envelope
REAR
FRONT