YG12F_Ope_E.pdf - 第102页
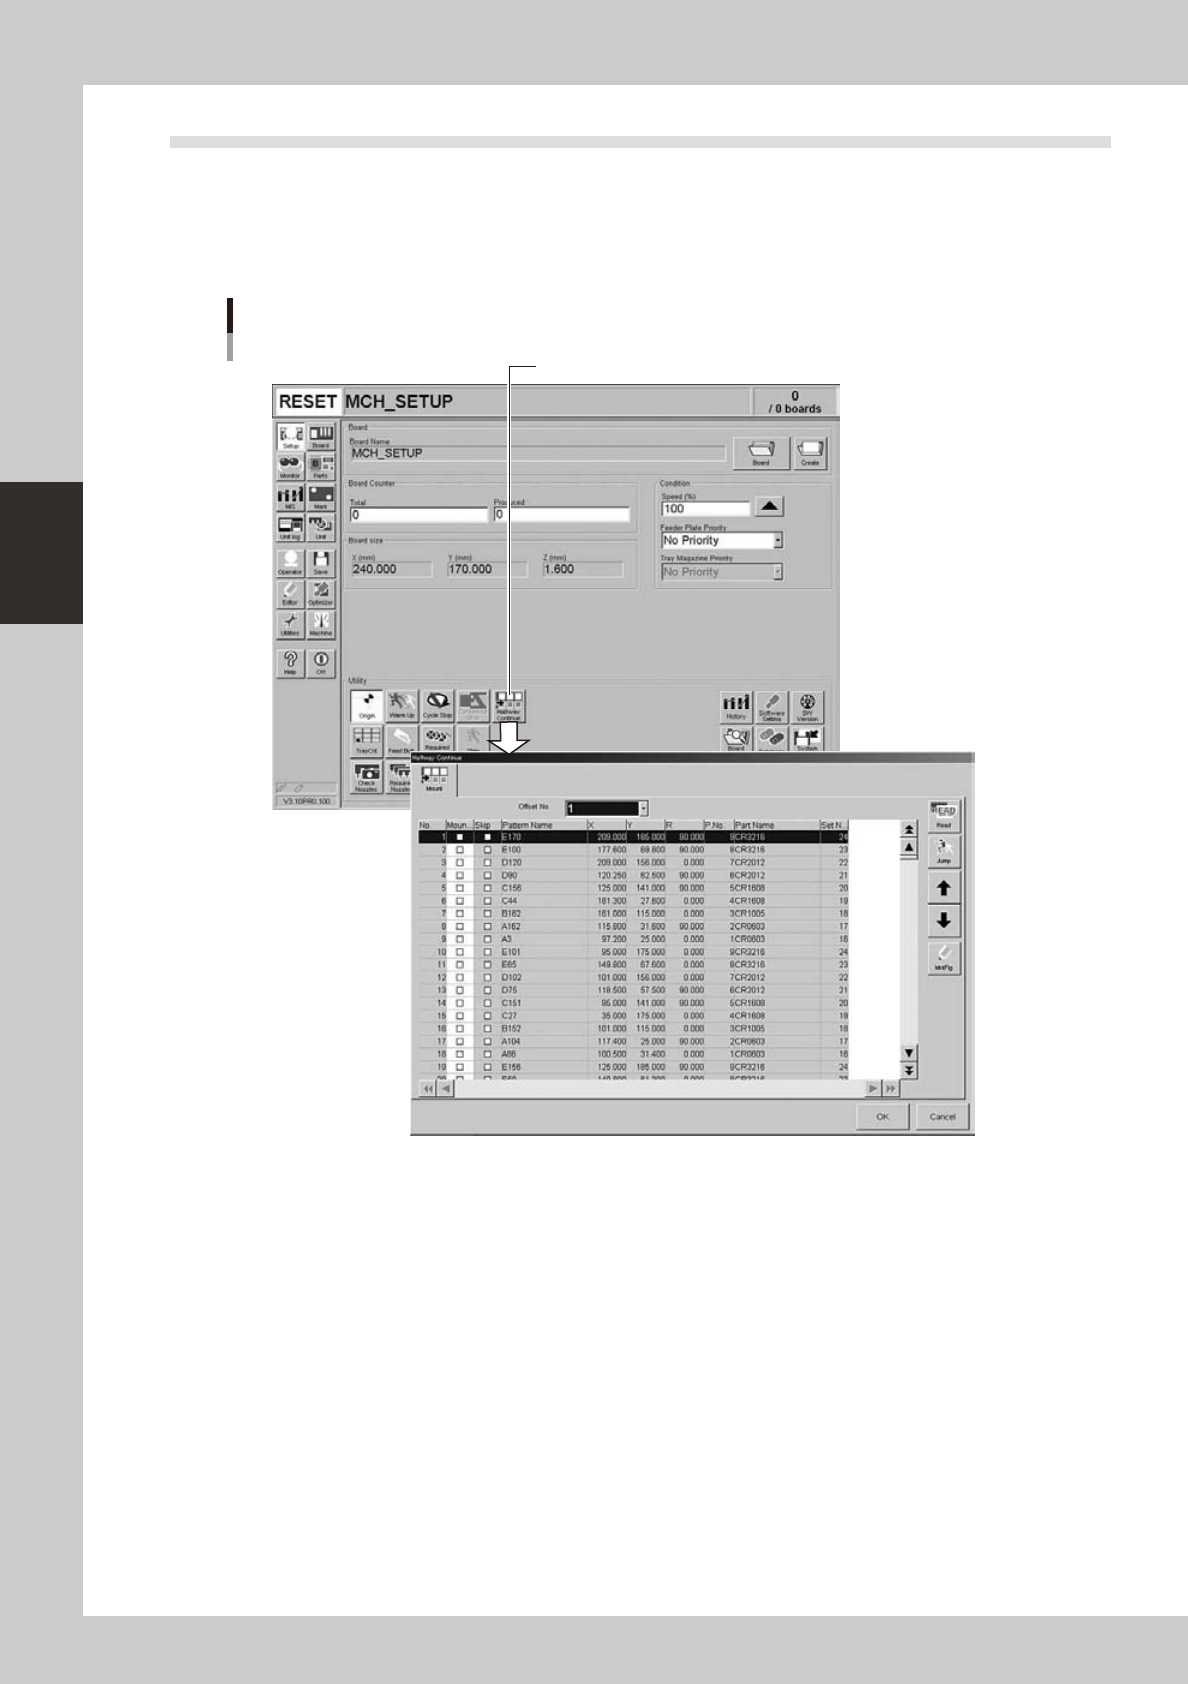
3-4 3 Starting and ending pr oduction 1.1 Resuming operation from the stopped point Pressing the [Halfwa y Continue] button on the "Setup" screen opens the "Halfwa y Continue" dialog box as shown belo…
3-3
3
Starting and ending production
2. [Required Nozzles] button
Displays a list of nozzle types that should be attached to each head. When the machine has no nozzle station or uses a
head not designed for auto nozzle change. Check that the correct nozzle is attached to each head by referring to the
displayed list.
3. [Feed Bulk] button
Cannot be used with this machine.
4. [Check Nozzles] button
Checks the nozzle tip condition with the vision camera. If an error occurs with this check, clean the nozzle.
c
4
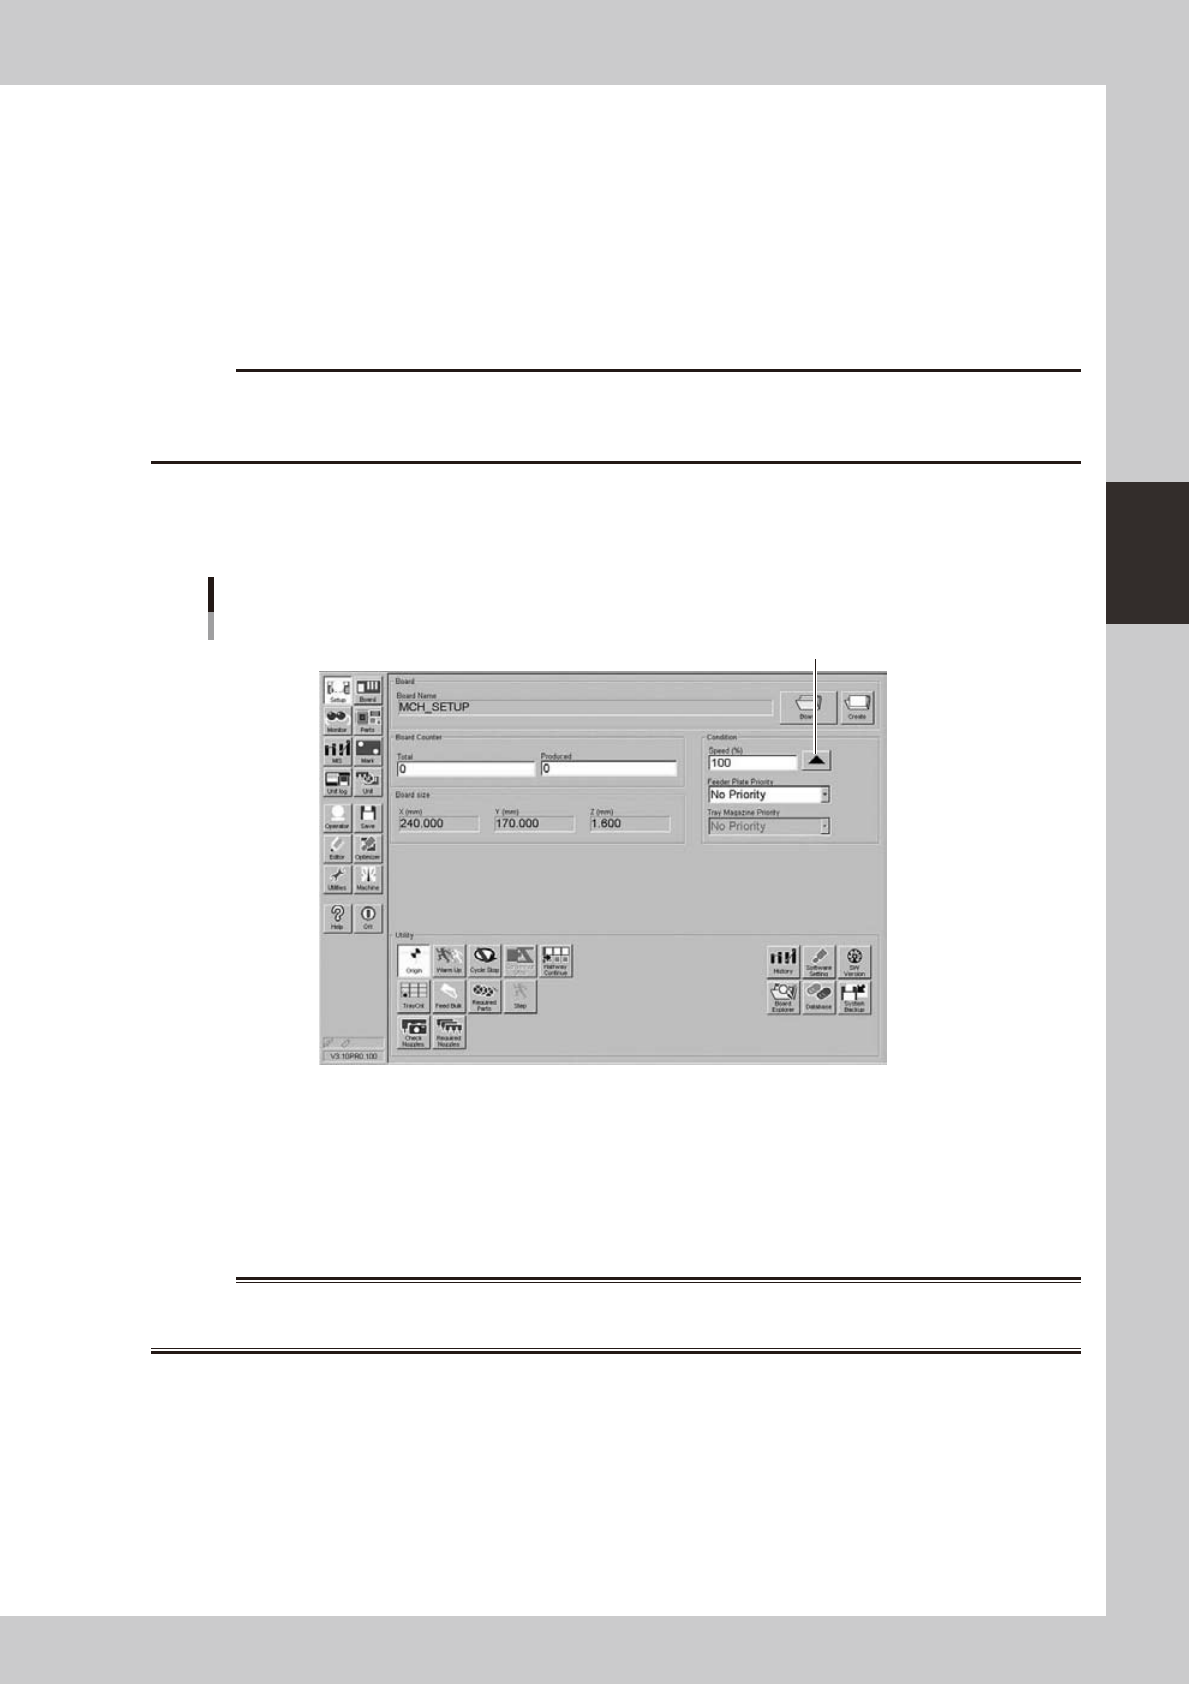
Set the operation speed.
The currently set operation speed is displayed in the "Speed" box. Press the UP arrow button to change
te operation speed.
Set the operation speed.
Setting the operation speed
24303-M7-00
5
Start operation.
1. Release the emergency stop button, and press the [READY] button on the operation panel.
2. Check that the surroundings are safe, and then press the [START] button on the operation panel.
3. When the entrance sensor detects a board, the conveyor belt will start rotation. The board will be
transferred to the work position, and component mounting will start.
w
WARNING
3-4
3
Starting and ending production
1.1 Resuming operation from the stopped point
Pressing the [Halfway Continue] button on the "Setup" screen opens the "Halfway Continue" dialog box as
shown below. Even after you have reset operation data while component mounting on a board was in progress,
this dialog box allows you to reload that operation data to continue the component mounting or to mount
components at a specific block or mounting points. Note that this function can be used just for the first board
after the operation is resumed, with routine mounting operation beginning from the next board.
[Halfway Continue] button
"Halfway Continue" dialog box
24304-M7-00
3-5
3
Starting and ending production
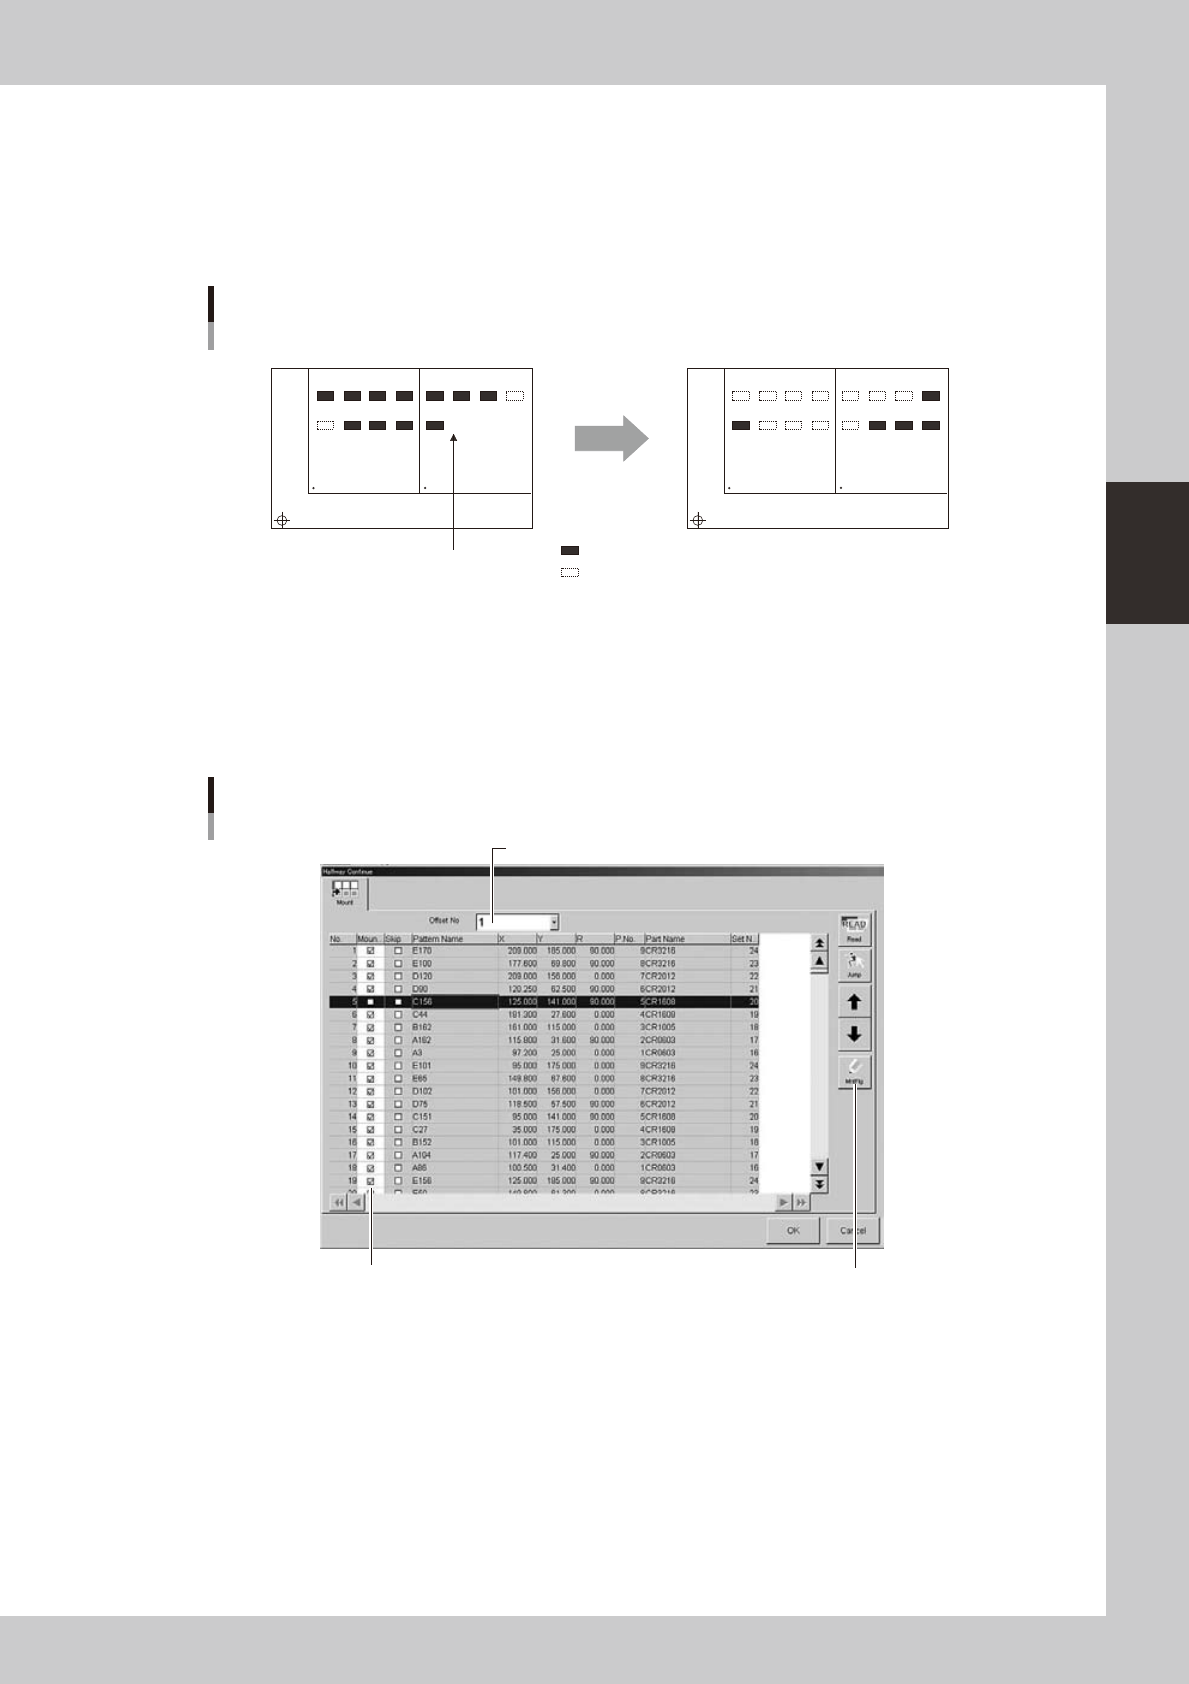
1.1.1 Loading the saved data
When you have reset automatic operation while component mounting on a board was in progress, the machine
automatically saves the operation data at the time the operation was reset. That operation data can be reloaded
by pressing the [Read] button on the "Halfway Continue" dialog box. Then you can resume automatic operation
to mount components from the stopped point. Since the saved operation data includes error information,
components will be mounted at the points where for some reason the machine failed to mount components.
1
5
2
6
3
7
4
8
1
5
2
6
3
7
4
8
1
5
2
6
3
7
4
8
1
5
2
6
3
7
4
8
Automatic operation restarts
after loading saved data.
BLOCK NO.1
Resuming component mounting
BLOCK NO.2 BLOCK NO.1 BLOCK NO.2
: mounted
: not mounted
Reset
23301-M7-00
1.1.2 Editing mount flags
The "Halfway Continue" dialog box also allows you to mount components at specific mounting points by
specifying the mount data numbers. When you have paused and reset operation data while component
mounting was in progress, you can reload that operation data by pressing the [Read] button and then edit each
mounting point as necessary by using the [MntFlg] button.
Editing mount flags
Offset No. selection box
Mounted flag (checkmark)
[MntFlg] button
24305-M7-00