00196614-03_AI_Vakuumpumpe_SXDX12_de_en.pdf - 第104页
Fitting the Vacuum Pump Preparatory Steps 3.3.4 Work to Distributor 104 Vacuum Pump Vakuumpumpe 3.3.4 3 . 3 . 4 W o r k t o D is t r ib u t o r Work to Distributor ► Remove the center cover f r om the control computer si…
Fitting the Vacuum Pump
3.3.3 Fitting the Vacuum Pump Connection Unit SX1/2 [03079949-xx] on Machines Kxxx / Lxxx / Mxxx Preparatory Steps
Vacuum Pump Vakuumpumpe 103
3.3.3.1
3.3.3.1 Fitting the Vacuum Pump Connection Unit SX1/SX2 [03079949-xx] (Machine Serial No. Nxxx)
Fitting the Vacuum Pump Connection Unit SX1/SX2 [03079949-xx] (Machine Serial No. Nxxx)
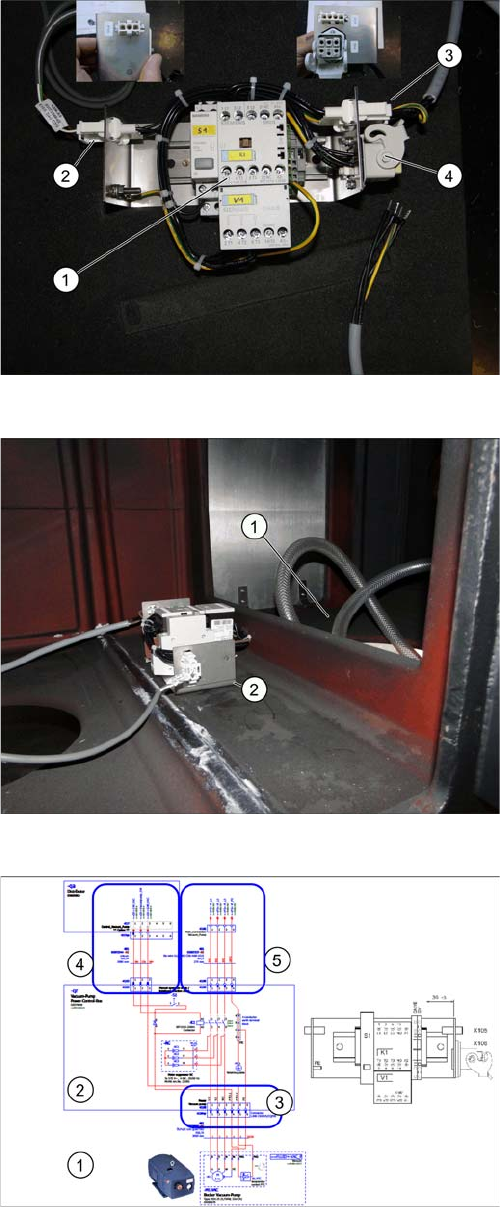
Connections on the vacuum control box
► Establish the electrical connections to the connection
unit vacuum pump
SX1/SX2 [03079949-xx] (1).
1. Vacuum pump connection unit SX1/SX2 [03079949-
xx]
2. Cable for the vacuum pump control [03072544-xx]
W2 X103 sector 2 (in the machine base at the instal-
lation position of the connection unit) <- from X17qa
distributor
3. AC power cable for the vacuum pump [03113252-xx]
(3) W6 X105 -> to (4) (The cable is already present in
the machine base at the installation position of the
connection unit.).
4. Connect the power cable of the vacuum pump
[03079997-xx] (4) -> to X95 (vacuum pump).
Position of the vacuum pump control box
► Place the connection unit of the vacuum pump SX1/
SX2 [03079949-xx] in the machine base.
► Fix the connection unit with the Klettostar tape.
Legend:
1. Position of the vacuum pump
2. Position of the vacuum pump connection unit SX1/
SX2 [03079949-xx]
Overview of the vacuum pump connections
Legend:
1. Vacuum pump
2. Vacuum pump connection unit SX1/SX2 [03079949-
xx]
3. Cable for the vacuum pump control [03072544-02]
W2 X103 present
4. AC power cable for the vacuum pump [03113252-xx]
X105 <-> X96
5. Vacuum pump cable - power control box [03079997-
xx] X106qr <-> pump
Fitting the Vacuum Pump
Preparatory Steps 3.3.4 Work to Distributor
104 Vacuum Pump Vakuumpumpe
3.3.4
3.3.4 Work to Distributor
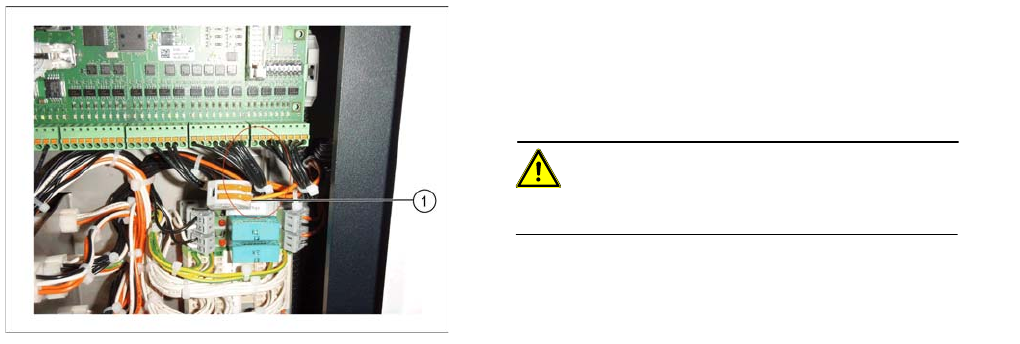
Work to Distributor
► Remove the center cover from the control computer
side.
► Unplug wire 8 from terminal 3 and secure wire 8 with
the WAGO 2-conductor connection terminal
[03090581-xx] (1).
CAUTION!
Wire 8 conducts 24 V voltage.
Fitting the Vacuum Pump
3.3.5 Checking the Direction of Pump Operation Preparatory Steps
Vacuum Pump Vakuumpumpe 105
3.3.5
3.3.5 Checking the Direction of Pump Operation
Checking the Direction of Pump Operation
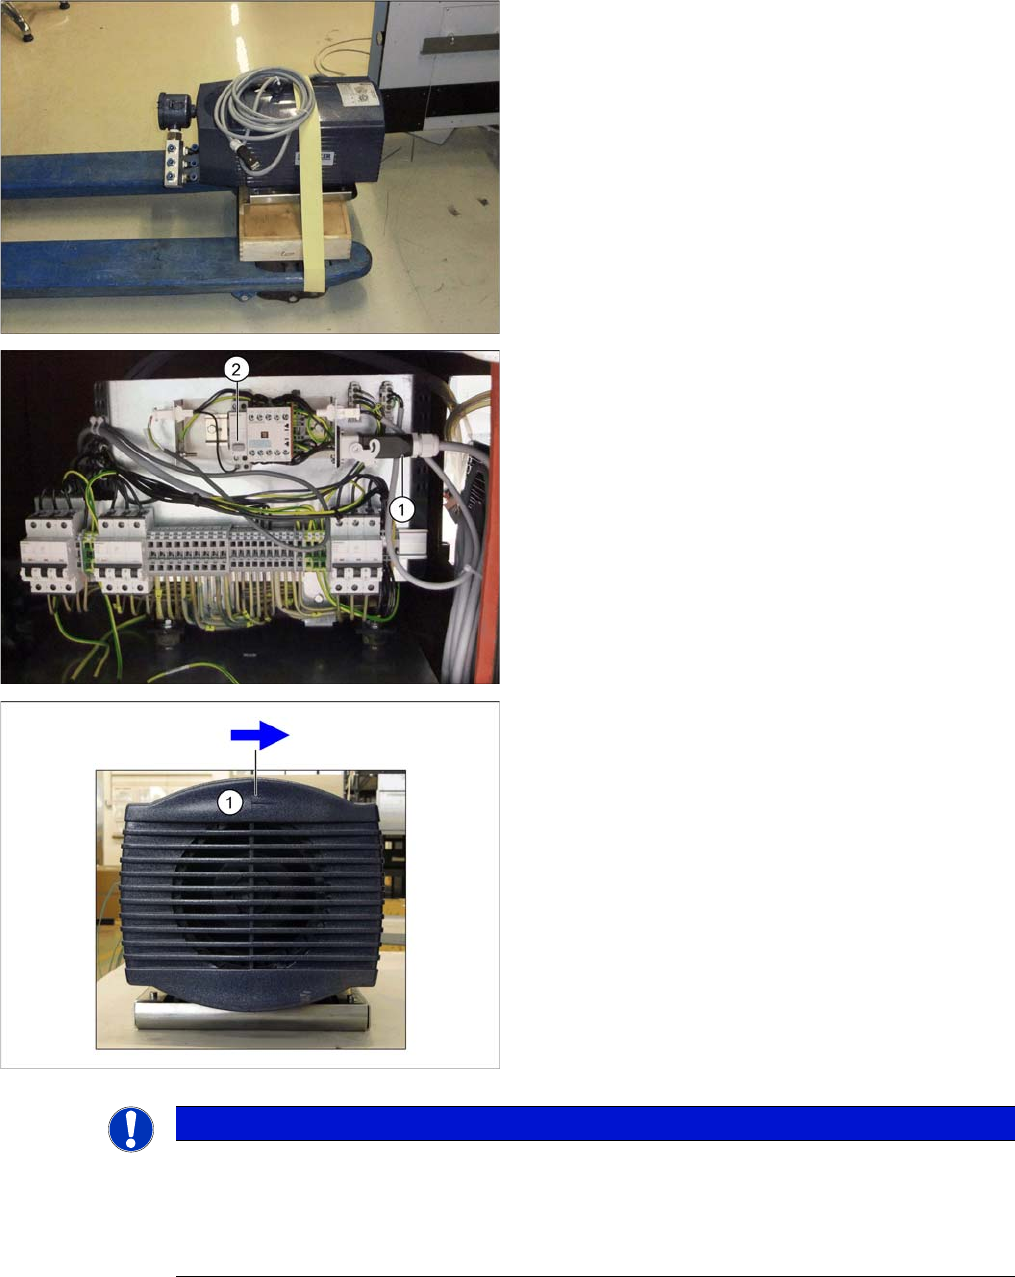
► Place the pump on a pallet truck with a suitable base
and secure this with a safety belt to prevent it falling
off.
► Move the pump to location 2, in front of the vacuum
pump connection unit.
► Connect the cable to the vacuum pump (1).
► Switch on the vacuum pump with S1 (2).
► On the back of the pump you will see an arrow (1),
which shows the correct direction of operation for the
fan.
► Check whether the fan turns in the correct direction.
► If the direction of operation is correct, unplug the
pump from the connection unit and continue with sec-
tion "3.4.1 Inserting the Pump into the Machine"
[ ➙ 109].
► If the direction of operation is not correct, continue
with section "3.3.5.1 Reversing the Direction of Pump
Operation" [ ➙ 106].
NOTICE
Check direction of pump operation when pump is fitted
If it is necessary to check the direction of pump operation when it is installed, switch on the
pump and check whether there is a vacuum at the nozzles for the affected placement head. If
yes, the direction of pump operation is correct. If not, continue with section "3.3.5.1 Reversing
the Direction of Pump Operation" [ ➙ 106].