PS288_PS388_PS588_981-0424-002D - 第132页
Operation ■ Printer Options 3—62 Data I/O • 981-0424-002 back 4. Set text lines— 4a. Select the first (left) box and type the text to be printed on the label. Each box represents one line of text. 4b. Repeat for the rema…
■ Printer Options ◘ (Optional) Creating a Label Printer File
PS Series Owner’s Manual 3—61
back
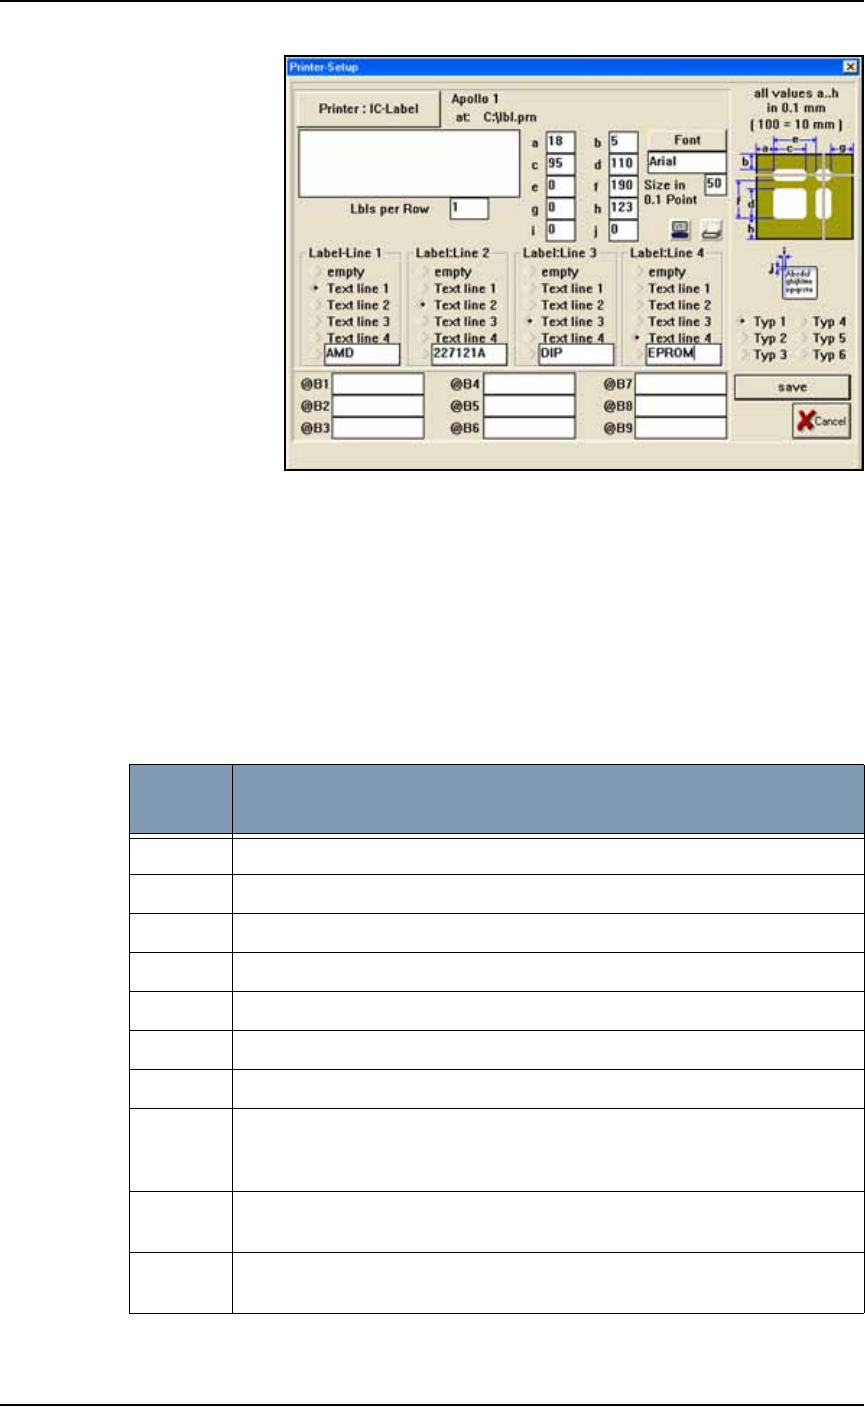
Figure 3-51: The Label Printer–Setup Window. Each label type has
different values for dimensions a to j. Up to four lines can be used per
label. All values are in millimeters.
2. Select label type—
2a. Select the label type to use when this job is run. The MRPRT soft-
ware allows up to six sizes of labels called types (abbreviated as
Typ).
3. Set values in millimeters—
3a. Enter the values for fields a to j. For an explanation of each
value, see the table below.
dimen-
sion
Description
a Left margin: the offset in X-axis of the text from the edge of the label.
b Top margin: the offset in Y-axis of the text from the edge of the label.
c The label size in the X.
d The label size in the Y (must be less than value for f).
e Not used on the PS System and should be set to 0.
f The distance from the front of the label to front edge of the next label.
gNot used.
h Label advance. This is the distance to advance the label toward the tamp
applicator after printing. (Use only for small adjustments. The Tamp
head should be in the correct position first.)
i Text centering in X direction. 0= Auto and 1= All the way to the left of the
label. Normally set to 0.
j Text centering in Y direction. 0= Auto and 1= All the way to the top of the
label. Normally set to 0.
Operation ■ Printer Options
3—62 Data I/O • 981-0424-002
back
4. Set text lines—
4a. Select the first (left) box and type the text to be printed on the
label. Each box represents one line of text.
4b. Repeat for the remaining text boxes: Label: Line 2, Label: Line 3
and Label: Line 4.
5. Set labels per roll—
5a. Type 1 into the Lbls per Roll field.
5b. Click Save to save and exit the printer setup.
Note: For information on selecting label printing during Task cre-
ation, see TaskLink online Help.
(Optional) Creating a Laser Marking File
Laser graphics used to mark devices are generated using
WinMark Pro software. It may be on the Laser Computer
located in
the Option Bay (some models) or on the Handler Computer.
Any style of marking (whether text-based, graphic-based, or both)
can be generated and used for marking devices. The only limitation is
the size of the device to be marked.
Creating an Image File for the Laser System
To create an image file for the laser system to use in laser marking
devices:
1. Preparation—
1a. Select the Laser Computer by pressing the Ctrl key twice— a list
of all computers is displayed on the monitor. If you don’t have a
Laser computer skip this step.
Note: The touch screen does not work while viewing the Laser
Computer. Use the keyboard and track pad.
1b. Navigate to and copy the file
Template.mkh
(or copy the .
mkh
file from an existing job).
1c. Paste it and rename it to the name you gave the laser marking
(drawing) file in the job creation process, for example,
Ver7.mkh
.
1d. Start WinMark Pro by double-clicking the WinMark icon on the
desktop.
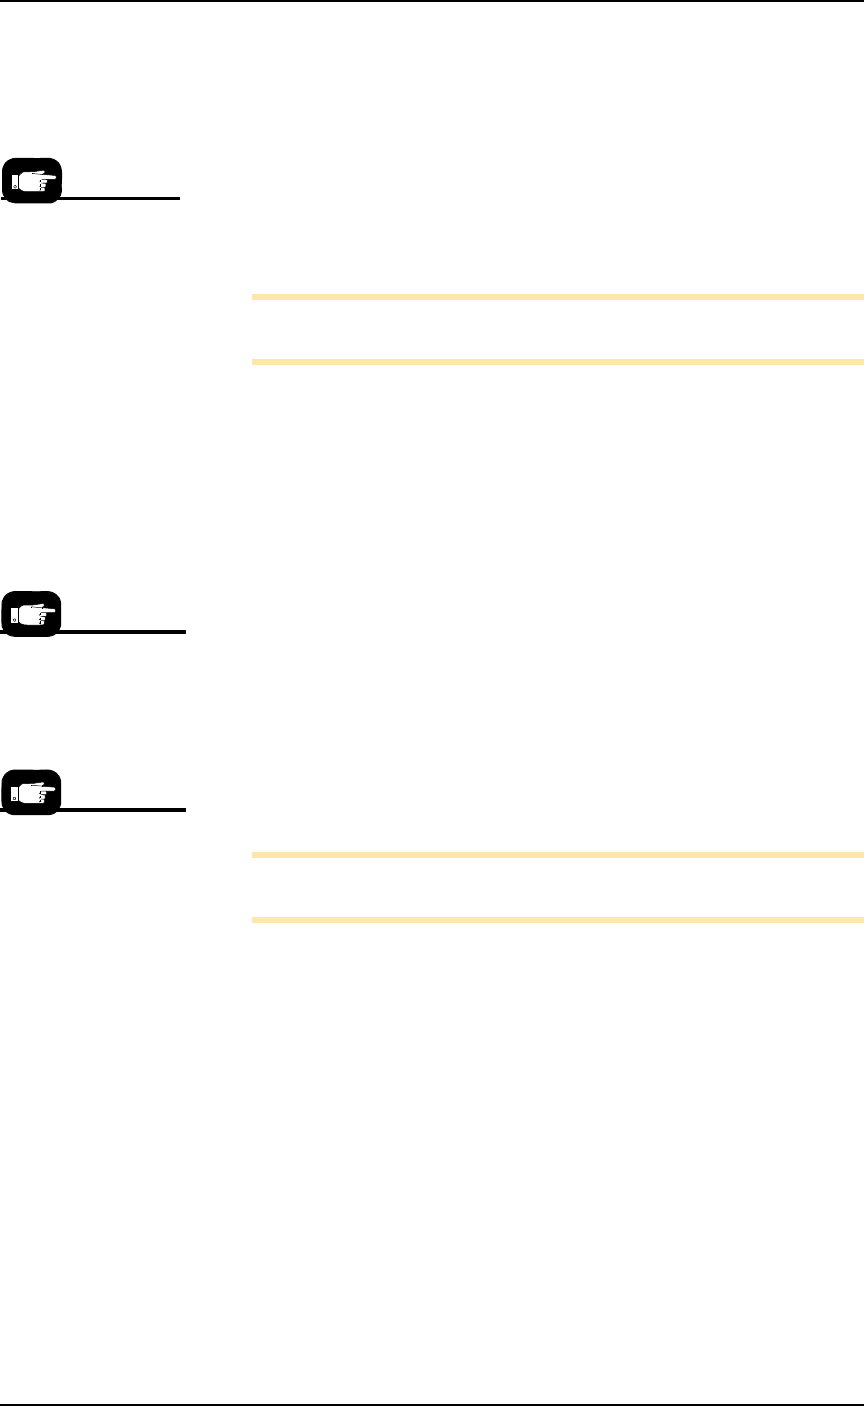
2. Load the file—
2a. Select File > Load.
2b. Select your laser marking file from the list, or navigate to the file
and select it.
2c. Click Open to load the file.
Are you using Serial-
ization with a laser or
label marker? See
TaskLink Help for more
information.
Newer PS models may
not have Laser Com-
puter.
On older PS models,
select the Laser Com-
puter by pressing button
14 on the KVM switch
box.
■ Printer Options ◘ (Optional) Creating a Laser Marking File
PS Series Owner’s Manual 3—63
back
Figure 3-52: Selecting a laser marking file. (WinMark software is not
part of AH500.)
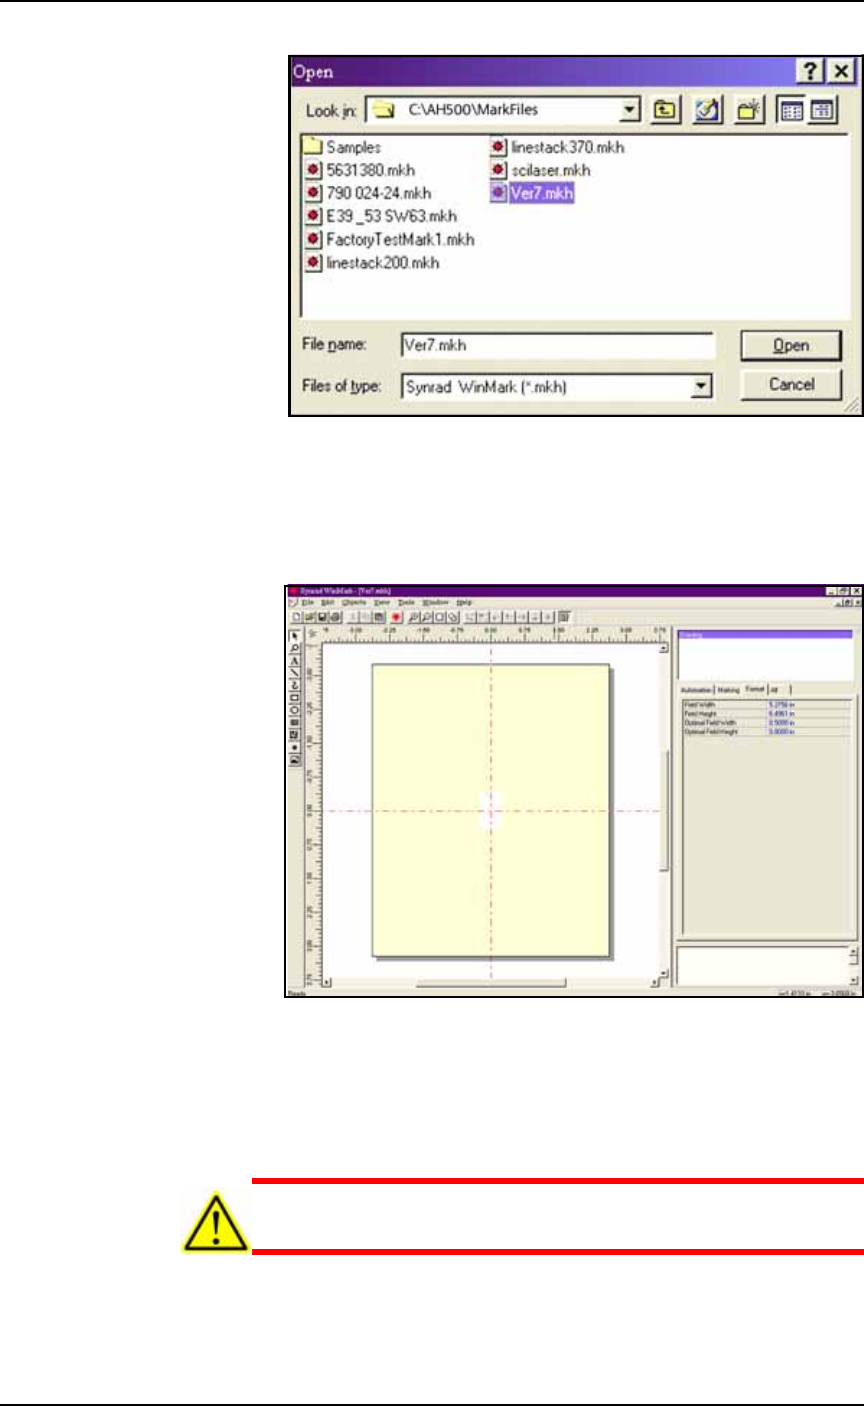
3. Format—
3a. Click Drawing on the right side of the Properties Window.
3b. Click the Format tab.
Figure 3-53: The Synrad WinMark Window with the Format tab on the
right.
3c. On the Format tab, set the Optimal Field Width and Optimal Field
Height to the approximate width and height (in inches) of the
device to be marked.
CAUTION: Do NOT change values in the
Automation
tab. These
values are set in
Template.mkh
.