PS288_PS388_PS588_981-0424-002D - 第185页
■ The Marking Systems and Shuttle ◘ Laser Marking Filters PS Series Owner’s Manual 4—45 back Figure 4-42: One of the spring clips securing the ex tractor t op. Also, the F umex care label. 4. Remove the filters— 4a. Lift…
Maintenance ■ The Marking Systems and Shuttle
4—44 Data I/O • 981-0424-002
back
Figure 4-40: The lower, side laser housing panel and screw locations.
1e. Put on the disposable protective gloves and the safety goggles.
Open the sealable plastic bag.
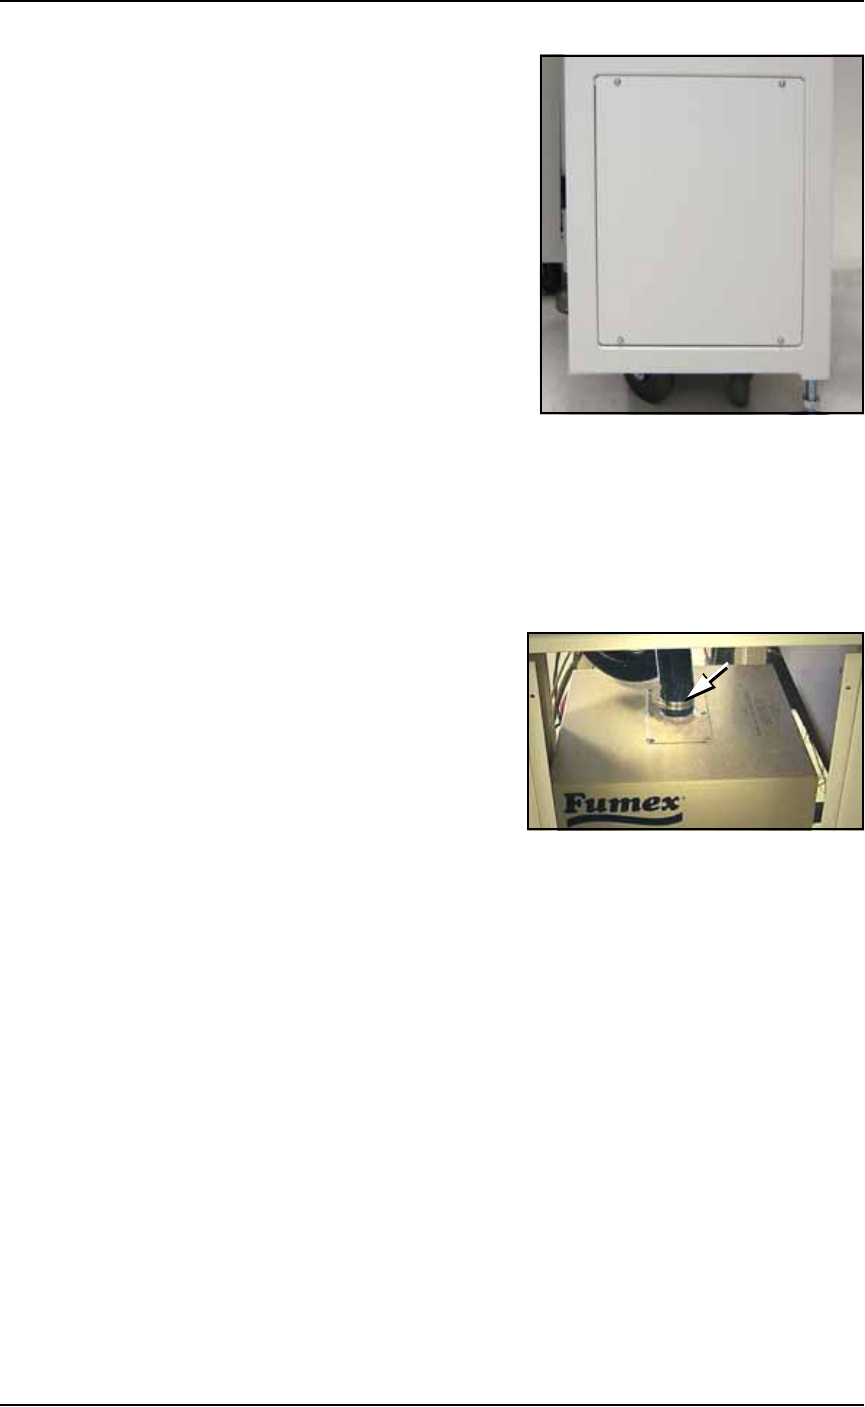
2. Detach vacuum hose—
2a. Loosen the clamp holding the vacuum hose to the extractor top
and detach the vacuum hose from the extractor top. See Figure
4-41.
Figure 4-41: The Vacuum hose clamp.
3. Release the four spring clips (one on each side except on early
models) securing the extractor top to the filter system. Pull the
extractor top up hard to release it.
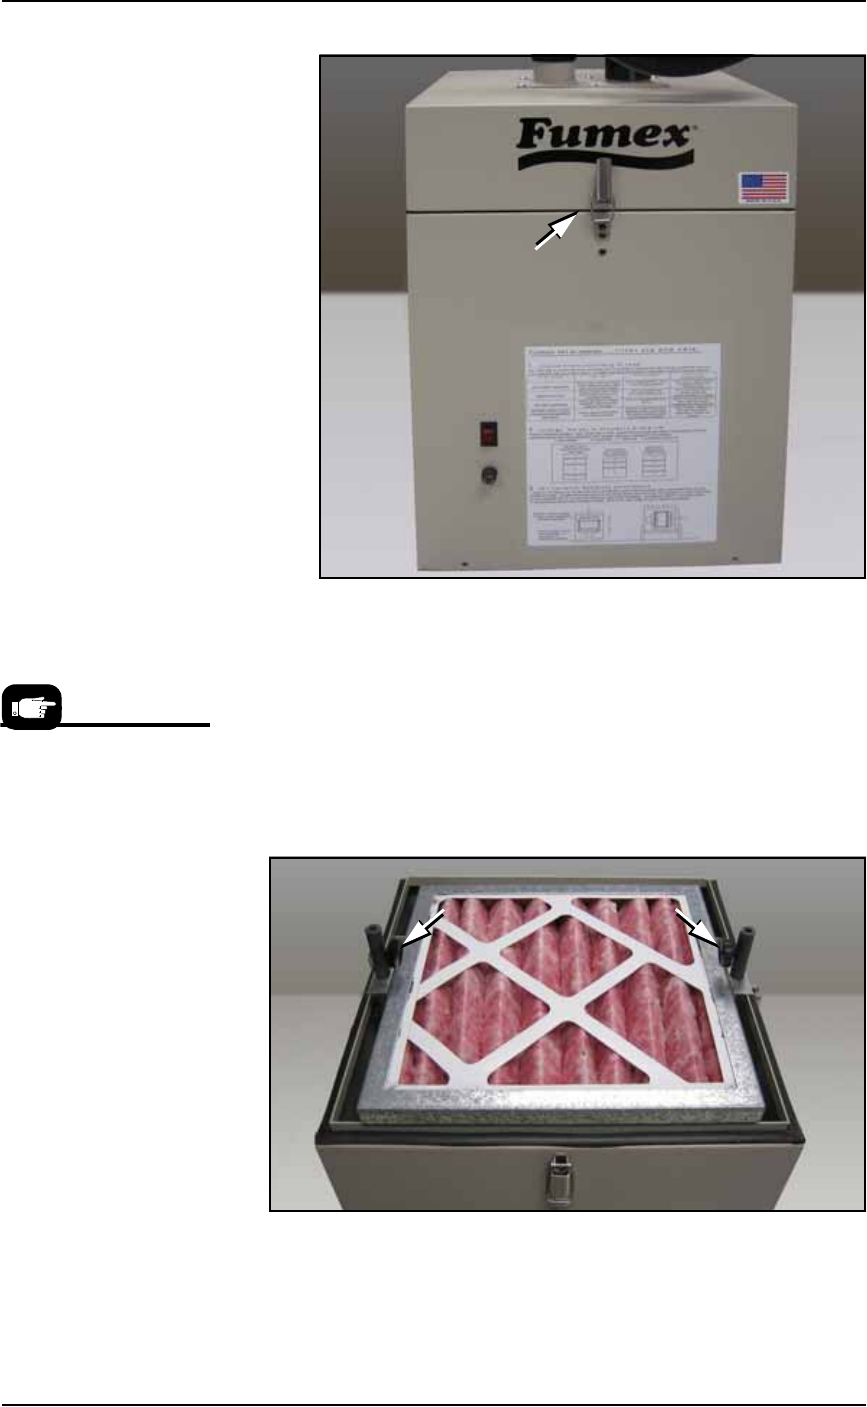
■ The Marking Systems and Shuttle ◘ Laser Marking Filters
PS Series Owner’s Manual 4—45
back
Figure 4-42: One of the spring clips securing the extractor top. Also, the
Fumex care label.
4. Remove the filters—
4a. Lift off the Pre-filter. Inspect and clean or replace with a new one
as necessary. If replacing it, place the used one in the sealable
bag.
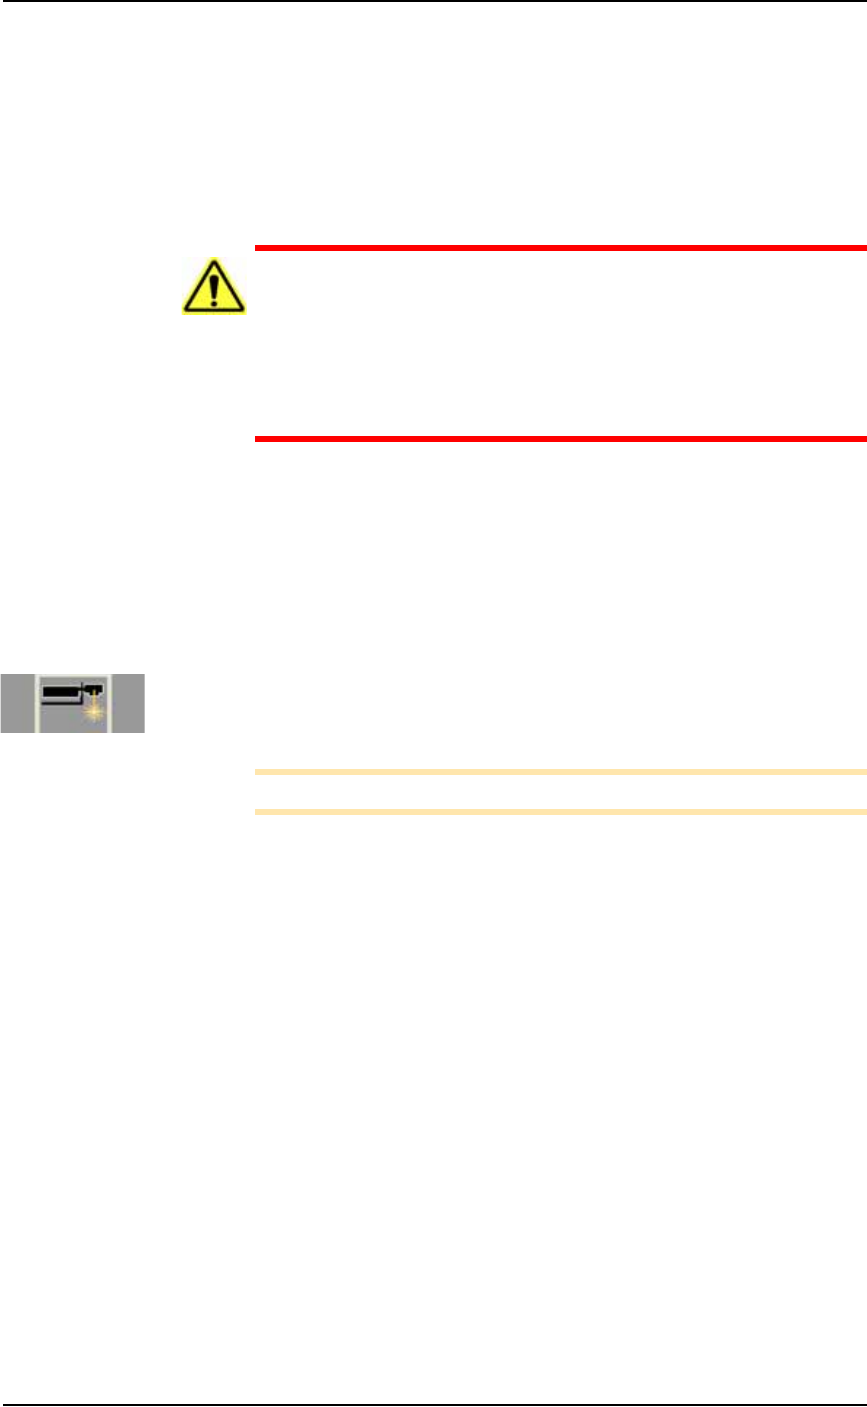
4b. Unscrew the two thumb knobs and lift the pleated filter out with
the frame. See Figure 4-43. Inspect and clean or replace with a
new one as necessary. If replacing it, place the used one in the
sealable bag.
Figure 4-43: Knurled knobs release the pleated filter. The Pre-filter has
already been removed.
Data I/O Model Names
for ordering are:
• Pre-Filter, Polyester.
• Filter, Panel, Pleated
• Filter, HEPA, Particle, BD
Frame
• Activated Carbon Cell,
3lb NET
Maintenance ■ The Marking Systems and Shuttle
4—46 Data I/O • 981-0424-002
back
4c. Lift out the HEPA filter. Inspect and replace as necessary. Inspect
and clean or replace with a new one as necessary. If replacing it,
place the used one in the sealable bag.
4d. Lift out the carbon. Replace with a new one as necessary. If
replacing it, place the used one in the sealable bag.
4e. Place your gloves in the bag and seal the bag and dispose of as
hazardous waste.
WARNING: Hazardous Materials. Government regulations apply
to the storage of hazardous waste. Ensure that contaminated fil-
ters are properly labeled and stored in your hazardous waste stor-
age area. Also, make sure that they are not stored on your site
longer than government regulations allow (the typical limit is 90
days). Check your government regulations for hazardous waste
storage requirements.
Reinstall all the filters in the same stack-order (with new or cleaned
filters). Reinstallation steps are in reverse order of the removal,
above, with this precaution:
The HEPA filter is directional. Make sure that it is installed with the
arrow (on its label) pointing down.
Removing the Laser Computer Air Filter
[Laser Marking only] On some models, the Laser Computer is
located in the Option Bay and the filter can be accessed from the back
of the Option Bay.
Note: Some PS models don’t have Laser Computers.
See Figure 4-44. In general, clean this filter every month and replace it
approximately every six months, depending on environment and
amount of use.