00195403-0102_AI_ AxisUnitA364_DE+EN.pdf - 第13页
Replacing Axis Unit with Adapter Cable (X and D series) Montageanleitung Axis Unit A364 SIPLACE X and D series 2-3 Installation X Connect all flat ribbon cable s coming from the machine with the correspondin g connectors…
Replacing Axis Unit with Adapter Cable (X and D series)
2-2 Montageanleitung Axis Unit A364 SIPLACE X and D series
Legend
1. Harting connector
2. Flat ribbon cable
3. Ballast resistor
In order to dismount the old axis unit proceed as
follows:
X Switch off the machine.
X Remove the safety cover above the axis unit to
have a free access to the axis unit.
X Pull the axis unit out from the machine.
X Lift up the axis unit of the guidance and place
it on the floor.
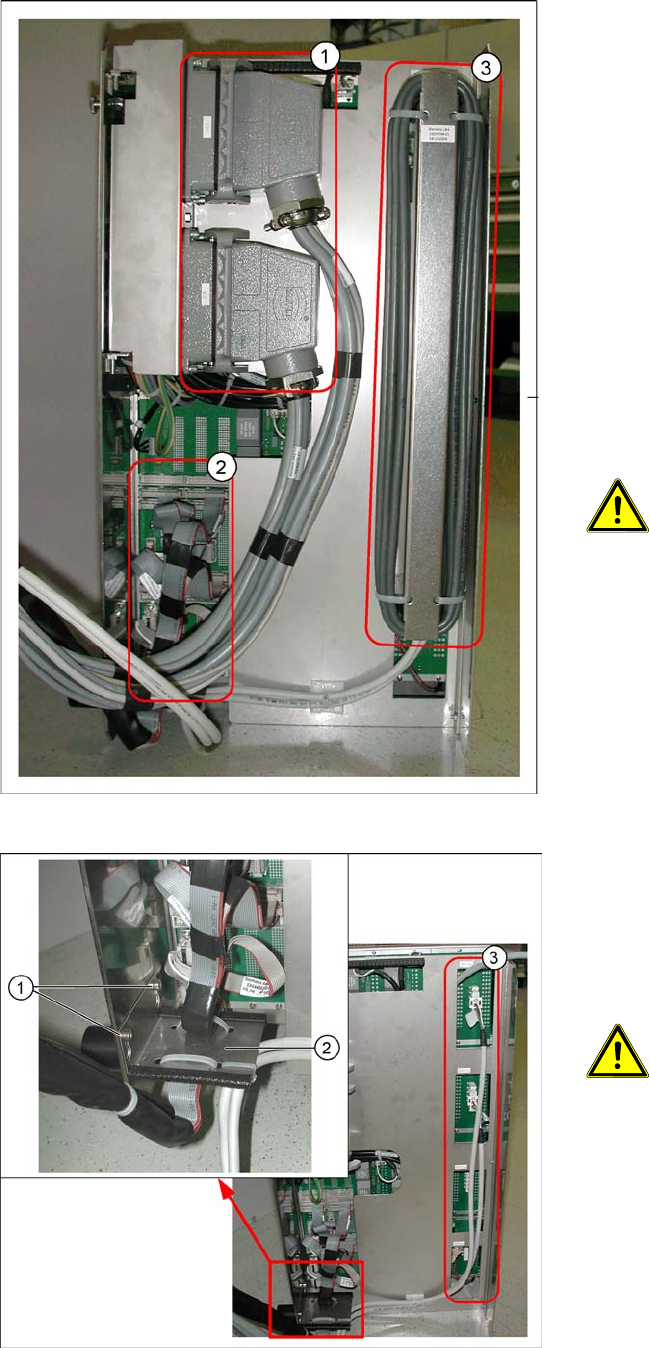
X Unplug the harting connector (1).
X Unplug all flat ribbon cables (2).
ATTENTION: Marking the connectors
Mark the flat ribbon cables to
make the reconnection easy later on.
X Lift up the ballast resistor (3) and disconnect
the plugs going to the axis units.
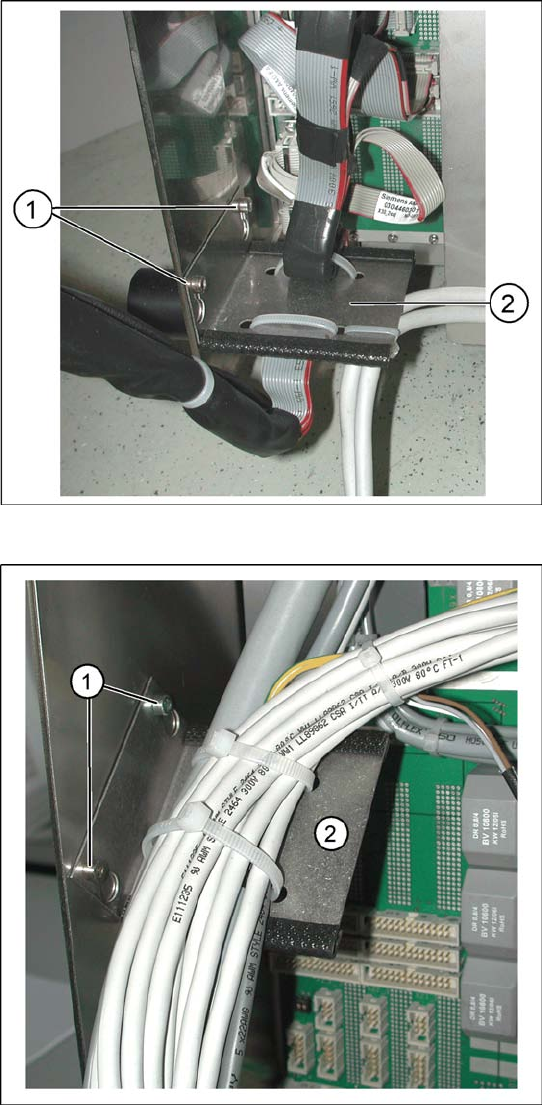
X Dismount the flat ribbon cable holder (2) by
loosening both screws (1).
X Remove the two or four connectors (3). Their
number varies depending on the machine ty-
pe. If the cables are fixed to the axis unit with
cable holders also loose these cable holders.
ATTENTION: Marking the connectors
Before you unplug mark
the connectors to make the
reconnection easy later on.
Replacing Axis Unit with Adapter Cable (X and D series)
Montageanleitung Axis Unit A364 SIPLACE X and D series
2-3
Installation
X Connect all flat ribbon cables coming from the
machine with the corresponding connectors at
the axis unit. Connect the cables in the same
way as they were connected in the older axis
unit.
X Mount the flat ribbon cable holder(2) with two
screws(1) to the new axis unit.
X Mount the holder of the cable harness (2) with
two provided screws(1) on the left inner side of
the axis unit.
Replacing Axis Unit with Adapter Cable (X and D series)
2-4 Montageanleitung Axis Unit A364 SIPLACE X and D series
2.1 Axis Unit (new version)
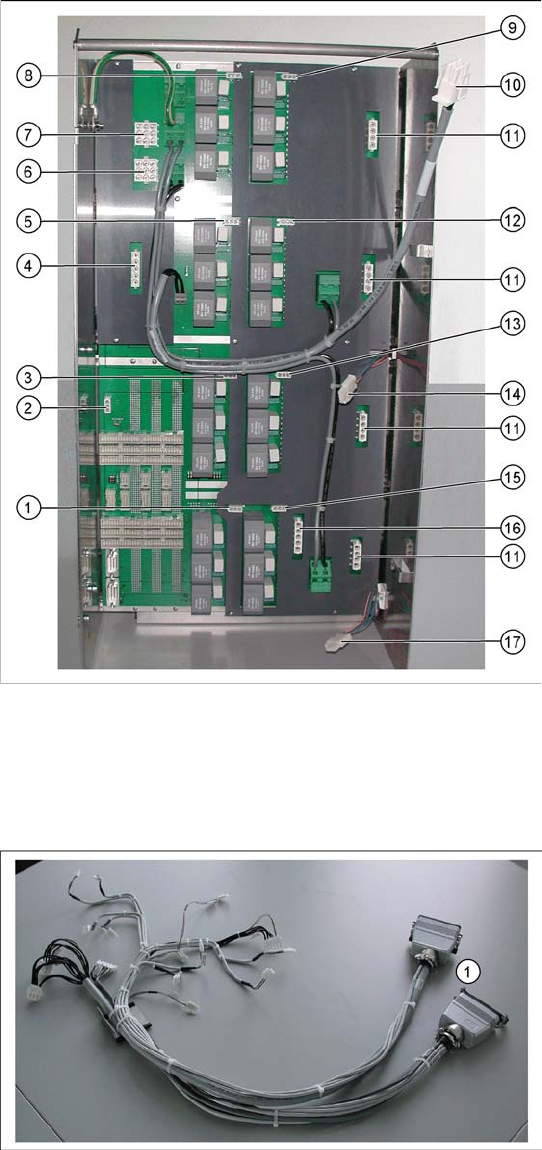
X Connect all connectors of the cable harness
with the axis unit as follows:
1. Connector for plug X11_3*q
2. Connector for plug X47*q
3. Connector for plug X08_3*q
4. Connector for plug X46*q
5. Connector for plug X09_3*q
6. Connector for plug X42_1*q
7. Connector for plug X41_1*q
8. Connector for plug X04_3*q
9. Connector for plug X03_3*q
10. Connector for ballast resistor
11. 4 connectors for X- and Y-drives
Depending on the machine type two or four
connectors are used.
12. Connector for plug X10_3*q
13. Connector for plug X07_3*q
14. Connector for plug X1we
15. Connector for plug X12_3*q
16. Connector for plug X45*q
17. Connector for plug X2we
X Fix the cables of the connectors of the X- and
Y-drives(11) with the cable holders to the back
side of the axis unit.
2.2 Cable harness with adapter
X Connect the harting connector (1) of the cable
harness adapter with the corresponding coun-
ter parts of the machine.