00195403-0102_AI_ AxisUnitA364_DE+EN.pdf - 第14页
Replacing Axis Unit with Adapter Ca ble (X and D series) 2-4 Montageanleitung Axis Unit A364 SIPLACE X and D series 2.1 Axis Unit (new version) X Connect all connectors of the cable ha rness with the axis unit as follows…
Replacing Axis Unit with Adapter Cable (X and D series)
Montageanleitung Axis Unit A364 SIPLACE X and D series
2-3
Installation
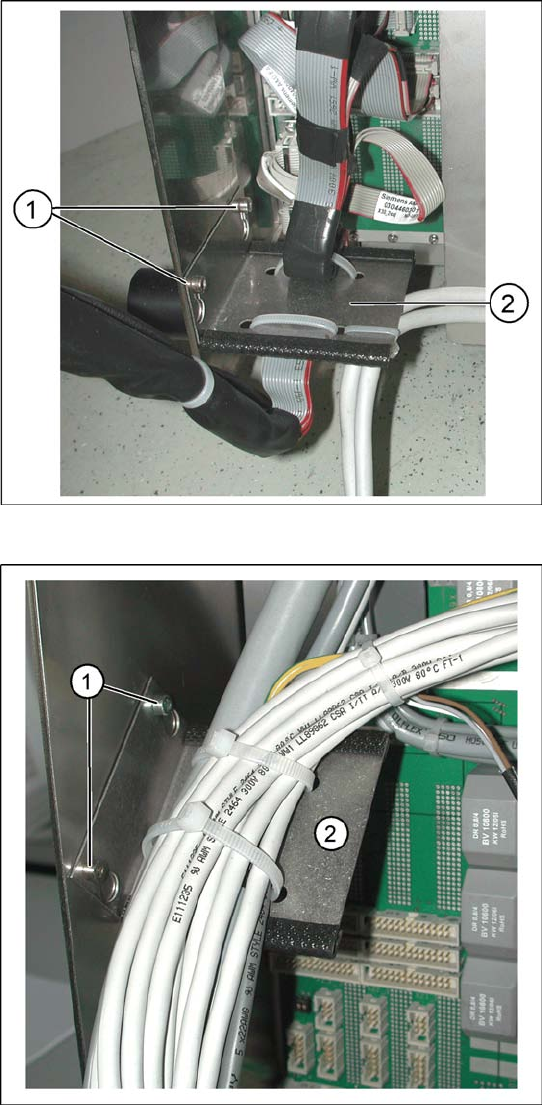
X Connect all flat ribbon cables coming from the
machine with the corresponding connectors at
the axis unit. Connect the cables in the same
way as they were connected in the older axis
unit.
X Mount the flat ribbon cable holder(2) with two
screws(1) to the new axis unit.
X Mount the holder of the cable harness (2) with
two provided screws(1) on the left inner side of
the axis unit.
Replacing Axis Unit with Adapter Cable (X and D series)
2-4 Montageanleitung Axis Unit A364 SIPLACE X and D series
2.1 Axis Unit (new version)
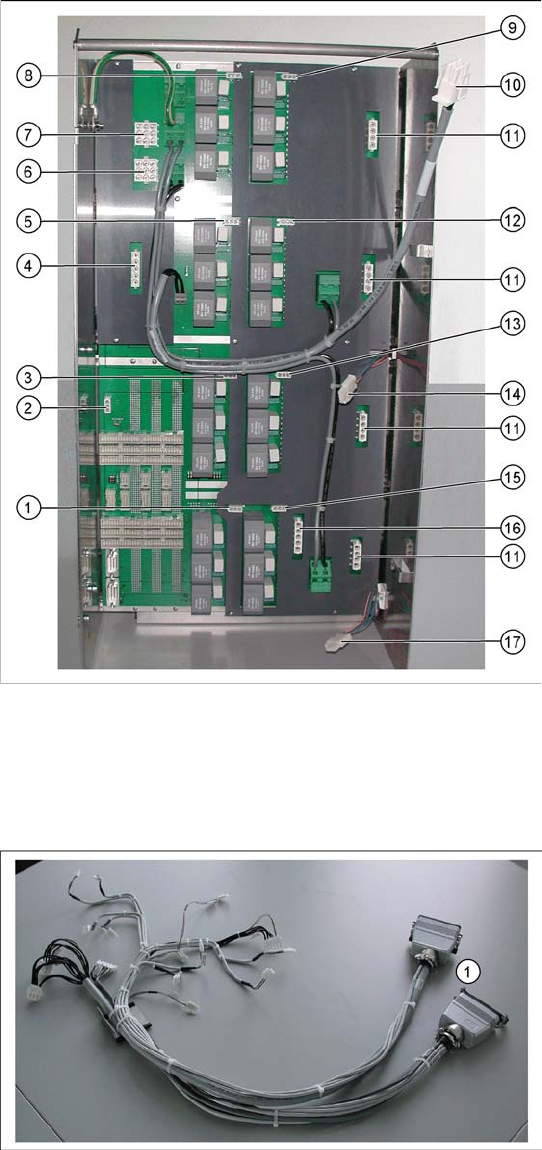
X Connect all connectors of the cable harness
with the axis unit as follows:
1. Connector for plug X11_3*q
2. Connector for plug X47*q
3. Connector for plug X08_3*q
4. Connector for plug X46*q
5. Connector for plug X09_3*q
6. Connector for plug X42_1*q
7. Connector for plug X41_1*q
8. Connector for plug X04_3*q
9. Connector for plug X03_3*q
10. Connector for ballast resistor
11. 4 connectors for X- and Y-drives
Depending on the machine type two or four
connectors are used.
12. Connector for plug X10_3*q
13. Connector for plug X07_3*q
14. Connector for plug X1we
15. Connector for plug X12_3*q
16. Connector for plug X45*q
17. Connector for plug X2we
X Fix the cables of the connectors of the X- and
Y-drives(11) with the cable holders to the back
side of the axis unit.
2.2 Cable harness with adapter
X Connect the harting connector (1) of the cable
harness adapter with the corresponding coun-
ter parts of the machine.
Replacing Axis Unit with Adapter Cable (X and D series)
Montageanleitung Axis Unit A364 SIPLACE X and D series
2-5
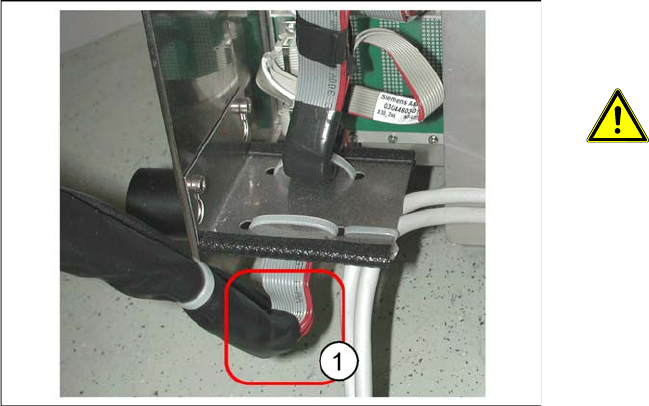
X Remount the axis unit into the guidance at the
machine. Carefully tuck away the cables into
the machine.
ATTENTION:
Pay special attention that you do not
damage the cables.
Take special care for the lower section
of the flat ribblon cable harness (1). It
must not rub anywhere.
X Insert the axis unit into the machine and mount
the safety cover.
X Switch on the machine and perform a functio-
nal test.