4OM-1322-006_w.pdf - 第107页
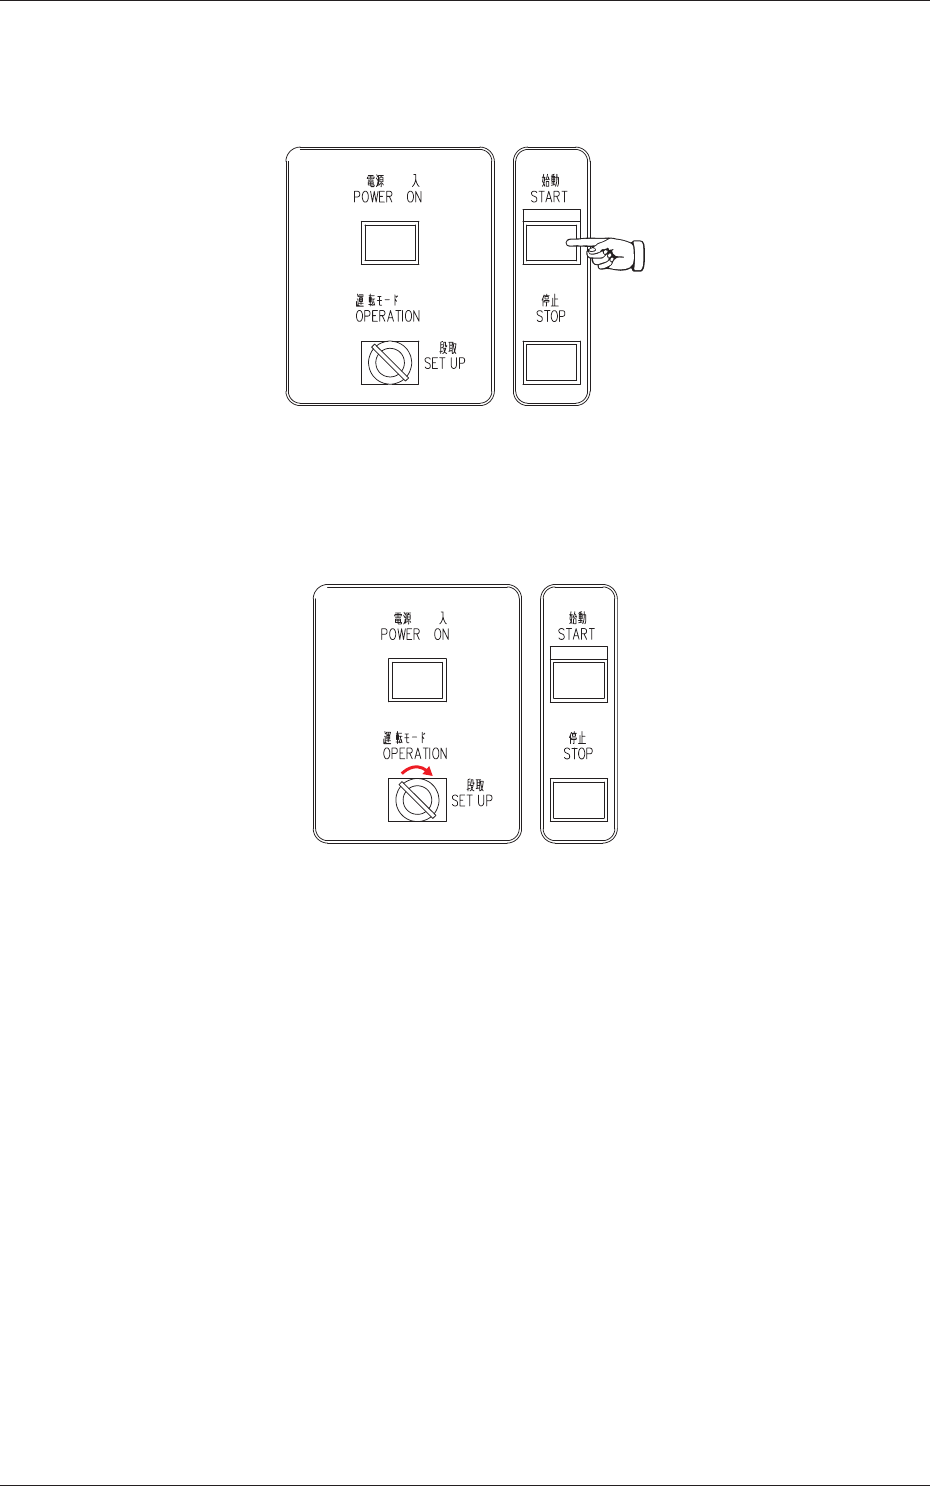
1-45 AKOEMT -ID (3) Press the [ST AR T] button on the front operation panel. The PEC recognition and screen holder sections move to the front side of the machine. Fig. 4A63 (4) Set the [OPERA TION/SET UP] switch on the f…
1-44 AKOEMT-ID
4.3 Replacement of Cleaning Paper
(How to change the cleaning paper width)
CAUTION
Set the [OPERATION/SET UP] switch to the “SET UP” side
before work.
Only the person in charge of maintenance should perform this
work.
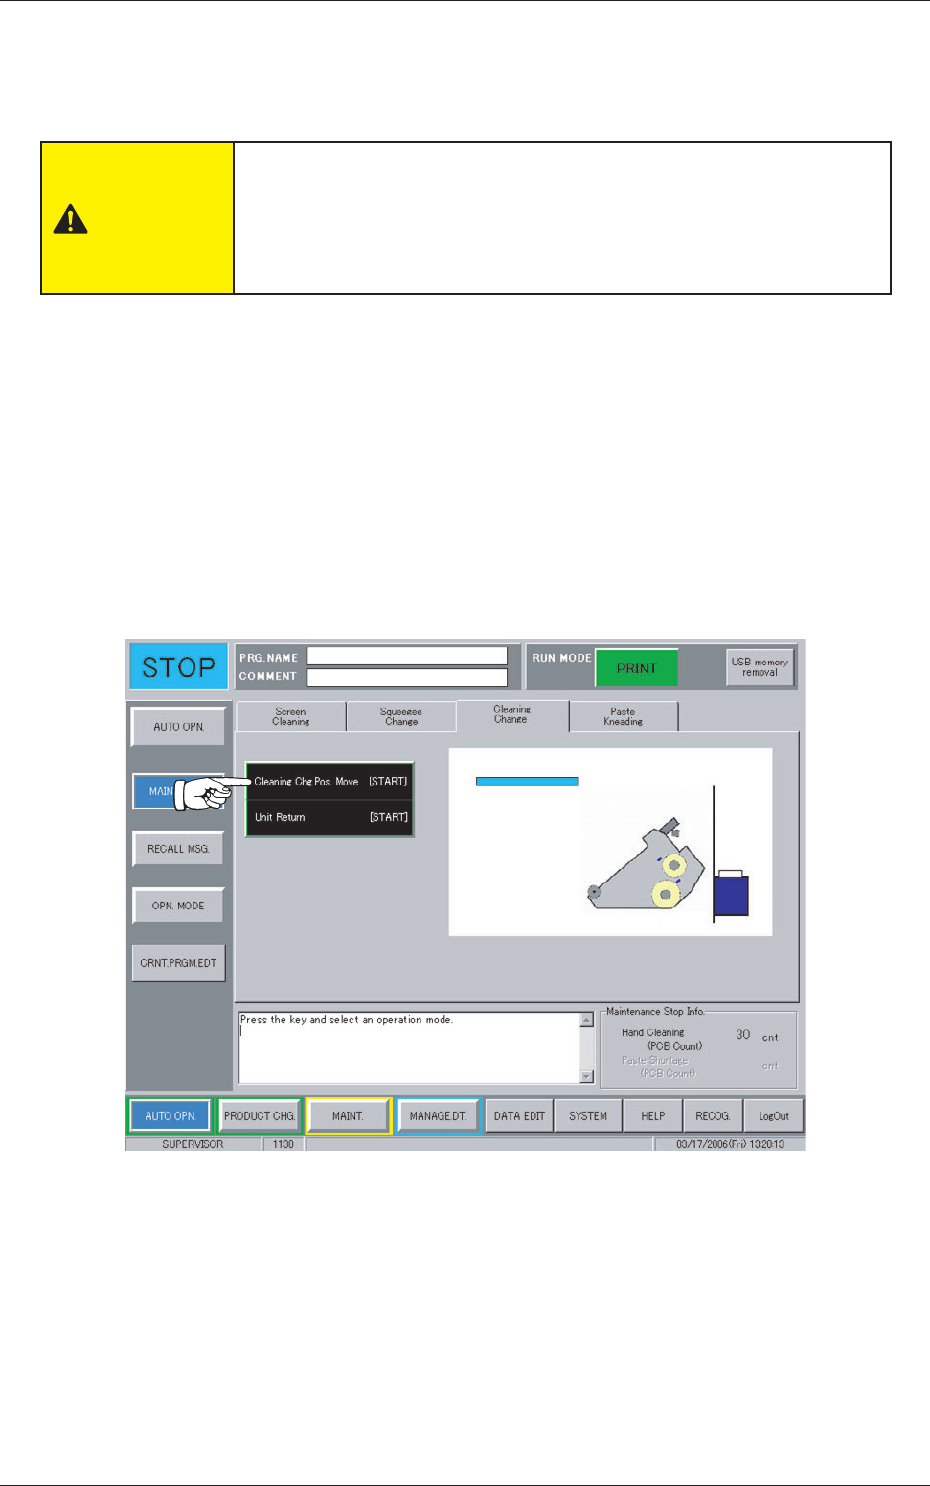
When the [MAINT. EXCH.] button on the "AUTO OPN." submenu bar is
pressed, the following window appears.
Operation Procedure
(1) Press the "Cleaning Change" tab.
(2) Press the [Cleaning Chg. Pos. Move [ST
ART]] button.
The background color of the button turns blue, indicating that it is
selected.
Fig. 4A62
0609-002
4.3 Replacement of Cleaning Paper (How to change the cleaning paper width)
1-45 AKOEMT-ID
(3) Press the [START] button on the front operation panel.
The PEC recognition and screen holder sections move to the front side
of the machine.
Fig. 4A63
(4) Set the [OPERATION/SET UP] switch on the front operation panel to
the "SET UP" side.
Fig. 4A64
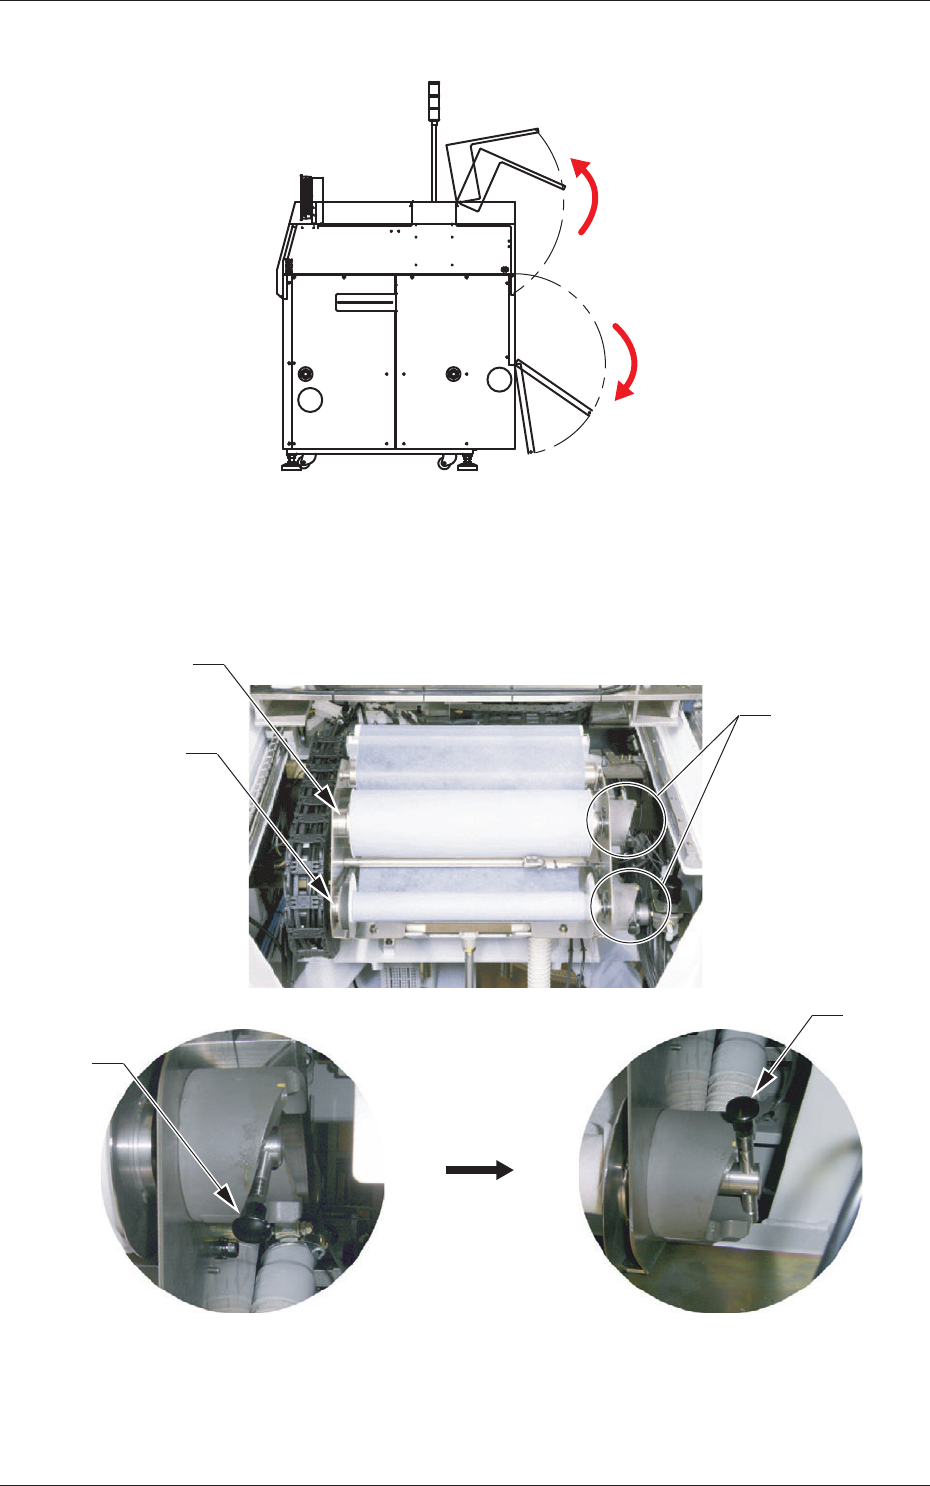
(5) Go back to the rear side of the machine.
0609-002
4.3 Replacement of Cleaning Paper (How to change the cleaning paper width)
1-46 AKOEMT-ID
(6) Open the two doors on the rear side.
Fig. 4A65
(7) Push up the levers of the take-up and supply rollers and pull out each
roller to the front side to detach from the cleaning unit.
Supply Roller
Take-Up Roller
Lever
Push up the lever.
Lever
Lever
Fig. 4A66
0609-002
4.3 Replacement of Cleaning Paper (How to change the cleaning paper width)