4OM-1322-006_w.pdf - 第85页
1-26 AKOEMT -ID R Conveyor Note Upper Surface of PCB T ransfer Belt Every Day Cleaning Remove solder paste and dust with a vacuum cleaner . Guide Bushing for Conveyor W idth Change T rapezoid Screw for Conveyor W idth Ch…
1-25 AKOEMT-ID
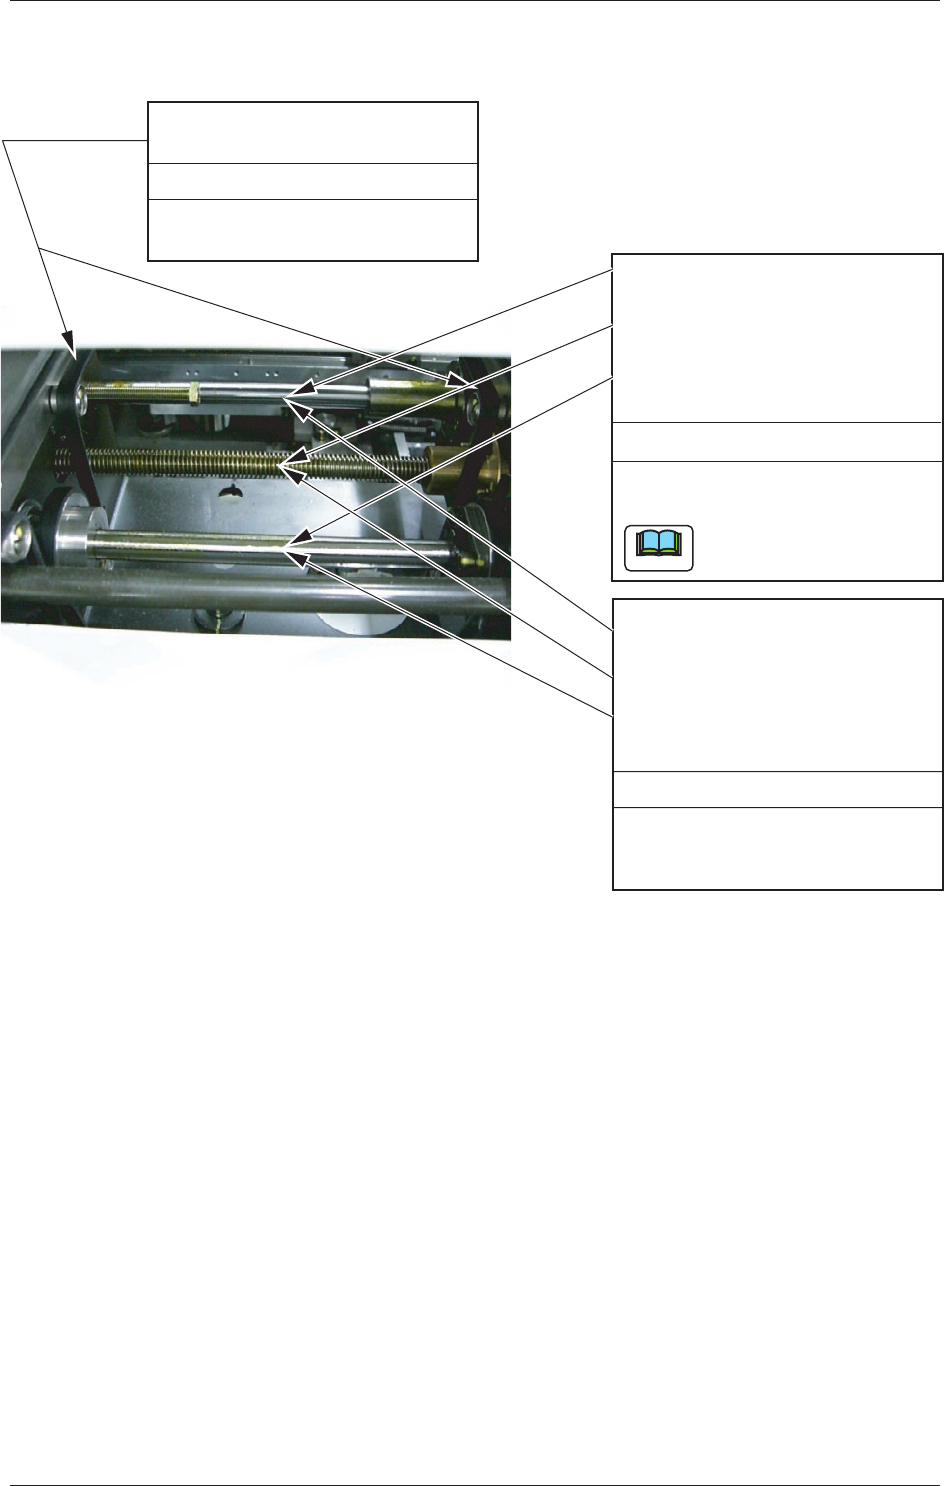
3.3.5 Conveyor Section
L Conveyor
Note
Upper Surface of PCB Transfer
Belt
Every Day Cleaning
Remove solder paste and dust
with a vacuum cleaner.
Guide Bushing for Conveyor
Width Change
Trapezoid Screw for Conveyor
Width Change
Spline Axis for Conveyor Width
Change
Every Month Cleaning
Clean the stopper with an oiled
rag.
Do not leave any waste
threads after cleaning.
Guide Bushing for Conveyor
Width Change
Trapezoid Screw for Conveyor
Width Change
Spline Axis for Conveyor Width
Change
Every 6 Months Lubrication
Apply grease with a brush or a
spatula.
Fig. 4A19
0609-002
3.3 Inspection, Cleaning, and Lubrication Spots
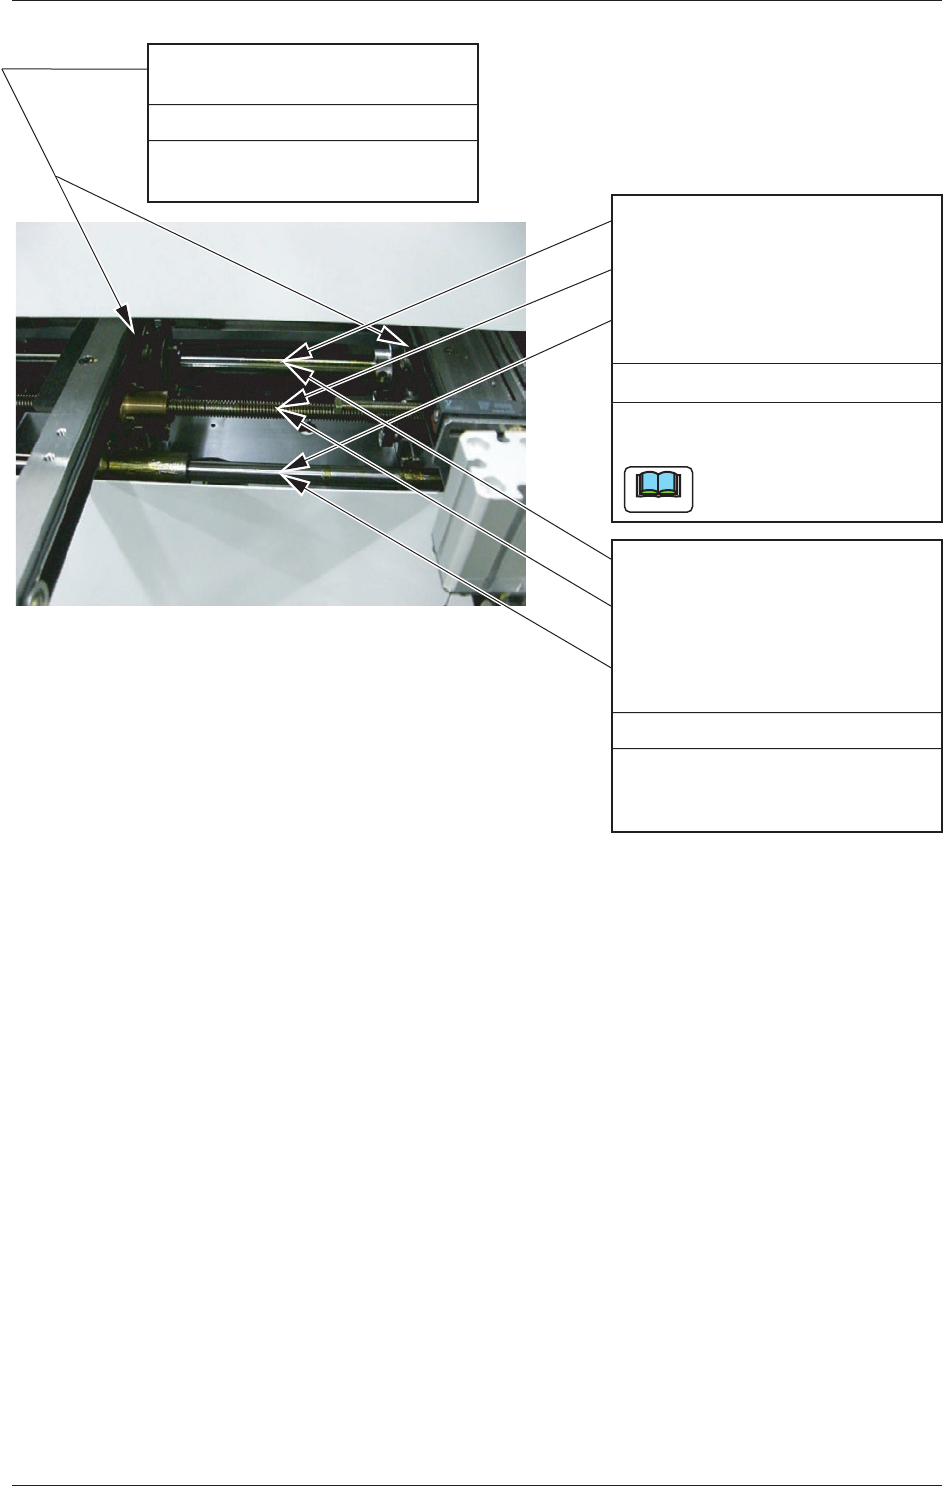
1-26 AKOEMT-ID
R Conveyor
Note
Upper Surface of PCB Transfer
Belt
Every Day Cleaning
Remove solder paste and dust
with a vacuum cleaner.
Guide Bushing for Conveyor
Width Change
Trapezoid Screw for Conveyor
Width Change
Spline Axis for Conveyor Width
Change
Every Month Cleaning
Clean the stopper with an oiled
rag.
Do not leave any waste
threads after cleaning.
Guide Bushing for Conveyor
Width Change
Trapezoid Screw for Conveyor
Width Change
Spline Axis for Conveyor Width
Change
Every 6 Months Lubrication
Apply grease with a brush or a
spatula.
Fig. 4A20
0609-002
3.3 Inspection, Cleaning, and Lubrication Spots
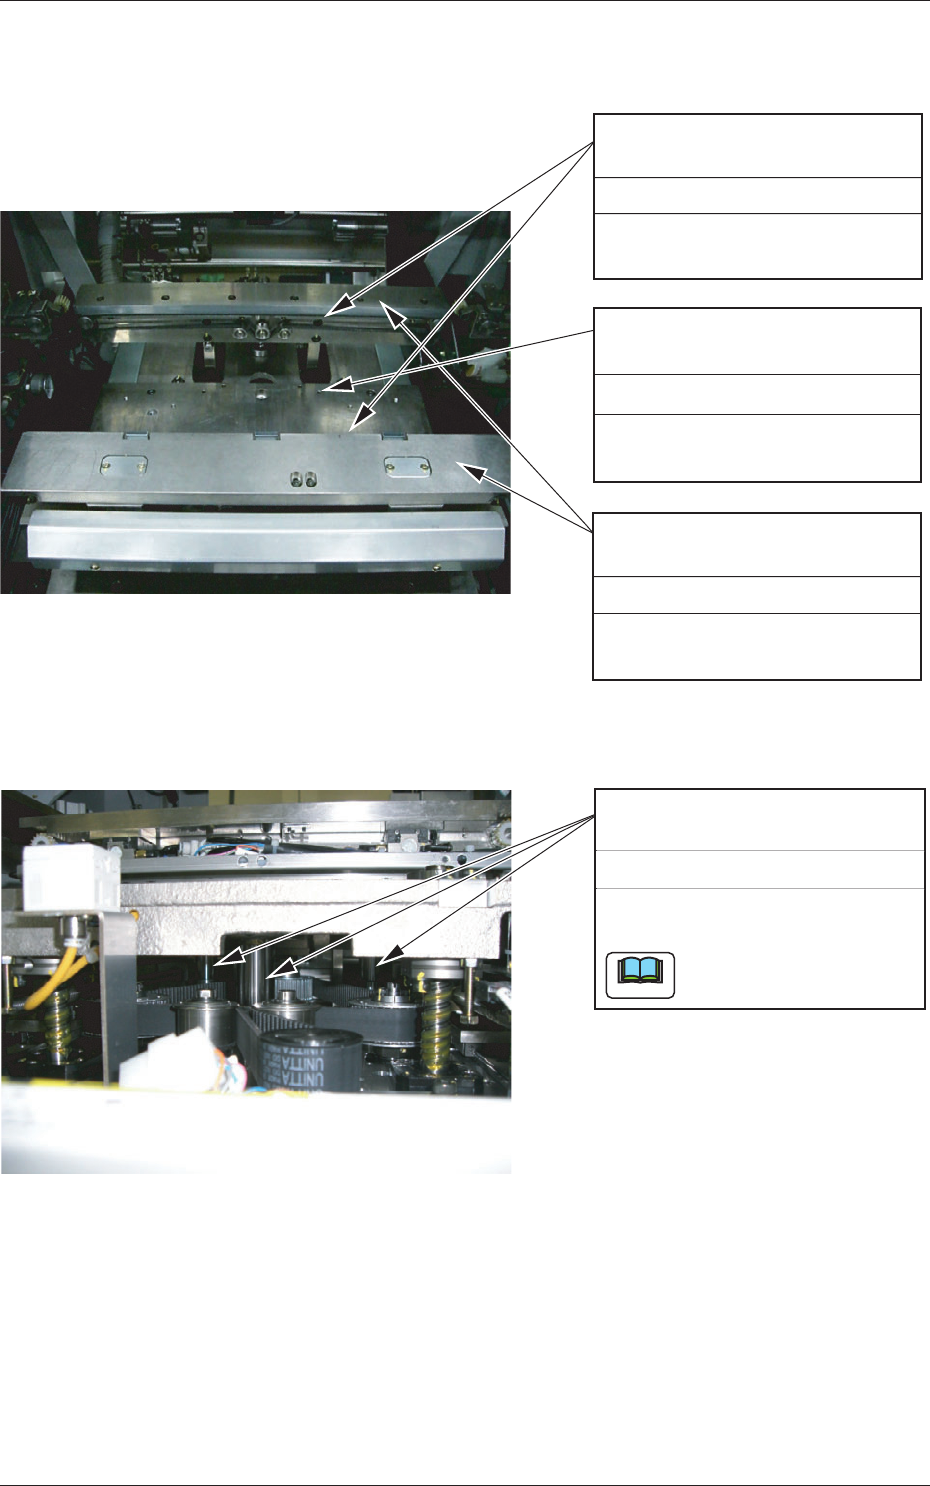
1-27 AKOEMT-ID
3.3.6 PCB Chuck Section
Upper Surface of PCB Transfer
Belt
Every Day Cleaning
Remove solder paste and dust
with a vacuum cleaner.
PCB Positioning Side and
Upper Surface
Every Day Cleaning
Remove solder paste and dust with
a vacuum cleaner.
Upper Surface and Pin Hole
Section of Backup Table
Every Week Cleaning
Remove solder paste and dust
with a vacuum cleaner
.
Fig. 4A21
Note
Backup Table Z-Axis Guide
Bushing
Every Month Cleaning
Clean the stopper with an oiled
rag.
Do not leave any waste
threads after cleaning.
Fig. 4A22
0609-002
3.3 Inspection, Cleaning, and Lubrication Spots