4OM-1322-006_w.pdf - 第89页
1-30 AKOEMT -ID 3.3.7 T able Section T abel X-Axis Linear Guide Every Month Cleaning Clean the stopper with an oiled rag. Do not leave any waste threads after cleaning. Note Fig. 4A27 T able X-Axis Ball Screw Every 6 Mon…
1-29 AKOEMT-ID
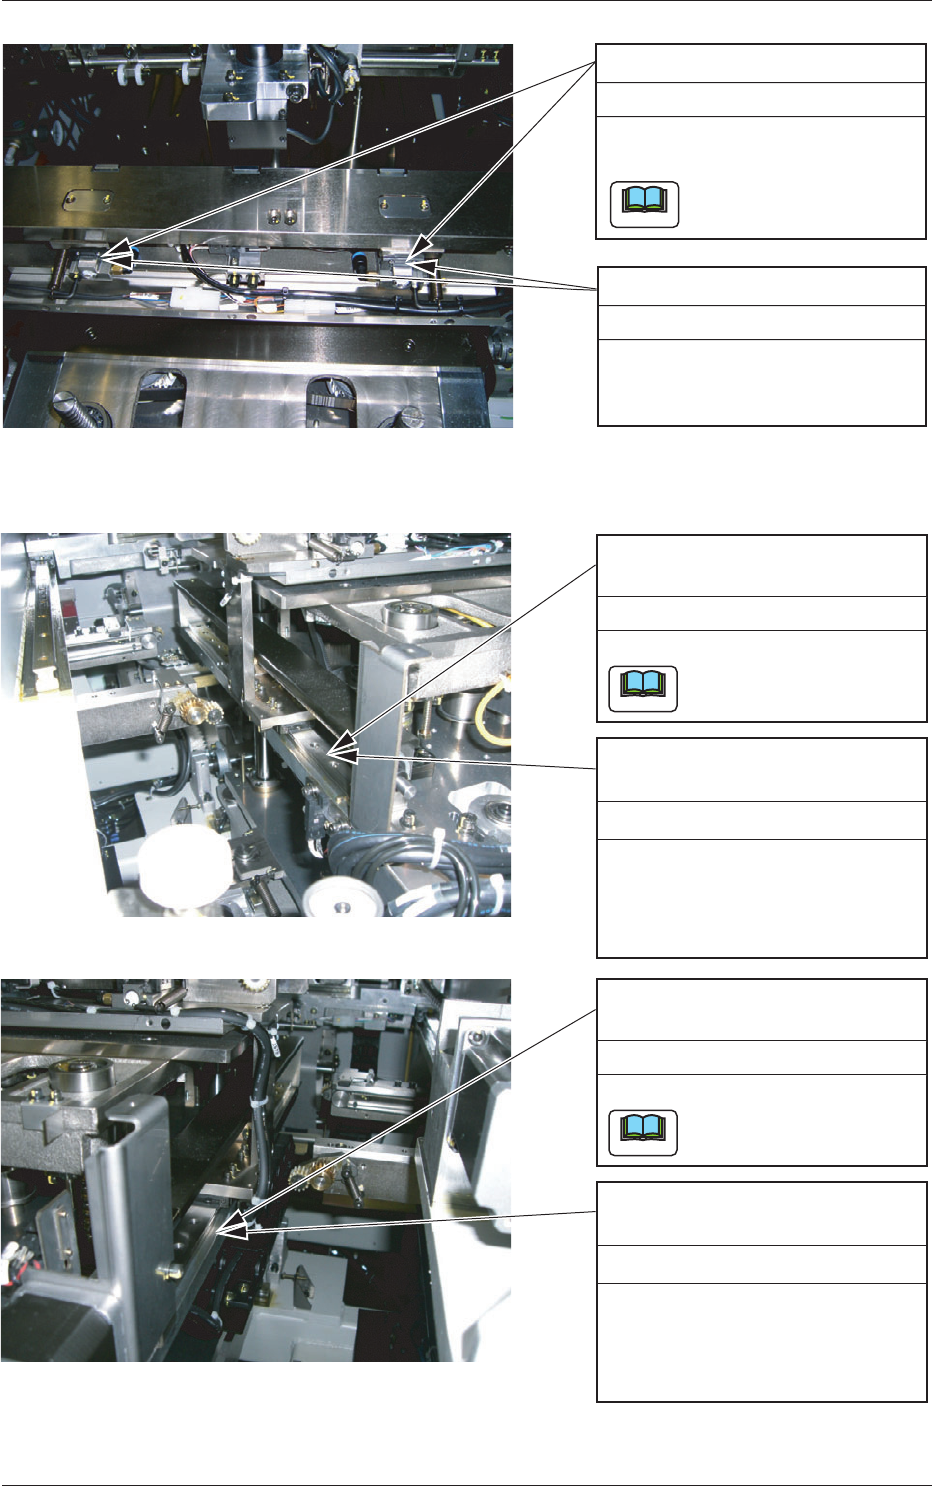
Linear Guide for PCB Clamping
Every Month Cleaning
Detach the cover and clean the
stopper with an oiled rag.
Do not leave any waste
threads after cleaning.
Note
Linear Guide for PCB Clamping
Every 6 Months Lubrication
Detach the cover and apply grease
with a brush or a spatula.
Fig. 4A25
Linear Guide for Chute Width
Adjustment (Left Side)
Every Month Cleaning
Clean the stopper with an oiled rag.
Do not leave any waste
threads after cleaning.
Note
Linear Guide for Chute Width
Adjustment (Left Side)
Every 6 Months Lubrication
(1)
Move up the backup table
Z axis.
(2) Apply grease with a brush
or a spatula.
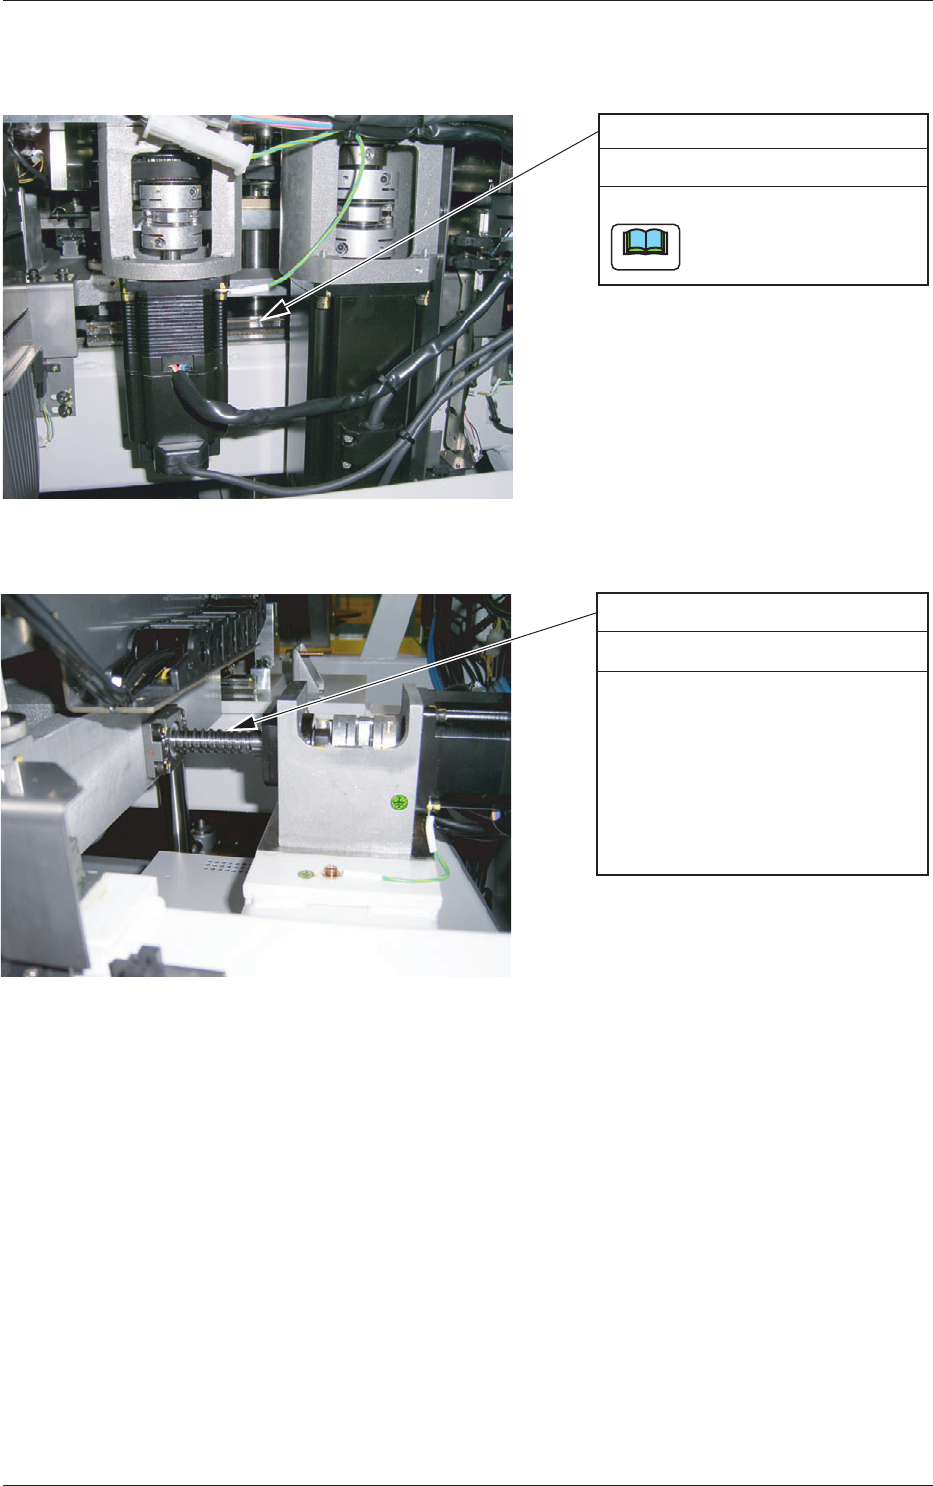
Linear Guide for Chute Width
Adjustment (Right Side)
Every Month Cleaning
Clean the stopper with an oiled rag.
Do not leave any waste
threads after cleaning.
Note
Linear Guide for Chute Width
Adjustment (Right Side)
Every 6 Months Lubrication
(1) Move up the backup table
Z axis.
(2) Apply grease with a brush
or a spatula.
Fig. 4A26
0609-002
3.3 Inspection, Cleaning, and Lubrication Spots
1-30 AKOEMT-ID
3.3.7 Table Section
Tabel X-Axis Linear Guide
Every Month Cleaning
Clean the stopper with an oiled rag.
Do not leave any waste
threads after cleaning.
Note
Fig. 4A27
Table X-Axis Ball Screw
Every 6 Months Lubrication
(1) Move the table Z axis up to
the printing position.
(2) Detach the cover located in
front of the table.
(3) Apply grease to the X-axis
ball screw with a brush or a
spatula.
Fig. 4A28
0609-002
3.3 Inspection, Cleaning, and Lubrication Spots
1-31 AKOEMT-ID
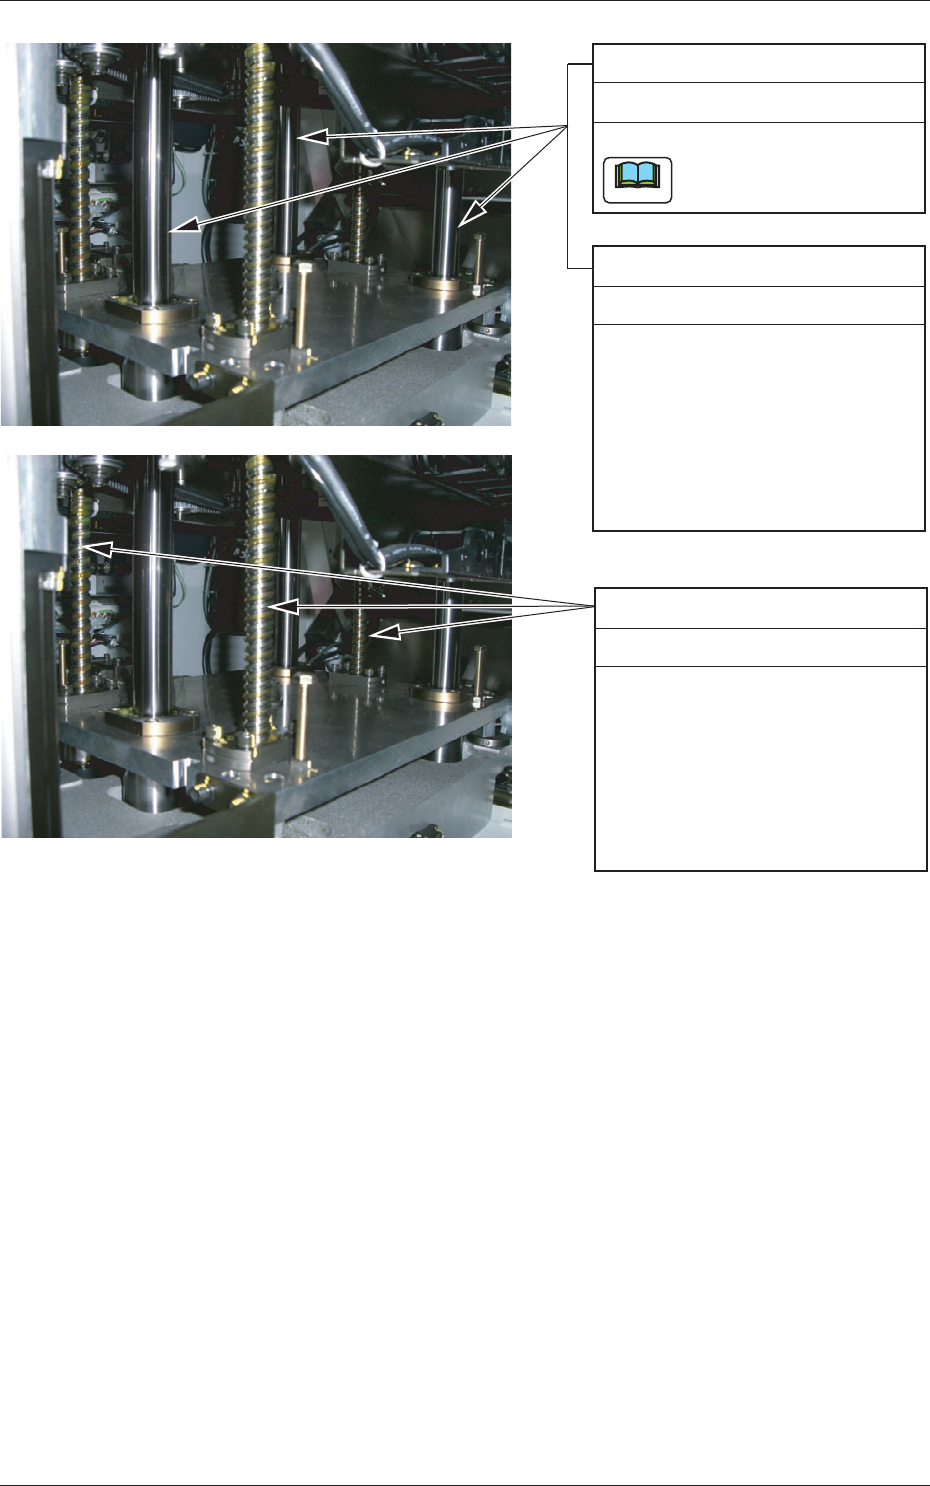
Table Z-Axis Guide Bushing
Every Month Cleaning
Clean the stopper with an oiled rag.
Do not leave any waste
threads after cleaning.
Note
Table Z-Axis Guide Bushing
Every 6 Months Lubrication
(1) Move the table Z axis up to
the printing position.
(2) Detach the cover located in
front of the table.
(3) Apply grease to the X-axis
ball screw with a brush or a
spatula.
Table Z-Axis Ball Screw
Every 6 Months Lubrication
(1) Move the table Z axis up to
the printing position.
(2) Detach the cover located in
front of the table.
(3) Apply grease to the X-axis
ball screw with a brush or a
spatula.
Fig. 4A29
0609-002
3.3 Inspection, Cleaning, and Lubrication Spots