YSM20&40_how_to_change_directionPDFA.pdf - 第6页
Service Engineer Service Information SI1407002E - 000 =YSM40_How to change the board flow direction (Tentative measure) 6/ 24 1.3 Remove the A NC unit If the mac hine is equipped with an ANC un it (Option), rem ove it to…
Service Engineer
Service Information
SI1407002E-000=YSM40_How to change the board flow direction (Tentative measure)
5/24
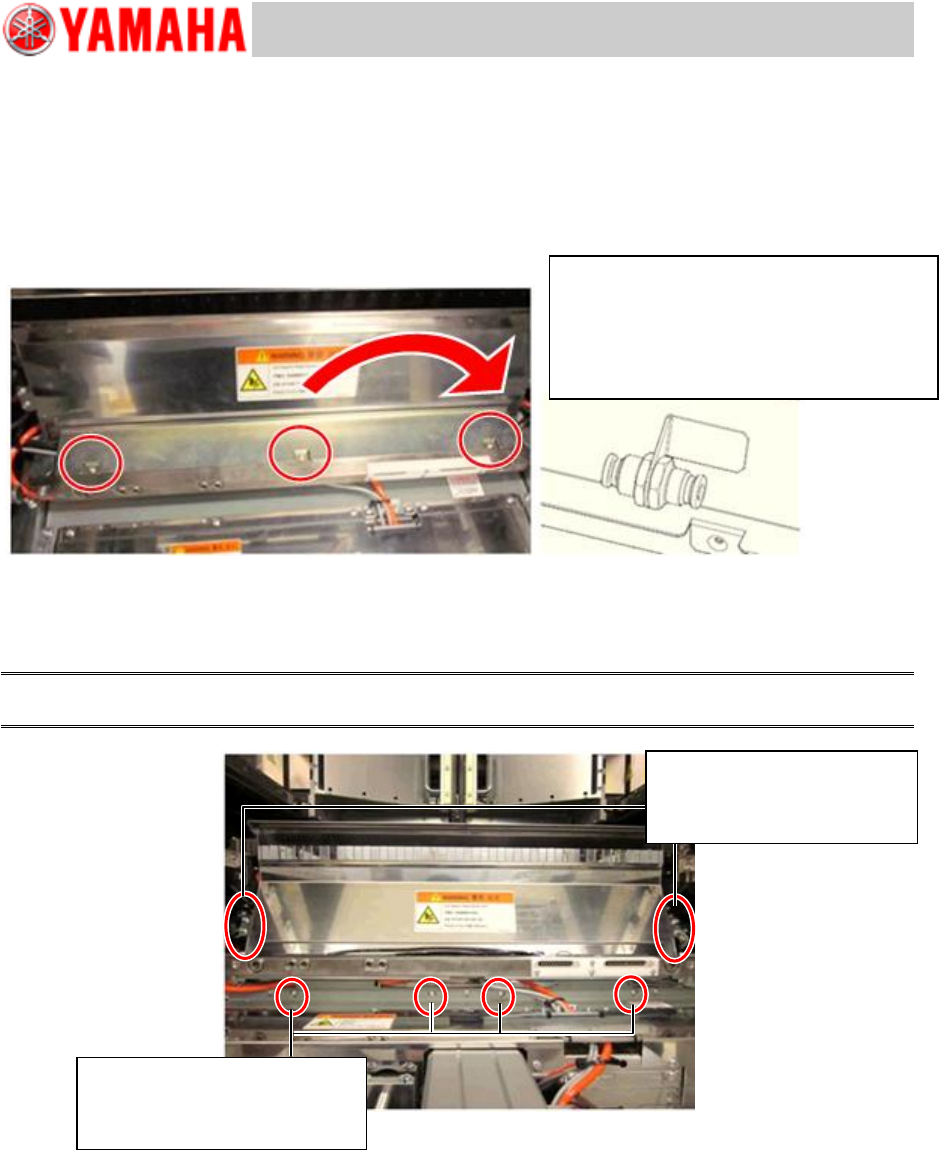
1.2 Remove the slope
1. Remove the air joint.
Remove the cover for the cables and remove the air hose from the joint.
The connection of the joint is fixed to the slope. This is for safety and to prevent the false operation
of the tape cutter after removing the slope.
Figure 2
2. Remove the slope.
Remove the screws and pull the slope upward to detach it.
Caution:
When removing the slope, be careful not to damage the sensor fibers and other wires.
Figure 3
Remove the M4 screws
(M4x20) on the under surface
of the slope. (Qty: 4)
Remove the M4 screws
(M4x6) on the both side of
the slope (Qty: 4)
Remove the air hose attached to the slope
(Orange).
As the joint is fixed to the slope, there is
not enough space to remove the hose.
Use long-nose pliers for the removal.
Service Engineer
Service Information
SI1407002E-000=YSM40_How to change the board flow direction (Tentative measure)
6/24
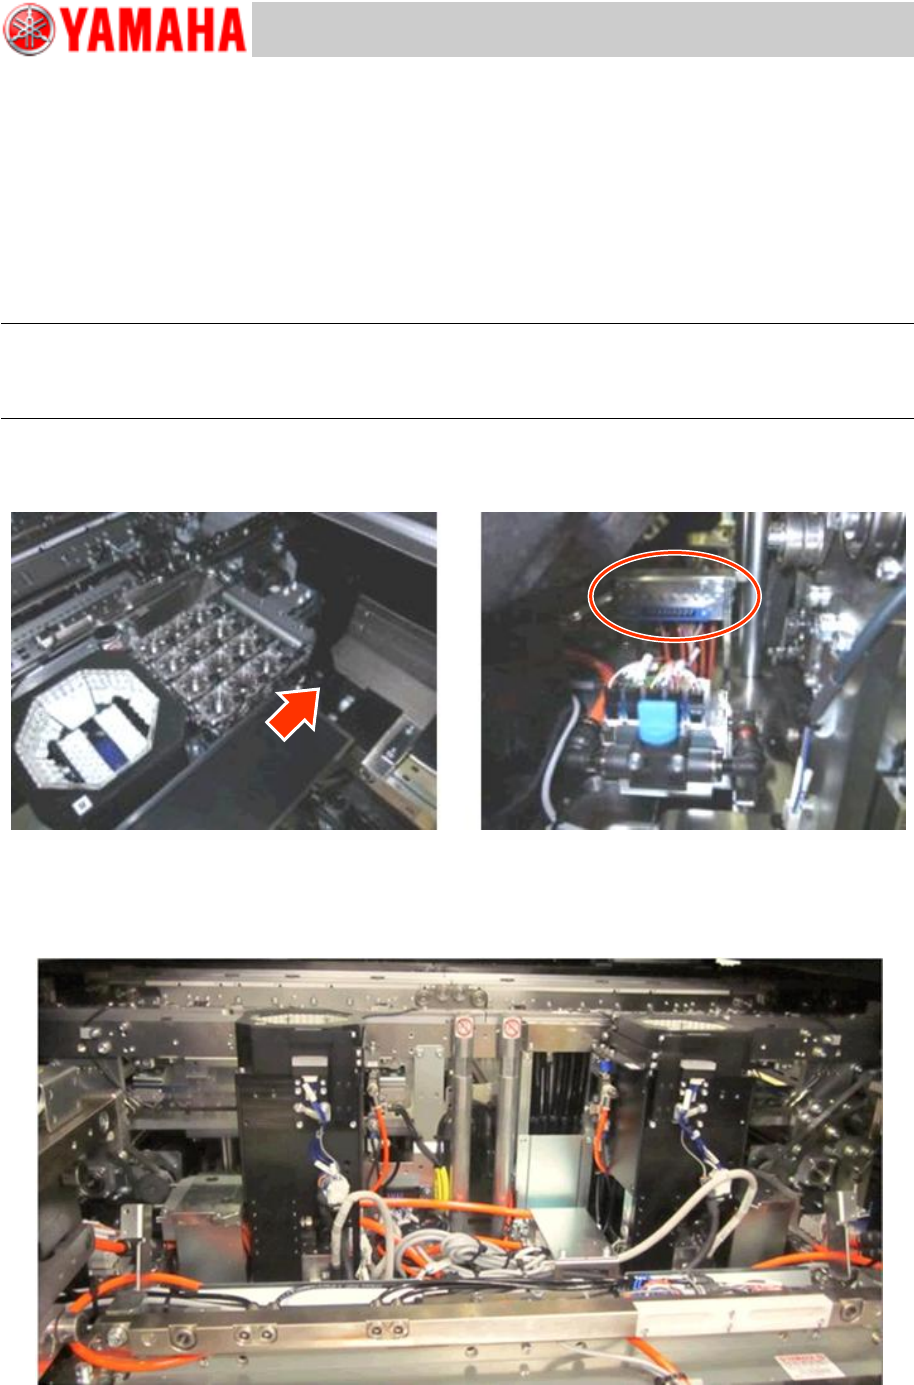
1.3 Remove the ANC unit
If the machine is equipped with an ANC unit (Option), remove it to create a work space.
1. Remove the chip damp box.
2. Remove the ANC unit
Remove the M6 screws (Qty:2) that secure the ANC unit.
Slide the ANC unit outward and sideways to detach it from the ANC unit base.
Note:
As the terminal connector that the signal wire and the air hoses are connected is attached to the ANC
unit, if you lift it up without detaching it from the ANC unit base, you may break the connector part.
Make sure to slide the terminal connecter to detach it from the ANC unit base and remove it.
* Although you can access to the screws that secure the ANC from above the ANC unit, there is
not enough space. Use a T-shaped wrench to remove the screws.
Figure 4
[The machine without the Slope and the ANC unit]
Remove the slope and the ANC unit from the machine to change the conveyor direction smoothly.
Figure 5
Service Engineer
Service Information
SI1407002E-000=YSM40_How to change the board flow direction (Tentative measure)
7/24
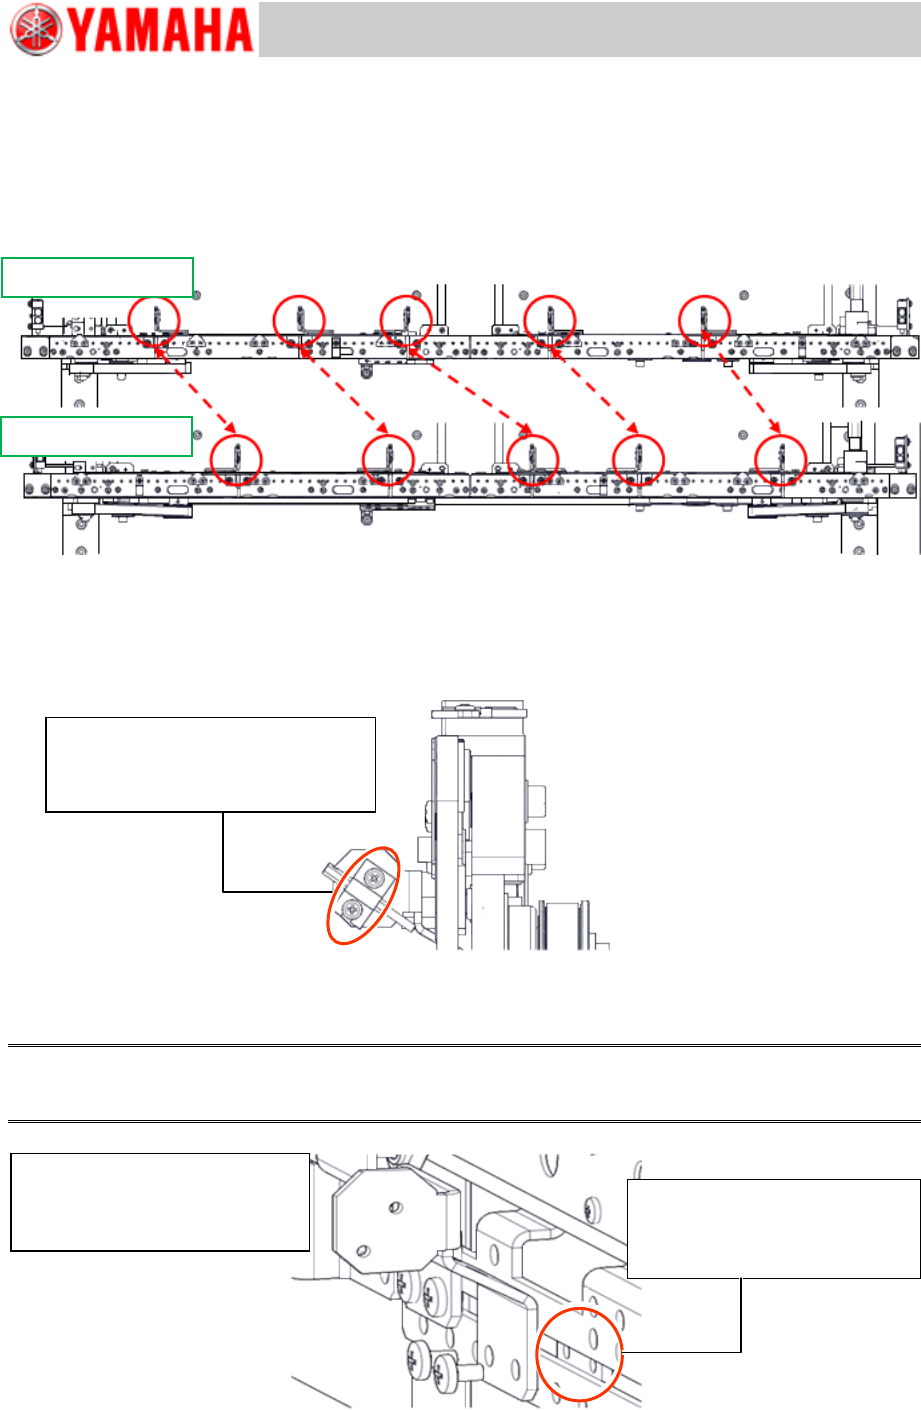
2. Change the board flow direction
2.1 Change the positions of the Transit position sensors
The positions of the Transit position sensors vary depending on the board flow direction.
Change the positions of the Transit position sensors and the brackets.
Figure 6
1. Remove the fiber sensor (Emitter).
As the positions of the sensor brackets need to be changed for changing the board flow direction,
remove the fiber sensor (Emitter).
Make sure to set the removed fiber sensor back to its original position.
Figure 7
2. Remove the sensor bracket.
Use the removed bracket for the opposite side lane.
Note:
When removing the bracket, be careful not to lose the plate nut that is behind the bracket to secure it
with the screws.
Figure 8
From Right to Left
From Left to Right
Sensor is secured with a bracket.
Remove the bracket with a
screwdriver.
Be careful NOT TO LOSE the
plate nut when removing the
bracket.
The sensor is secured with the
bracket.
Remove it with a screwdriver.