00197684-02_AI_Innenraumbeleuchtung_SX12_de_en.pdf - 第41页
Installation Preparatory Steps Interior Lighting Innenraumbeleuchtung 41 3 3 I n s t a lla t io n Installation 3.1 3 . 1 P r e p a r a t o r y S t e p s Preparatory Steps ► If the inter ior light is not pre-assembl ed on…
Brief description
Tools and Equipment Required
40 Interior Lighting Innenraumbeleuchtung
2.4
2.4 Tools and Equipment Required
Tools and Equipment Required
▪ Standard tool
▪ Cable clamps or cable ties
Consumables
▪ Loctite 243 screw locking varnish [00334892-xx]
2.5
2.5 Required Working Time
Required Working Time
The complete installation will take approx. 0.5 hours.
Installation
Preparatory Steps
Interior Lighting Innenraumbeleuchtung 41
3
3 Installation
Installation
3.1
3.1 Preparatory Steps
Preparatory Steps
► If the interior light is not pre-assembled on the mounting rail, fix the two brackets of the interior light
onto the mounting rail using two M4 x 5 screws (with a short head).
► Snap the interior light onto the brackets.
► Switch off the machine, disconnect it from the power supply and secure it to prevent unauthorized
reactivation. Observe the instructions in section "1.2 Preparatory Work..." [ ➙ 32].
► Move the component trolley out of the machine.
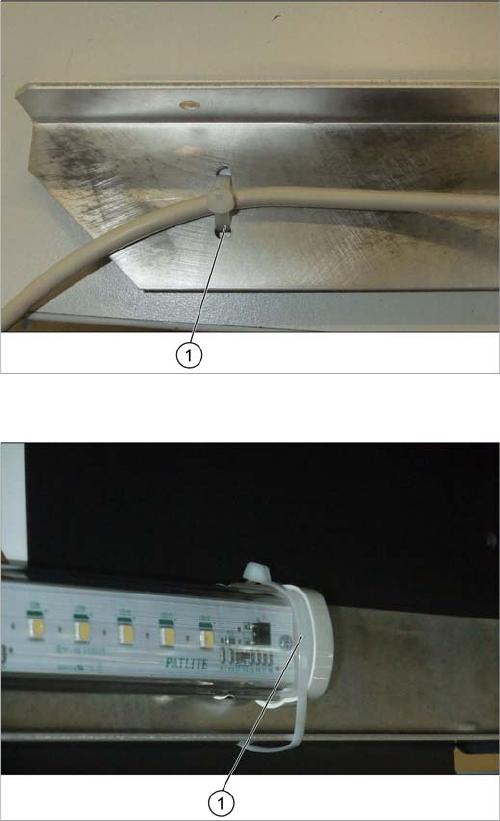
Fixing the cable
► Fix the cable of the interior light to the mounting rail
using a cable tie (1).
Additionally securing the interior light
► Additionally secure the interior light on the other side
using a cable tie (1).
Installation
Installing the Interior Lighting
42 Interior Lighting Innenraumbeleuchtung
3.2
3.2 Installing the Interior Lighting
Installing the Interior Lighting
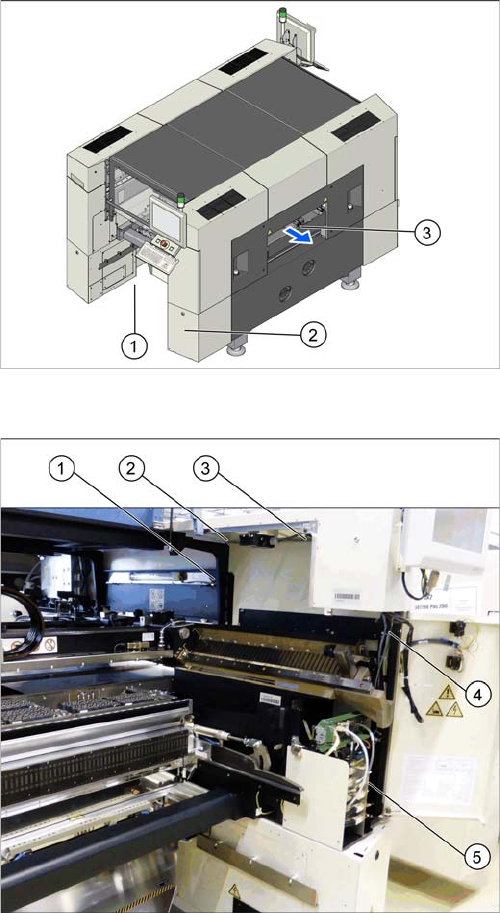
Overview
Installation location using the example of an SX2
1. Location 1
2. Distributor in sector 2
3. Installation location for the interior lighting
One interior lighting per machine is possible that you in-
stall on the output side.
Routing the cable
1. to the side
2. over the machine frame
3. along the ceiling of the machine interior
4. down along the machine frame
5. to the distributor