00197684-02_AI_Innenraumbeleuchtung_SX12_de_en.pdf - 第43页
Installation Installing the Interior Lighting Interior Lighting Innenraumbeleuchtung 43 Installation ► Open the cover. Fixture points Installation location for the in terior lighting on t he output side 1. Fixtur e point…
Installation
Installing the Interior Lighting
42 Interior Lighting Innenraumbeleuchtung
3.2
3.2 Installing the Interior Lighting
Installing the Interior Lighting
Overview
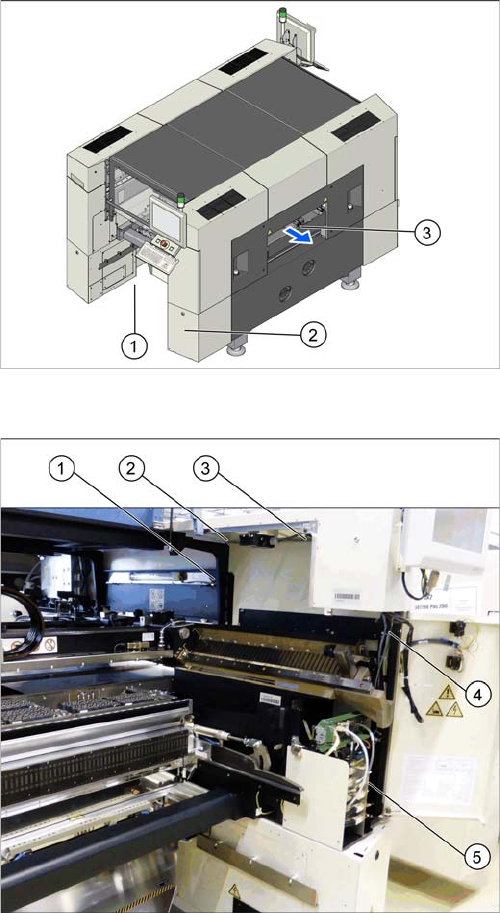
Installation location using the example of an SX2
1. Location 1
2. Distributor in sector 2
3. Installation location for the interior lighting
One interior lighting per machine is possible that you in-
stall on the output side.
Routing the cable
1. to the side
2. over the machine frame
3. along the ceiling of the machine interior
4. down along the machine frame
5. to the distributor
Installation
Installing the Interior Lighting
Interior Lighting Innenraumbeleuchtung 43
Installation
► Open the cover.
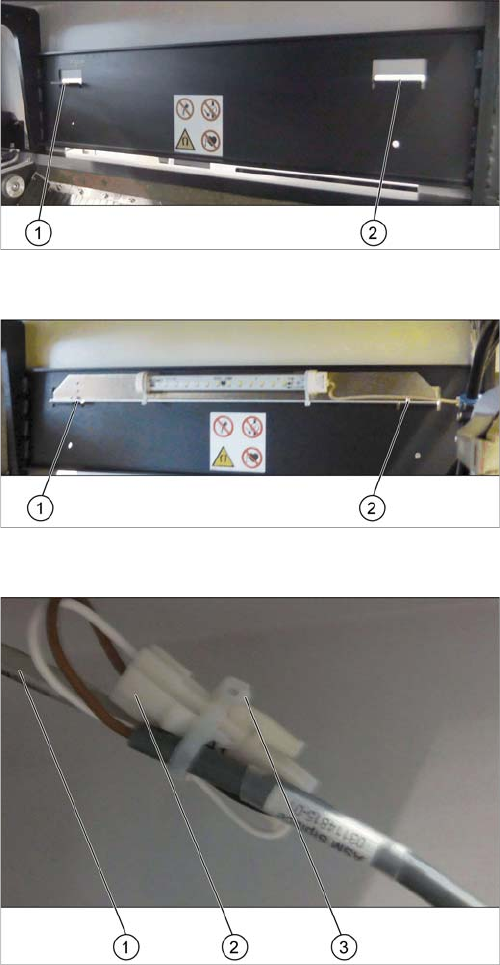
Fixture points
Installation location for the interior lighting on the output
side
1. Fixture point left
2. Fixture point right
Fixing the interior lighting
► Fix the interior lighting at the two fixture points (1)
and (2).
Use the two M4 x 8 screws and the washers from the
retrofit kit.
► Secure the screws with Loctite 243.
Connecting and securing the extension cable
► Connect the extension cable (2) to the cable of the in-
terior light (1).
► Secure the connectors and the cable using a cable
tie (3).
Installation
Installing the Interior Lighting
44 Interior Lighting Innenraumbeleuchtung
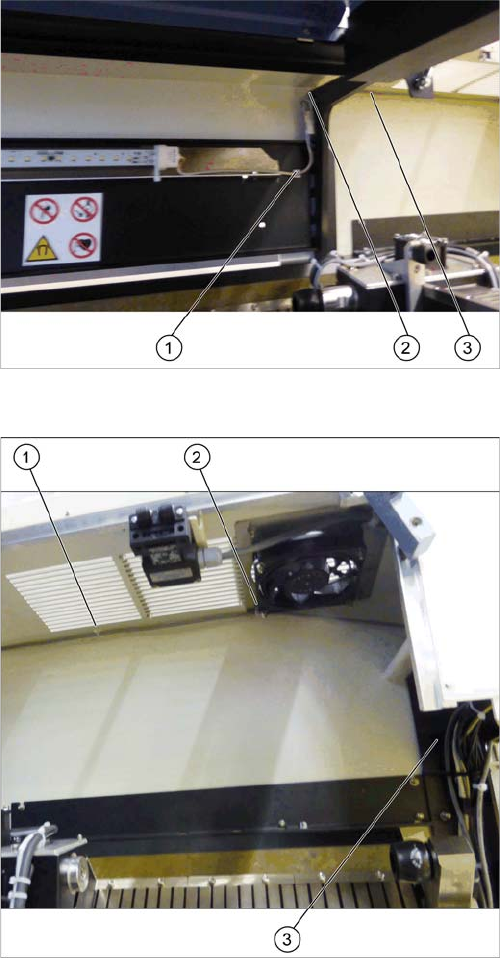
Cable routing
During installation, the cable must be routed to the distrib-
utor in section 2.
► Route the cable to the side and fix it with an adhesive
mounting base (1).
► Secure the connectors on the extension cable at the
machine frame.
► Route the extension cable between the machine
frame and the ceiling of the machine interior (2) and
(3).
Cable routing
► Route the extension cable along the ceiling of the ma-
chine interior towards location 1, sector 2.
► Fix the cable with an adhesive mounting base (1) and
to the provided bolt using a cable clamp (2).
Use an M4 self-securing screw nut.
► Route the cable down the machine base towards the
distributor (3).
► Secure the cable using a cable tie.
► Additionally, fix the cable to the provided bolt on the
fan using a cable clamp.