00197684-02_AI_Innenraumbeleuchtung_SX12_de_en.pdf - 第44页
Installation Installing the Interior Lighting 44 Interior Lighting Innenraumbeleuchtu ng Cable routing During installation, the cable must be routed to the distrib - utor in section 2. ► Route the cable to the side and f…
Installation
Installing the Interior Lighting
Interior Lighting Innenraumbeleuchtung 43
Installation
► Open the cover.
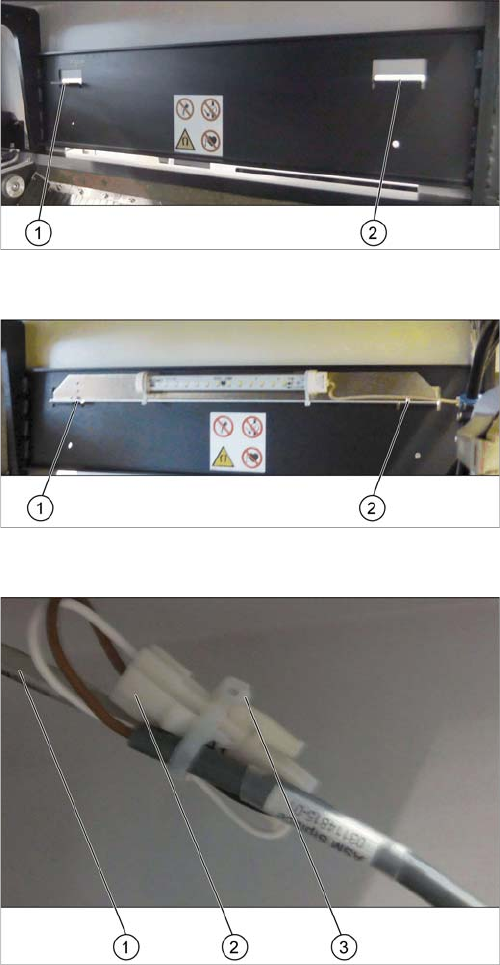
Fixture points
Installation location for the interior lighting on the output
side
1. Fixture point left
2. Fixture point right
Fixing the interior lighting
► Fix the interior lighting at the two fixture points (1)
and (2).
Use the two M4 x 8 screws and the washers from the
retrofit kit.
► Secure the screws with Loctite 243.
Connecting and securing the extension cable
► Connect the extension cable (2) to the cable of the in-
terior light (1).
► Secure the connectors and the cable using a cable
tie (3).
Installation
Installing the Interior Lighting
44 Interior Lighting Innenraumbeleuchtung
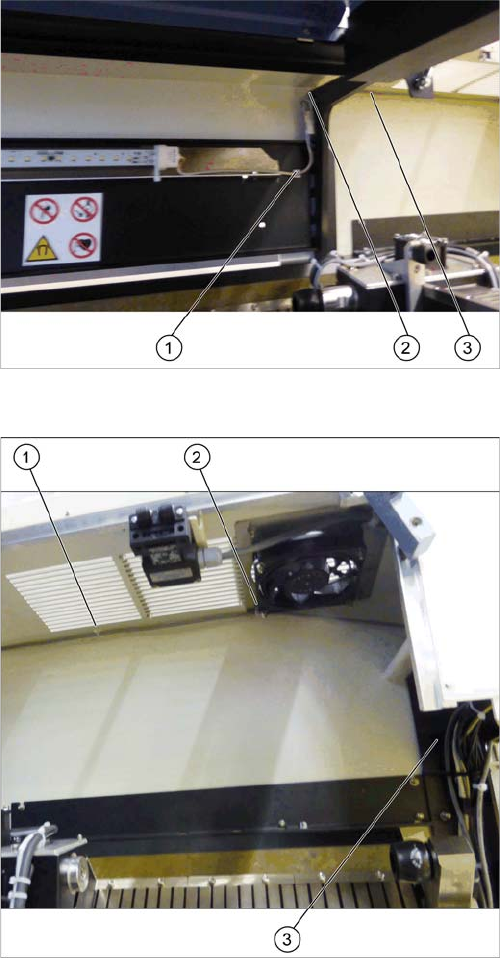
Cable routing
During installation, the cable must be routed to the distrib-
utor in section 2.
► Route the cable to the side and fix it with an adhesive
mounting base (1).
► Secure the connectors on the extension cable at the
machine frame.
► Route the extension cable between the machine
frame and the ceiling of the machine interior (2) and
(3).
Cable routing
► Route the extension cable along the ceiling of the ma-
chine interior towards location 1, sector 2.
► Fix the cable with an adhesive mounting base (1) and
to the provided bolt using a cable clamp (2).
Use an M4 self-securing screw nut.
► Route the cable down the machine base towards the
distributor (3).
► Secure the cable using a cable tie.
► Additionally, fix the cable to the provided bolt on the
fan using a cable clamp.
Installation
Final Work
Interior Lighting Innenraumbeleuchtung 45
3.3
3.3 Final Work
Final Work
► Close all covers.
► Switch on the machine
► Move the component trolley into the machine.
► Close the cover.
The station software automatically detects that the interior lighting is installed and controls its function
accordingly:
▪ The interior lighting is switched on if the safety circuit is opened, for example if the cover is opened.
▪ The interior lighting is switched off if the machine is in production mode.
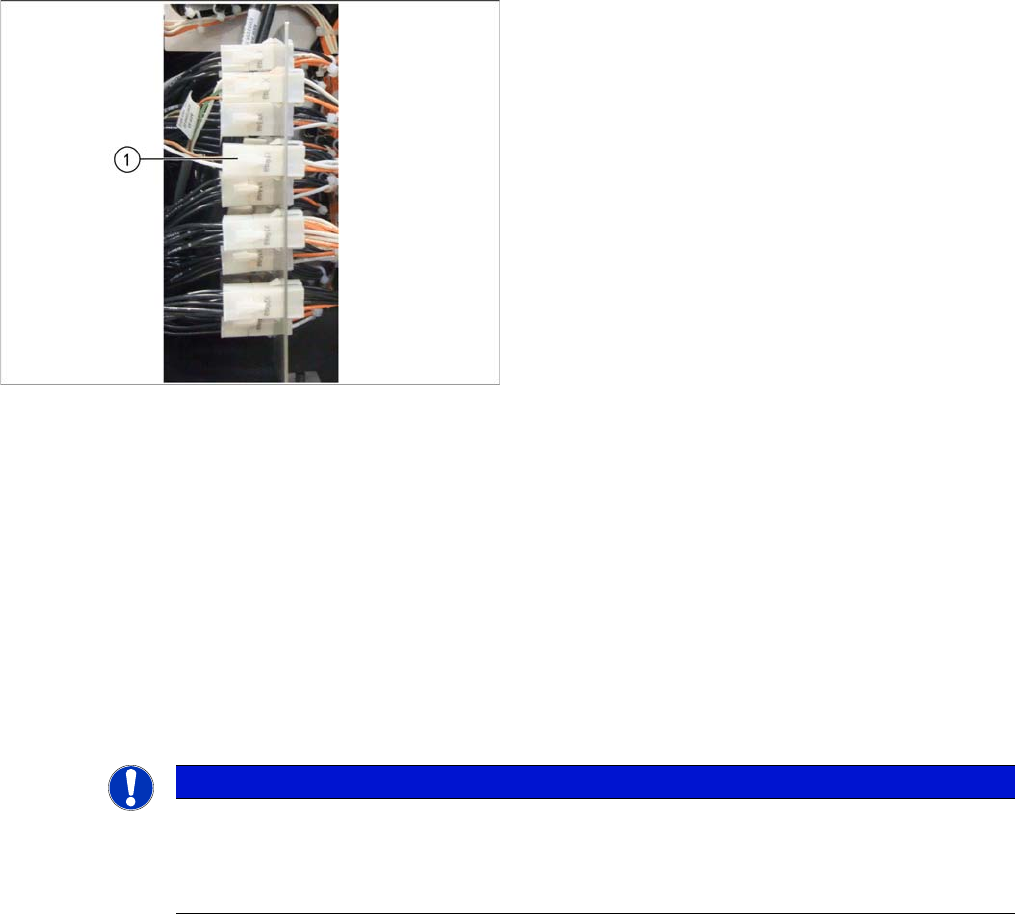
Connecting the extension cable to the distributor
► Open the distributor door in sector 2 of location 1.
► Find the connector X18qa.
► Connect the extension cable to connector X18qa (1).
► Close the distributor door.
NOTICE
Function test
► For testing the function, you can switch on the interior lighting via the I/O functions. Make
sure to switch it of before starting a production as the placement accuracy may be ham-
pered by external light.