N7201A616E00_0317.pdf - 第185页
NPM-W 2 EJM7DE-MB-02O-0 0 Dual conveyor 1 Follow the same steps as 1 7 1 those through used for the single conv ey or To 2 2-5-8 -4 Preparatio n
NPM-W2 EJM7DE-MB-02O-00
Installing support pins
(for automatic change) 2
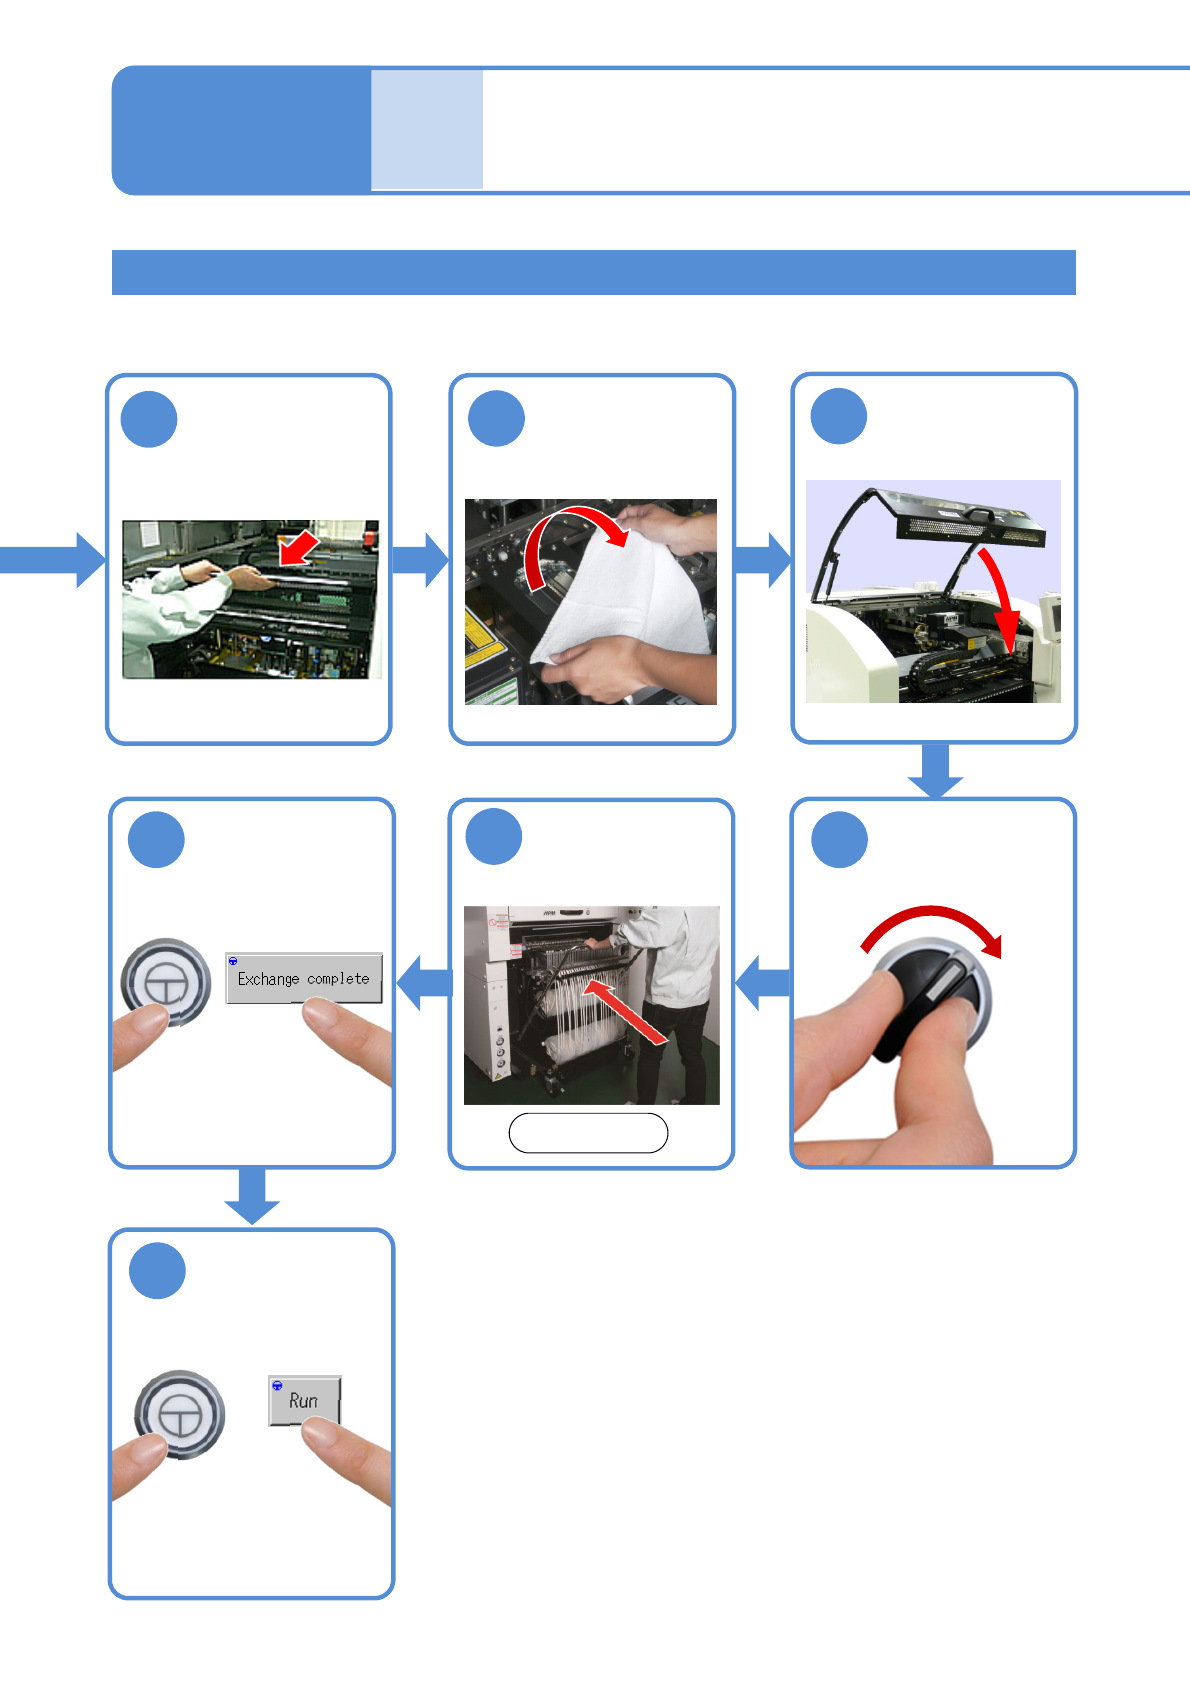
Single conveyor 2
11
10
9
Put the feeder
table cover back
in its place
14
ENABLING
13
15
ENABLING
●The PCB-support block
moves down.
Confirm a
message
SERVO
ON
12
2-5-8-3
Attach the feeder
cart
Front side
(→[Maintenance] P.3-2)
Remove the
cloth
Individu-
al
prepara-
tion
Operating procedure
2-5-8
NPM-W2 EJM7DE-MB-02O-00
Dual conveyor 1
Follow the same steps as
1 7
1
those through used
for the single conveyor
To
2
2-5-8-4
Preparation
NPM-W2 EJM7DE-MB-02O-00
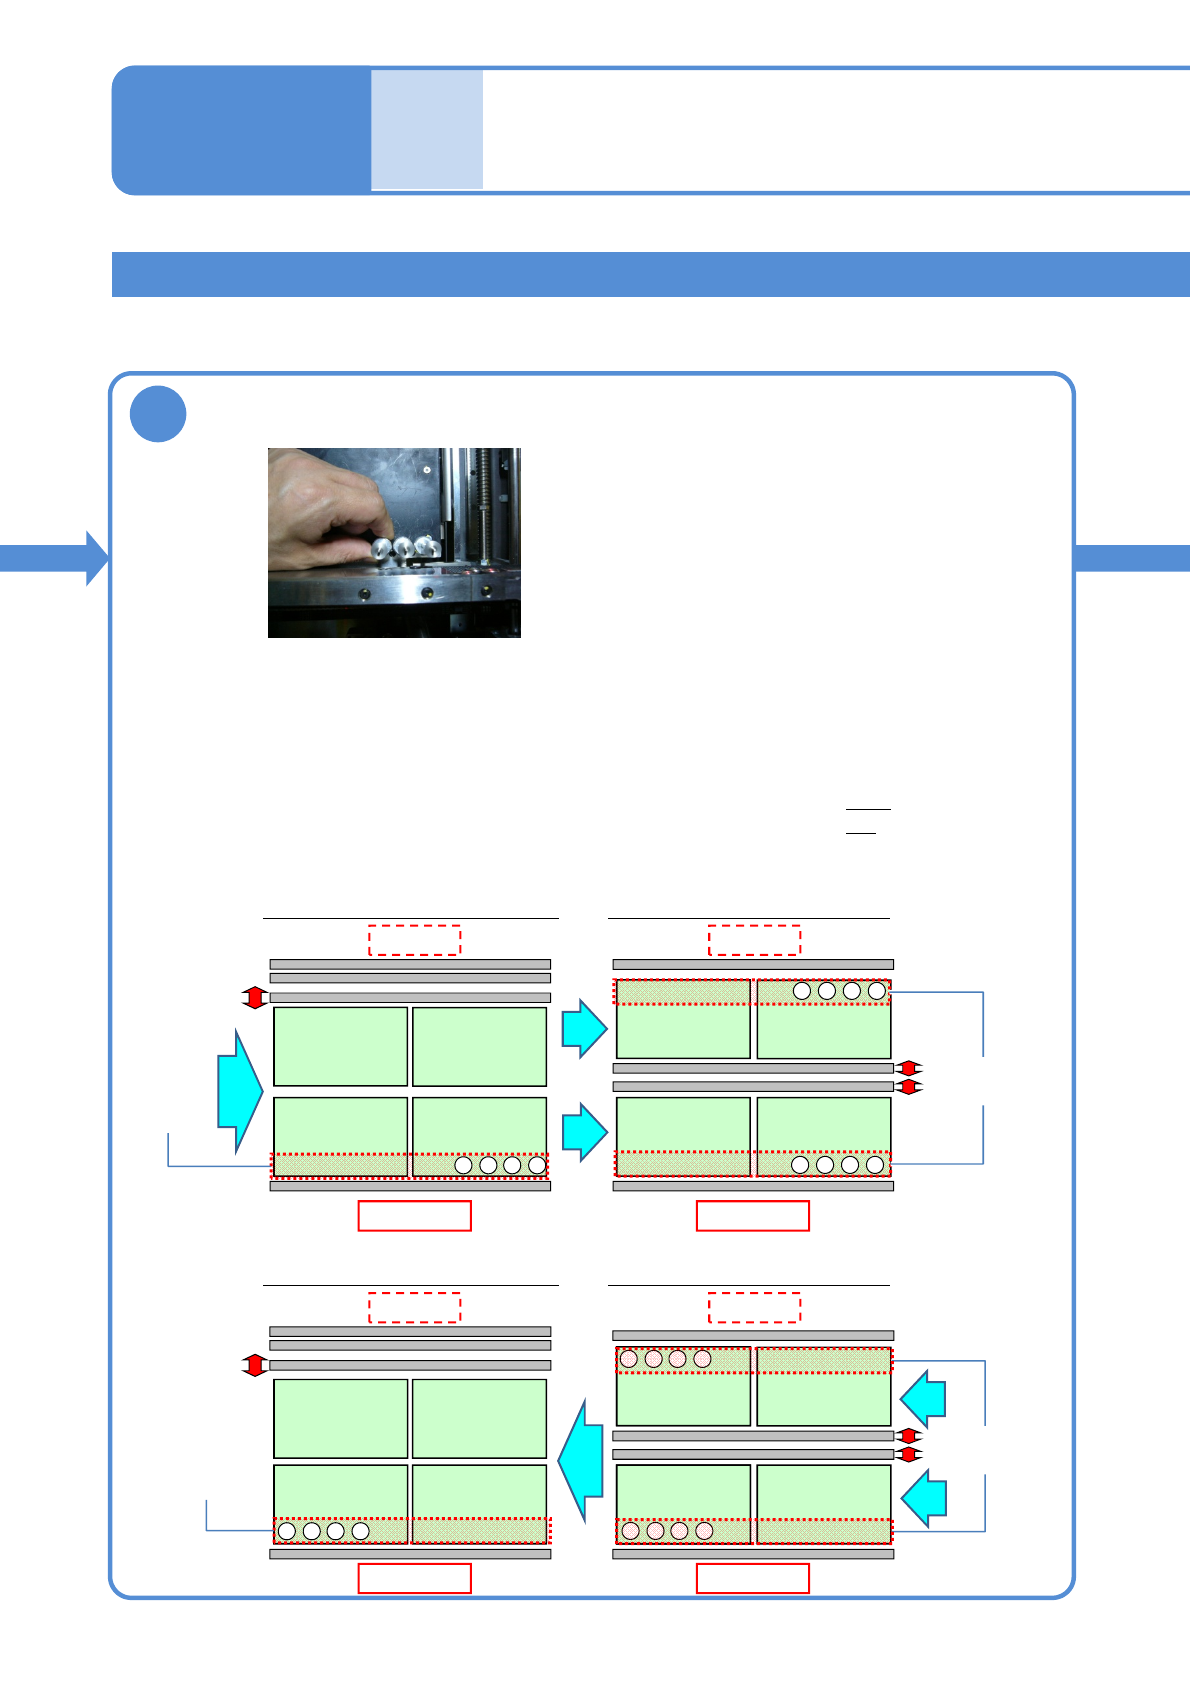
Installing support pins
(for automatic change) 3
Dual conveyor 2
2
Configuration in single-lane mode
Front side
Configuration in dual-lane mode
Front side
4321
・・・
4321
・・・
4321
・・・
●Make sure to always set support pins to the home position.
(Risk of interference with the conveyor)
●Set the support pins while pressing them against the bolt at the home position.
(They may interfere with vacuumed support pins during arrangement of the pins)
●Change a support pin configuration according to the PCB flow direction.
(To replace the support pins in the shortest period of time)
・When PCB flows left to right: set the pins, starting from the right
・When PCB flows right to left: set the pins, starting from the left
●Set the pins to the fixed rail side only.
■Left right flow
■Right left flow
Home
position
Home
position
1234
・・・
Front side Front side
Home
position
Home
position
Configuration in single-lane mode Configuration in dual-lane mode
Set support pins (for automatic change) to the PCB-support block (for
automatic change)
2-5-8-5
4321
・・・
1234
・・・
PCB
flow
PCB flow
PCB flow
PCB
flow
Rear side Rear side
Rear side Rear side
Individu-
al
prepara-
tion
Operating procedure
2-5-8