N7201A616E00_0317.pdf - 第269页
NPM-W 2 EJM7DE-MB-03 O-00 4 3-4 -2 To 10 9 7 Attach the nozzle to the screw unit 5 Disconnect the joint from the syringe ■ Material setting for new production ■ Syringe replacement Disconnect the air plug 1 2 8 ● Align t…
NPM-W2 EJM7DE-MB-03O-00
OFF
SERVO
3-4-1
Setting production
materials 1 (dispensing head)
It explains in the case that the dispensing head is attached to the rear side and operation is performed
from the front side.
Operating procedure
3-4
1
ENABLING
2 3
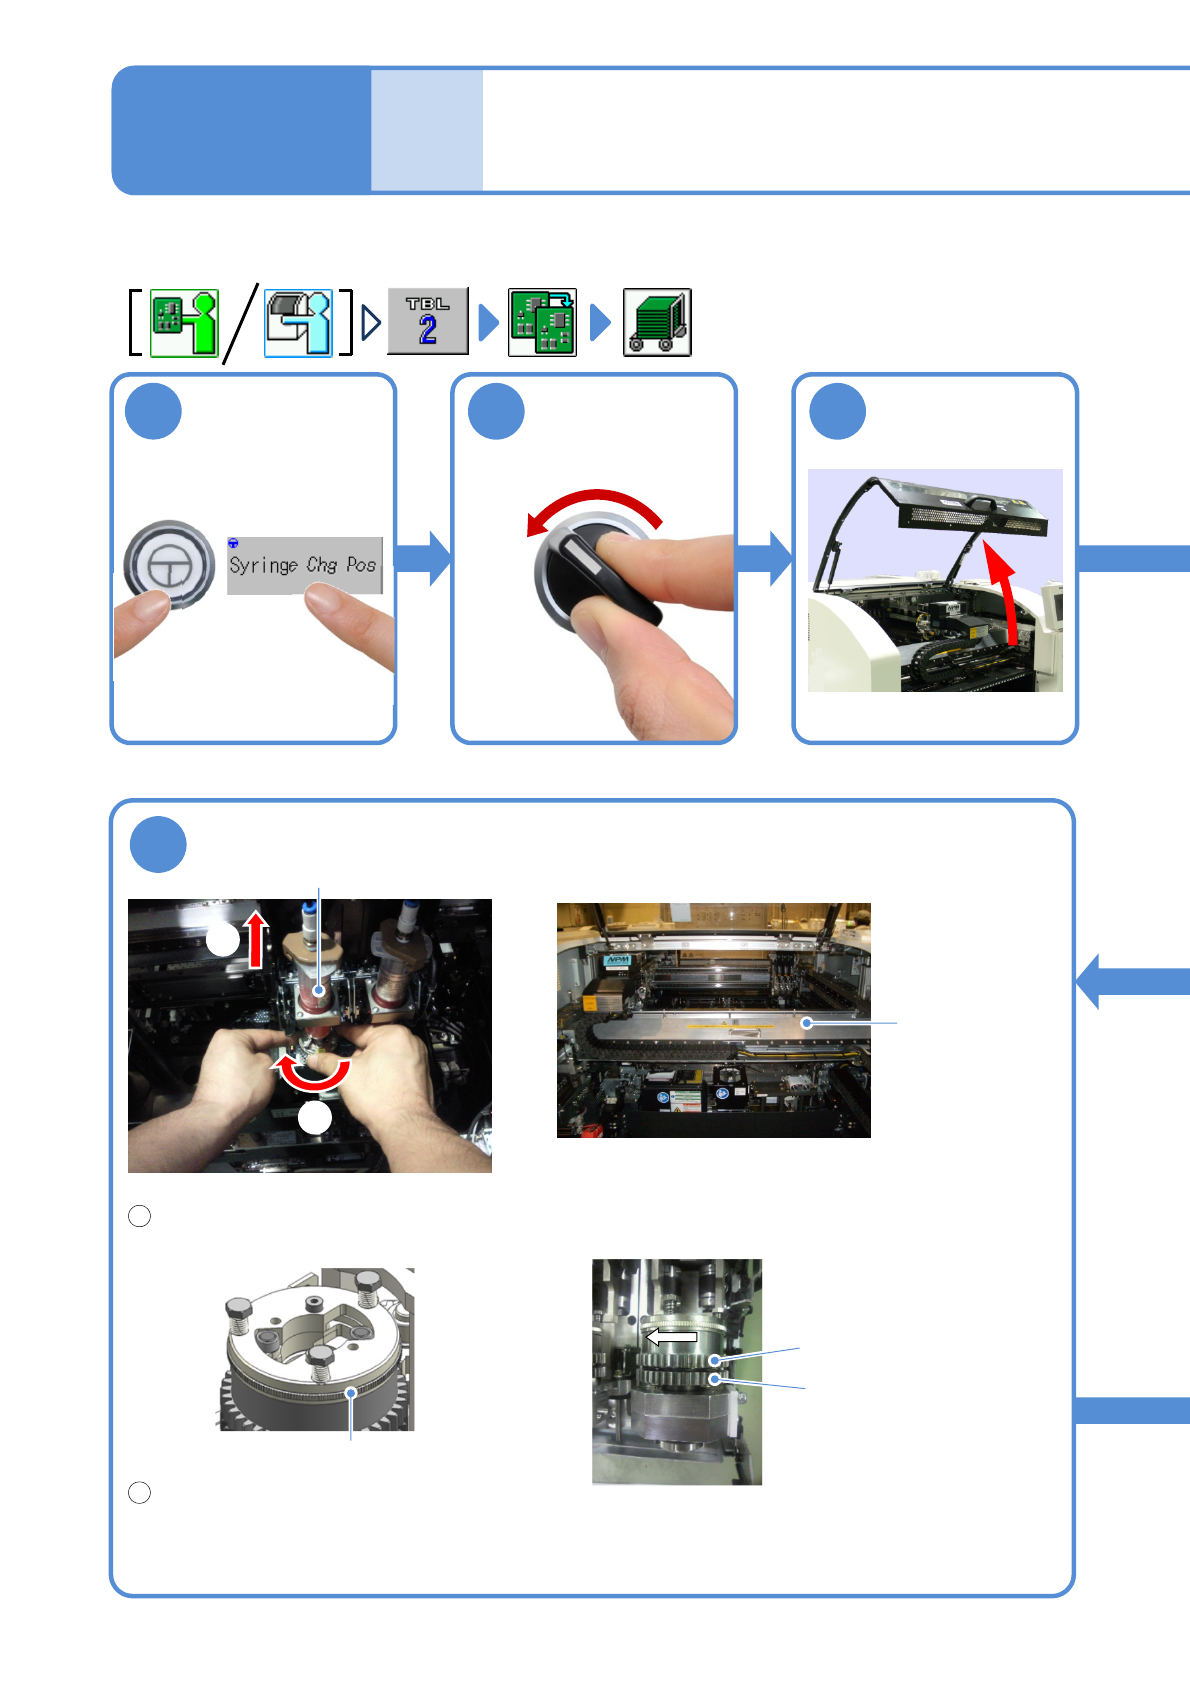
Move the head to
the replace
position
6
Detach a syringe
Pull the syringe straight up.
Syringe
1
2
1
2
Θ-axis
●Be careful not to apply force to the protection cover
for the X-axis linear scale during syringe replacement.
There is possibility for interference with the linear
scale reading head due to cover deformation.
SC-axis
Lock plate
●Be careful not to turn the gear of SC-axis in a
clockwise direction during syringe replacement,
otherwise, adhesive may leak.
Linear scale
protection cover
Turn the lock plate clockwise to
release the syringe lock.
NPM-W2 EJM7DE-MB-03O-00
4
3-4-2
To
10
9
7
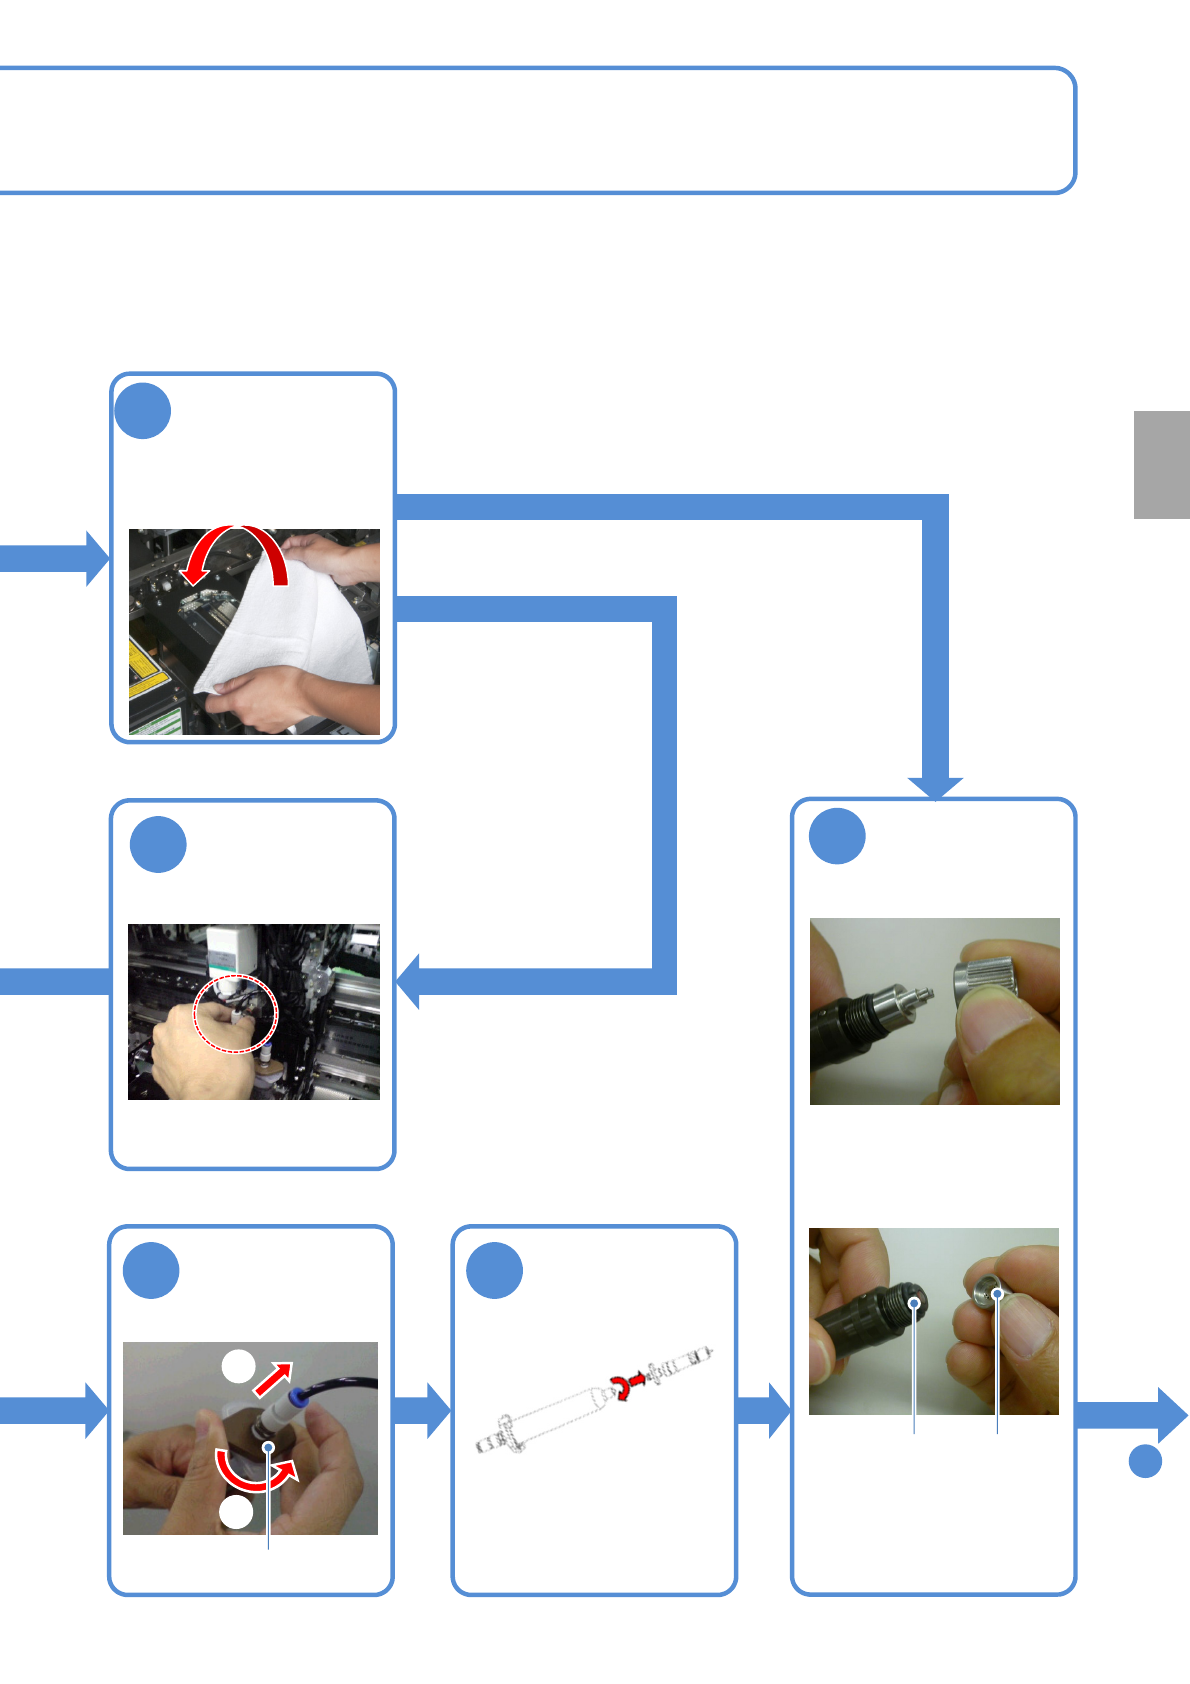
Attach the
nozzle to the
screw unit
5
Disconnect the
joint from the
syringe
■Material setting for new production
■Syringe replacement
Disconnect the
air plug
1
2
8
●Align the nozzle guide pin
with the nozzle
holder groove.
Groove
Guide
pin
joint
Remove the
screw unit from
the syringe
Production
Cover the multi-
recognition
camera, nozzle
changer
with a waste cloth
●Turn the syringe tip
counter-clockwise as
viewed from above.
NPM-W2 EJM7DE-MB-03O-00
3-4-3
Setting production
materials 2 (dispensing head)
Operating procedure
3-4
10
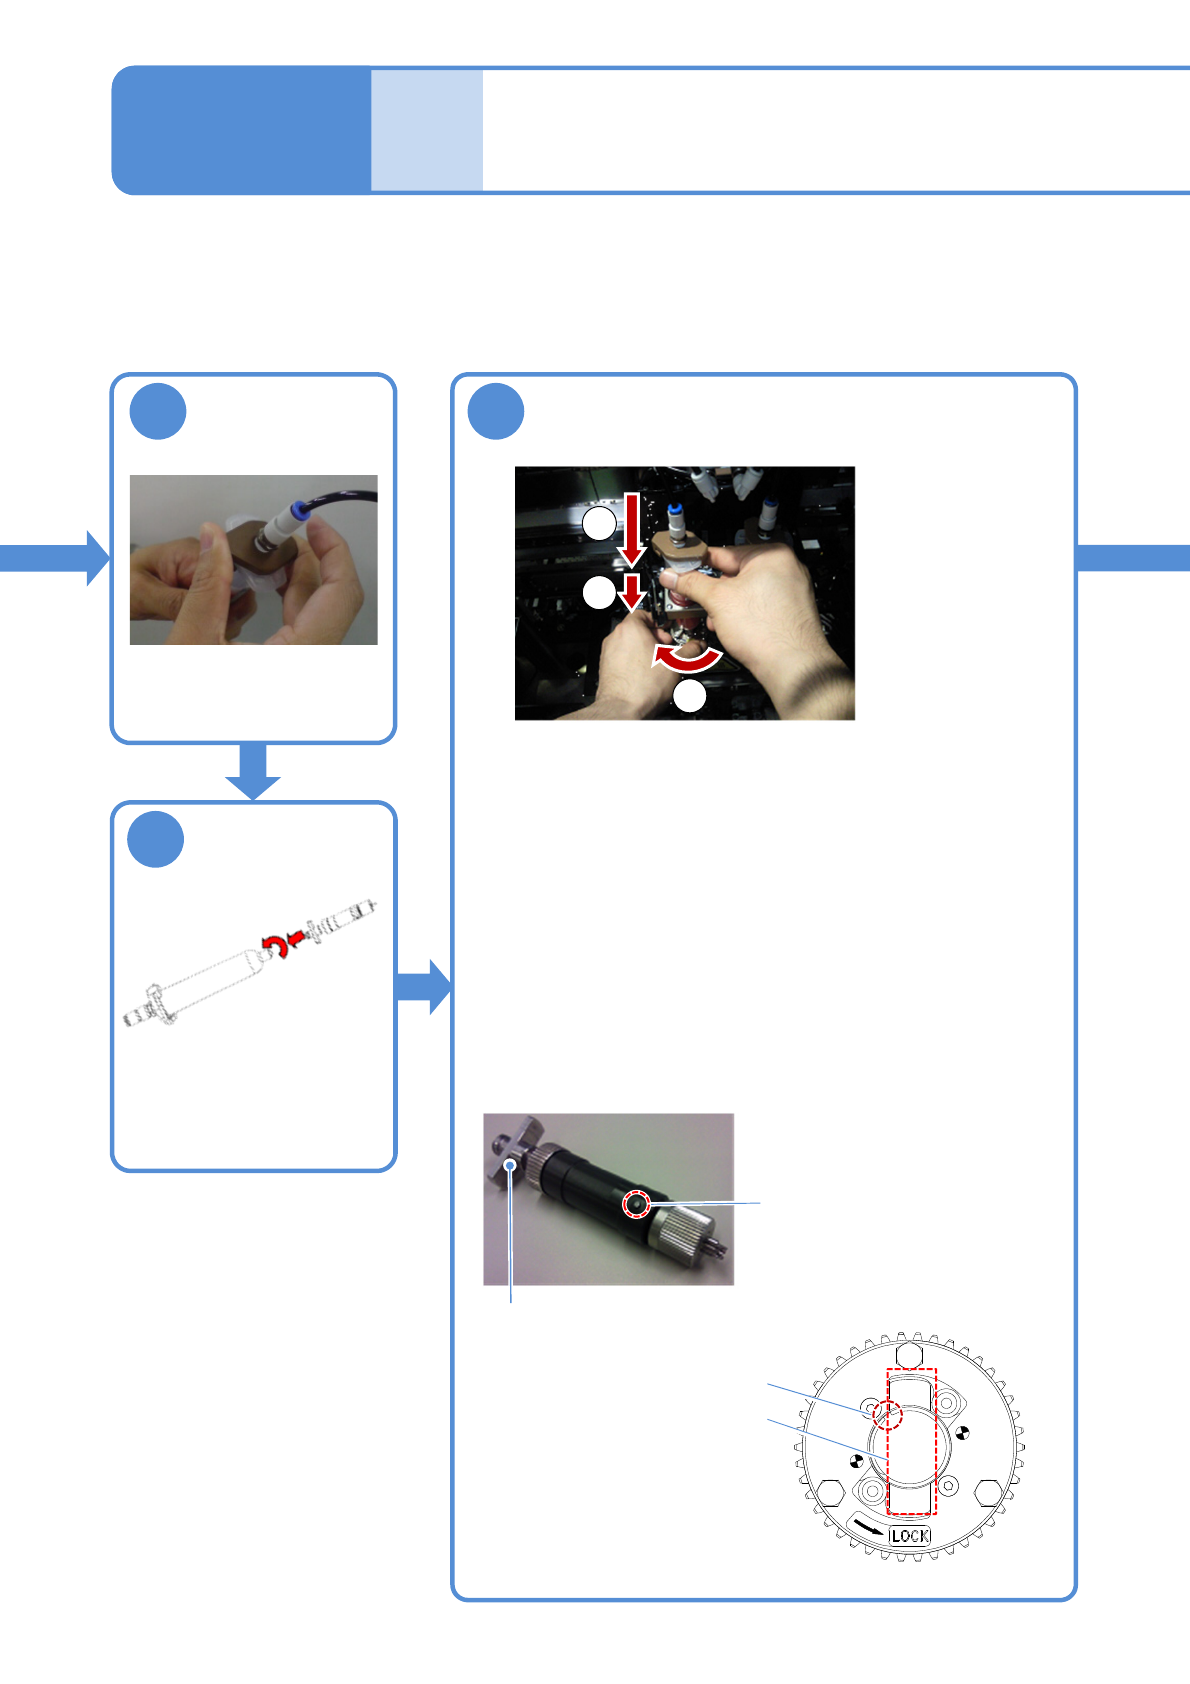
Attach the joint to
the syringe
●Push and screw in the
joint.
12
Set the screw unit to the syringe holder
11
Attach the
syringe to the
screw unit
Flange
Guide pin
(1)Place the screw unit in the syringe holder.
●While fixing the lock plate with one hand, with the other
hand, hold and rotate the syringe.
(2)Insert the guide pin into the housing slot.
●The insertion force exerted should be barely high enough
to rotate the syringe holder as you turn around the syringe.
(3)Insert the flange into the slot in the syringe holder.
●Turn around and press in the syringe.
Screw unit
Housing slot
Syringe holder
Slot in syringe holder
●Turn the syringe tip
clockwise as viewed from
above.
●Can be attached to a 30mL
syringe.
1
2
3