N7201A616E00_0317.pdf - 第270页
NPM-W 2 EJM7DE-MB-03 O-00 3-4 -3 Setting pr oduction ma terials 2 (dispensing head) Operating procedure 3-4 10 Attach the joint to the syringe ● Push and screw in the joint. 12 Set the screw unit to the syringe holder 11…
NPM-W2 EJM7DE-MB-03O-00
4
3-4-2
To
10
9
7
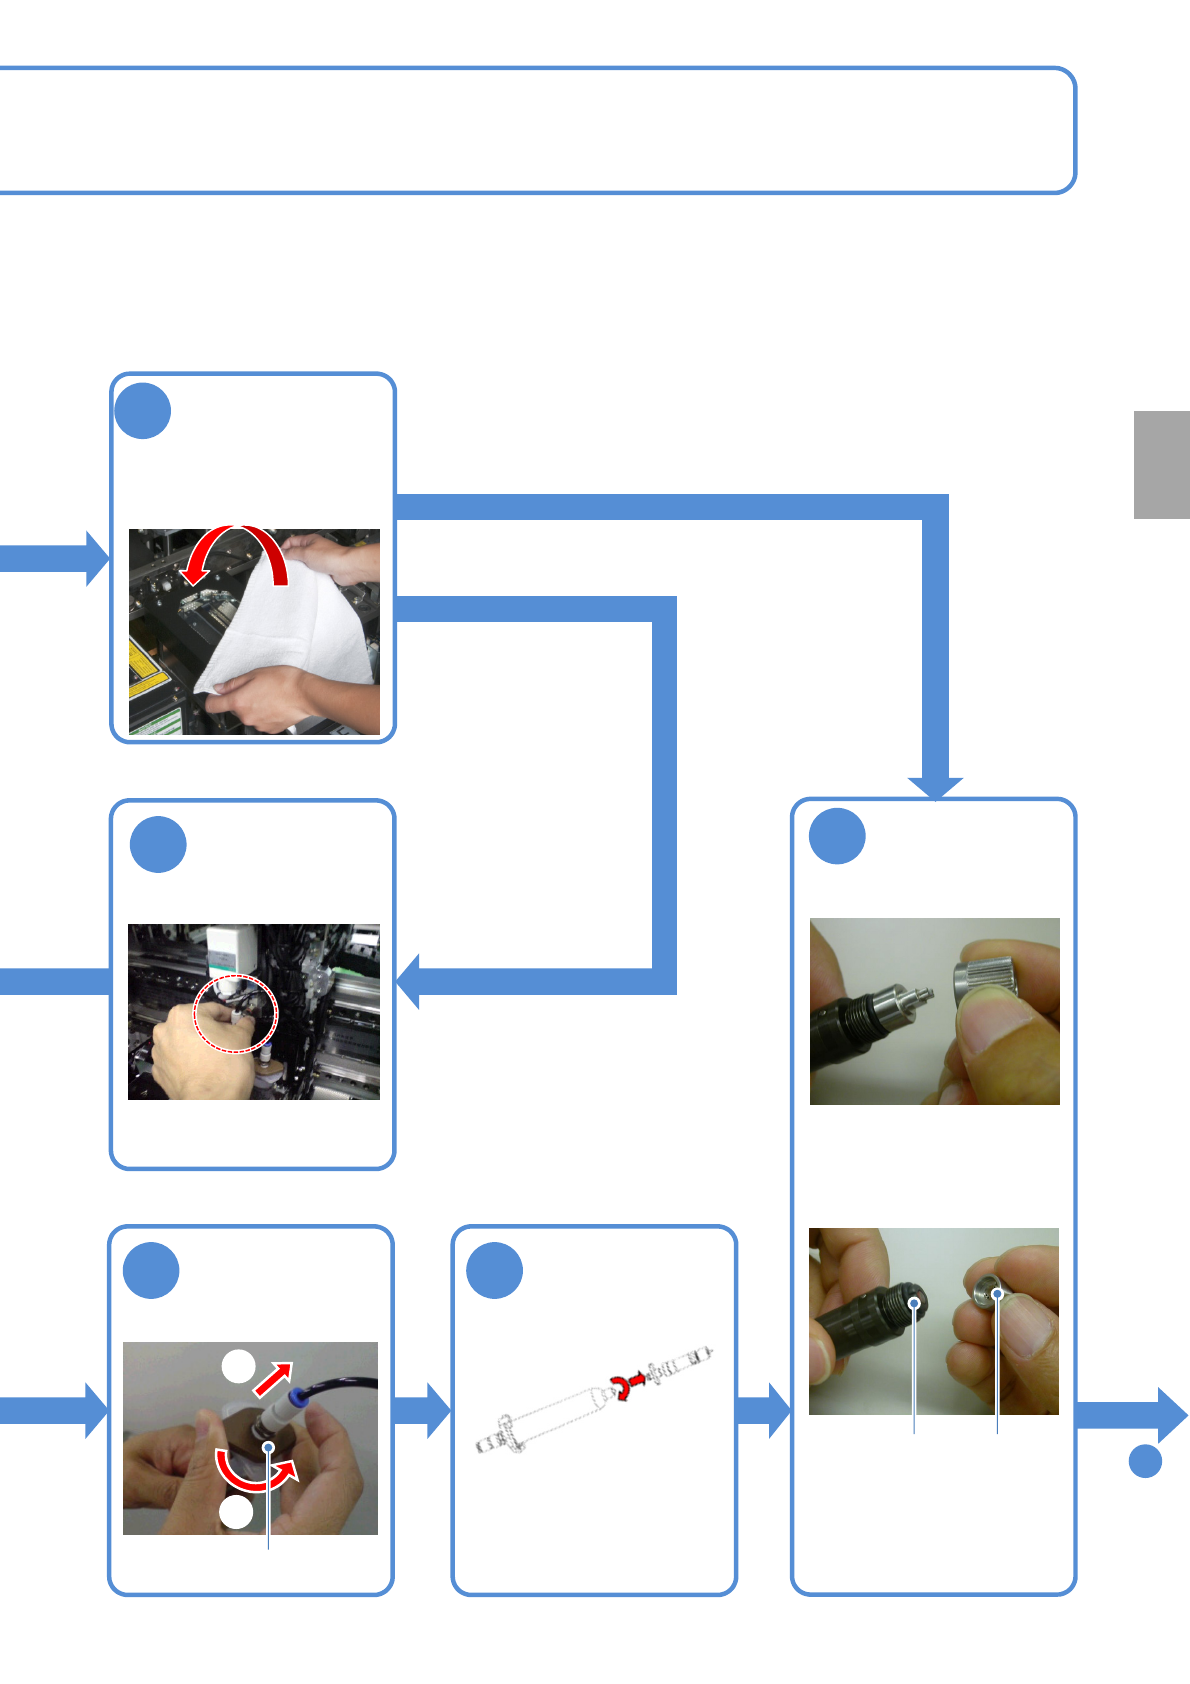
Attach the
nozzle to the
screw unit
5
Disconnect the
joint from the
syringe
■Material setting for new production
■Syringe replacement
Disconnect the
air plug
1
2
8
●Align the nozzle guide pin
with the nozzle
holder groove.
Groove
Guide
pin
joint
Remove the
screw unit from
the syringe
Production
Cover the multi-
recognition
camera, nozzle
changer
with a waste cloth
●Turn the syringe tip
counter-clockwise as
viewed from above.
NPM-W2 EJM7DE-MB-03O-00
3-4-3
Setting production
materials 2 (dispensing head)
Operating procedure
3-4
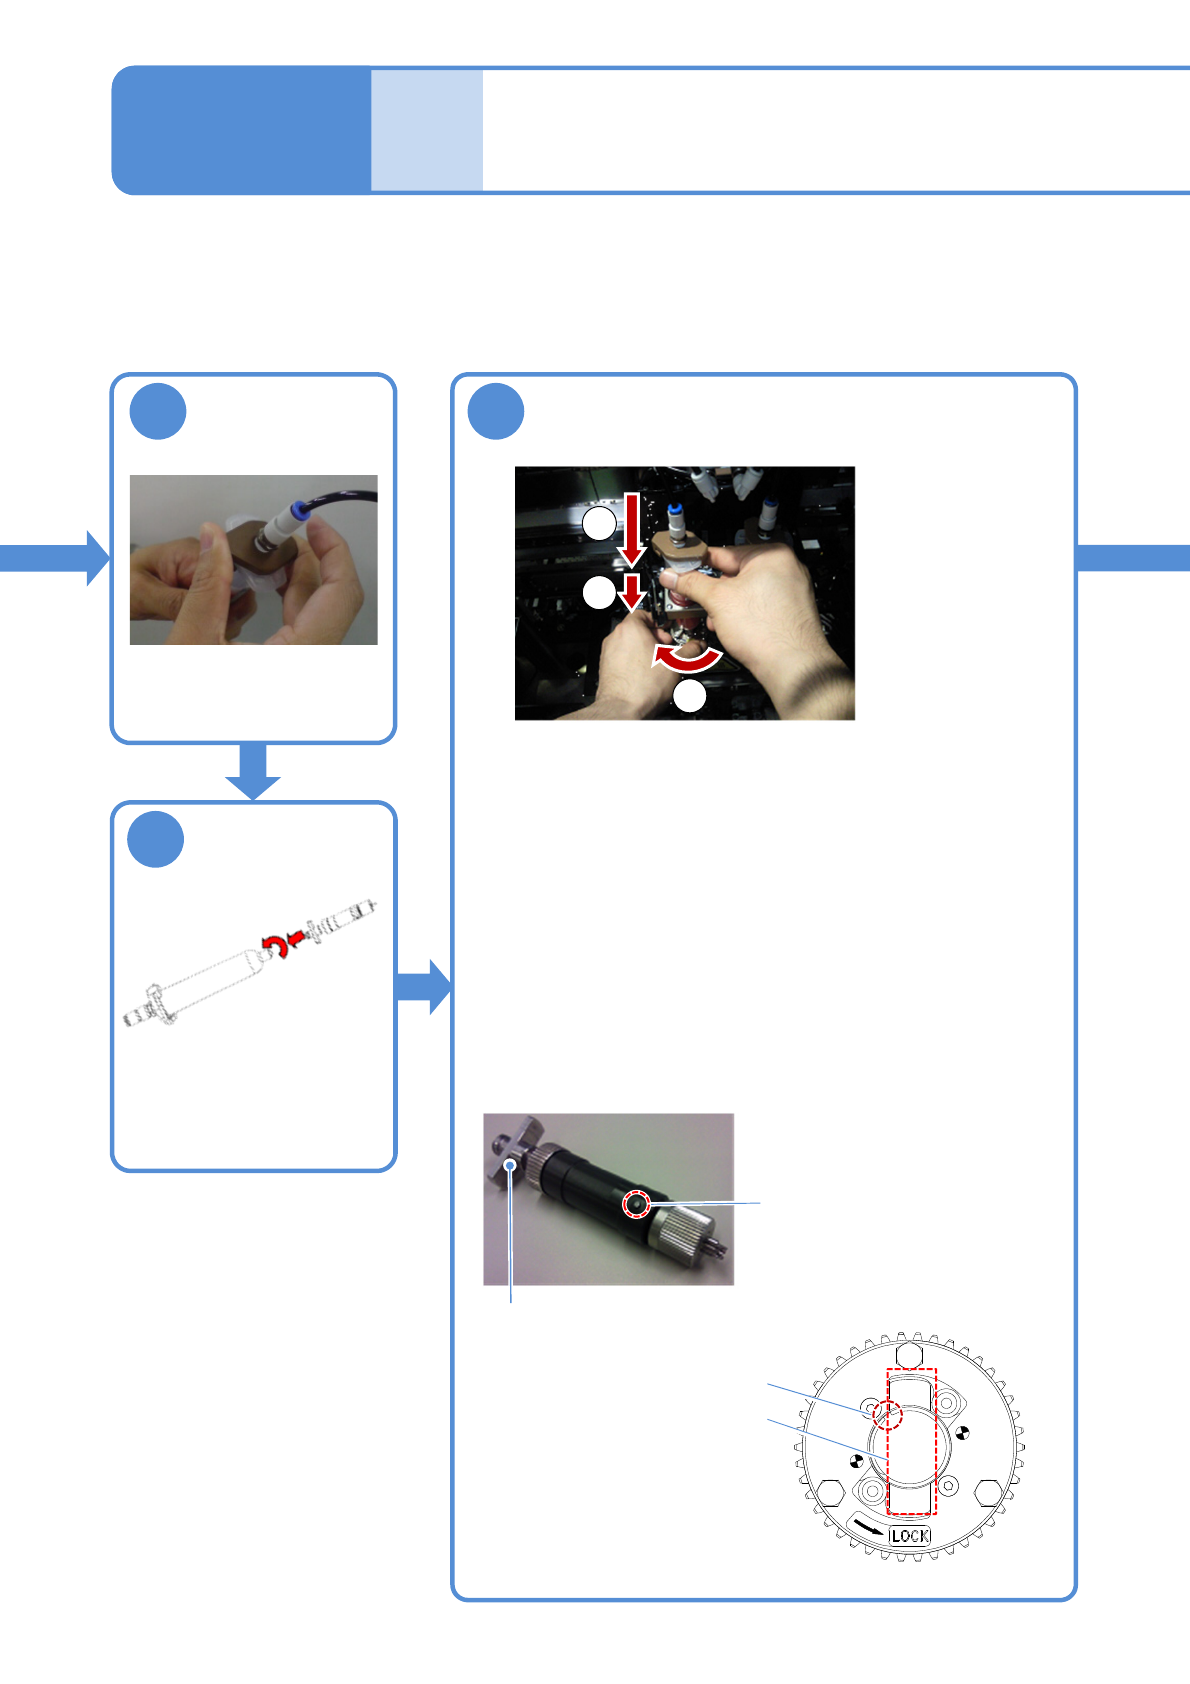
10
Attach the joint to
the syringe
●Push and screw in the
joint.
12
Set the screw unit to the syringe holder
11
Attach the
syringe to the
screw unit
Flange
Guide pin
(1)Place the screw unit in the syringe holder.
●While fixing the lock plate with one hand, with the other
hand, hold and rotate the syringe.
(2)Insert the guide pin into the housing slot.
●The insertion force exerted should be barely high enough
to rotate the syringe holder as you turn around the syringe.
(3)Insert the flange into the slot in the syringe holder.
●Turn around and press in the syringe.
Screw unit
Housing slot
Syringe holder
Slot in syringe holder
●Turn the syringe tip
clockwise as viewed from
above.
●Can be attached to a 30mL
syringe.
1
2
3
NPM-W2 EJM7DE-MB-03O-00
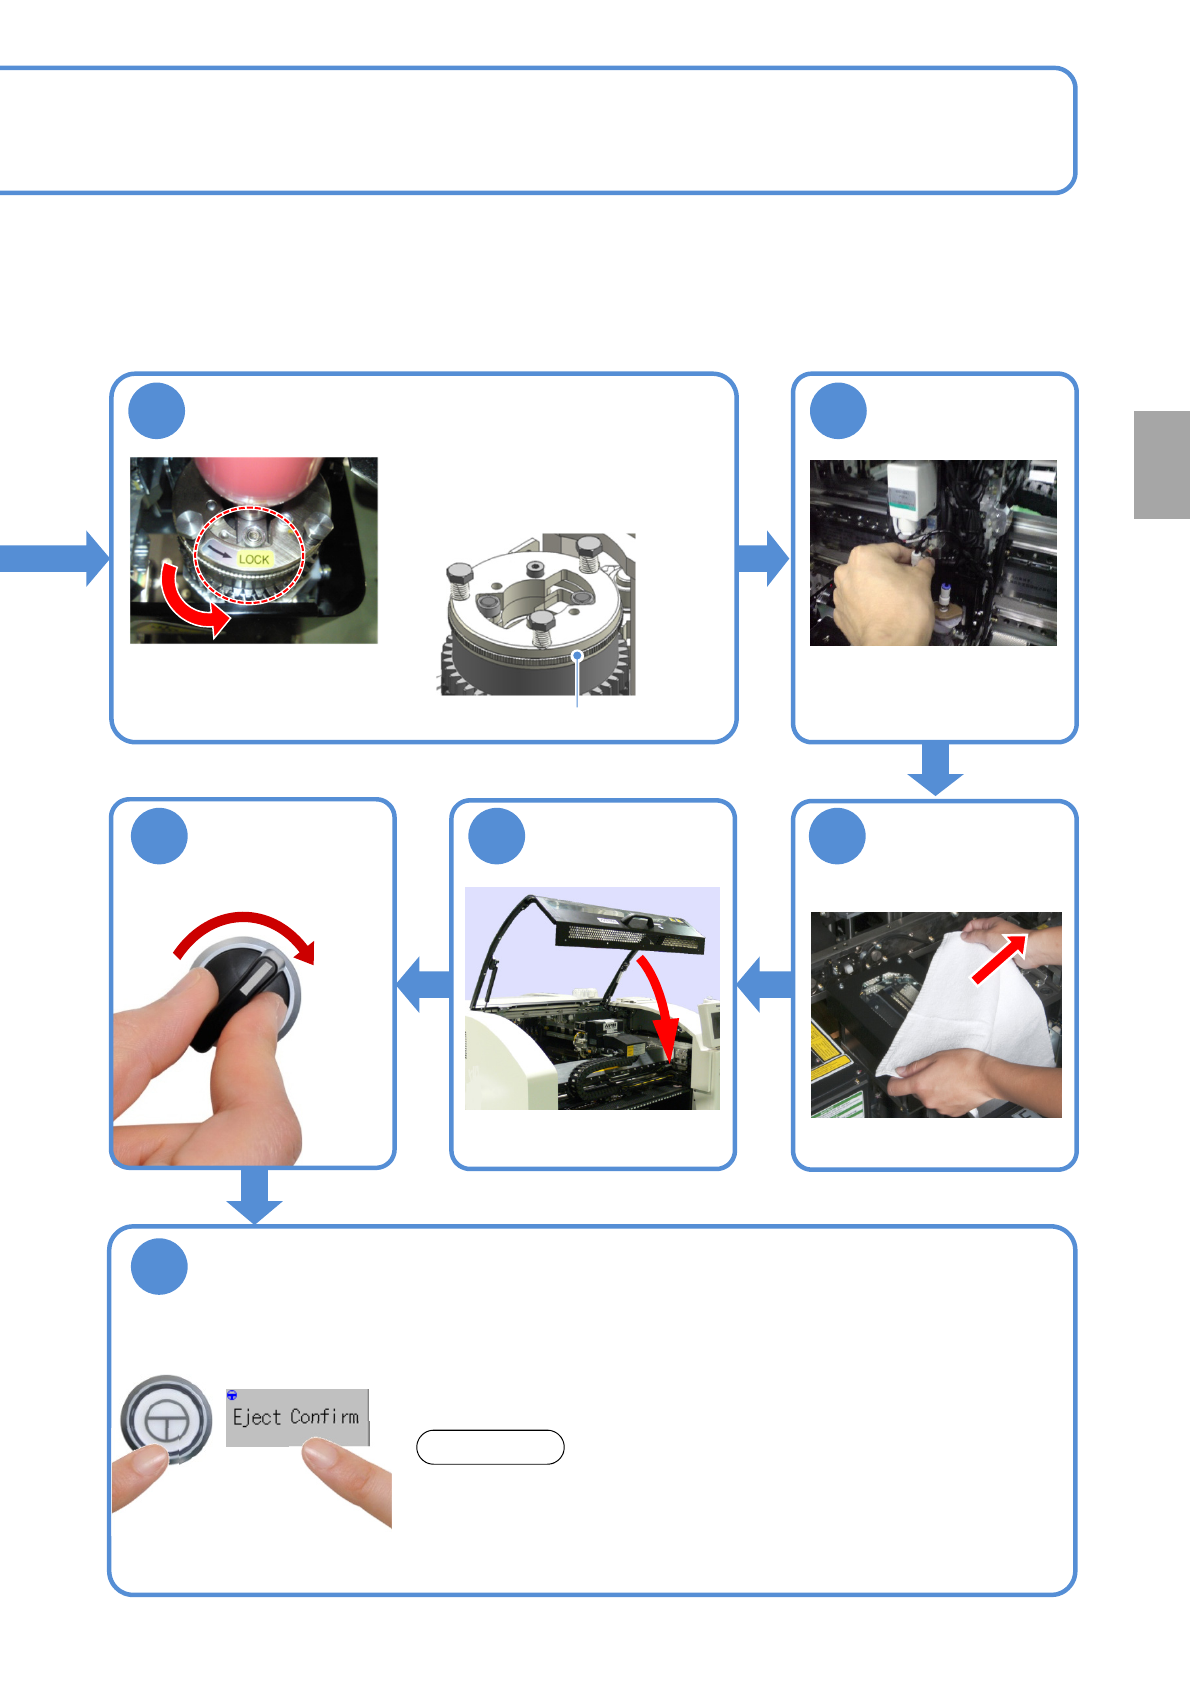
SERVO
ON
13
3-4-4
15
Remove a lint
free cloth
14
Connect the air
plug
Lock plate
1617
18
ENABLING
●Make sure that the lock plate is in
the lock position.
●Thoroughly perform an ejection check so as to fill the inside of the
screw with adhesive. (Preferably, for more than 30 seconds with
0.12MPa of discharge pressure. For information on how to set the
discharge pressure (→P.6-1-16))
●For the purpose of preventing adhesive from being scattered inside
equipment, perform dummy dispensing operation after the forced
ejection, and check the condition of the nozzle tip. Use the dummy
dispensing unit for cleaning the nozzle tip separately.
When, with adhesive remained inside the screw, a syringe is
attached/detached, air bubbles may be generated inside the screw. Since
the air bubbles can cause a defect in dispensing, make sure to clean the
screw unit after a syringe is removed from the screw unit, and then you will
refill the screw unit with adhesive while running an ejection check.
NOTICE
Production
Rotate the lock plate in the counterclockwise
direction, and lock the syringe