00197455-01_IM_TX150SS8_en.pdf - 第40页
Installing Prim ergy TX 150 S8 with W indows S erver 20 12 07/2012 Edit ion 40 4 A dditional F inishing S teps 4.1 Un install ing Fujitsu Automate d Immune Sy stem ( A IS) Since the features of the F ujit s u A utom ated…
Installing Primergy TX150 S8 with Windows Server 2012 07/2012 Edition
39
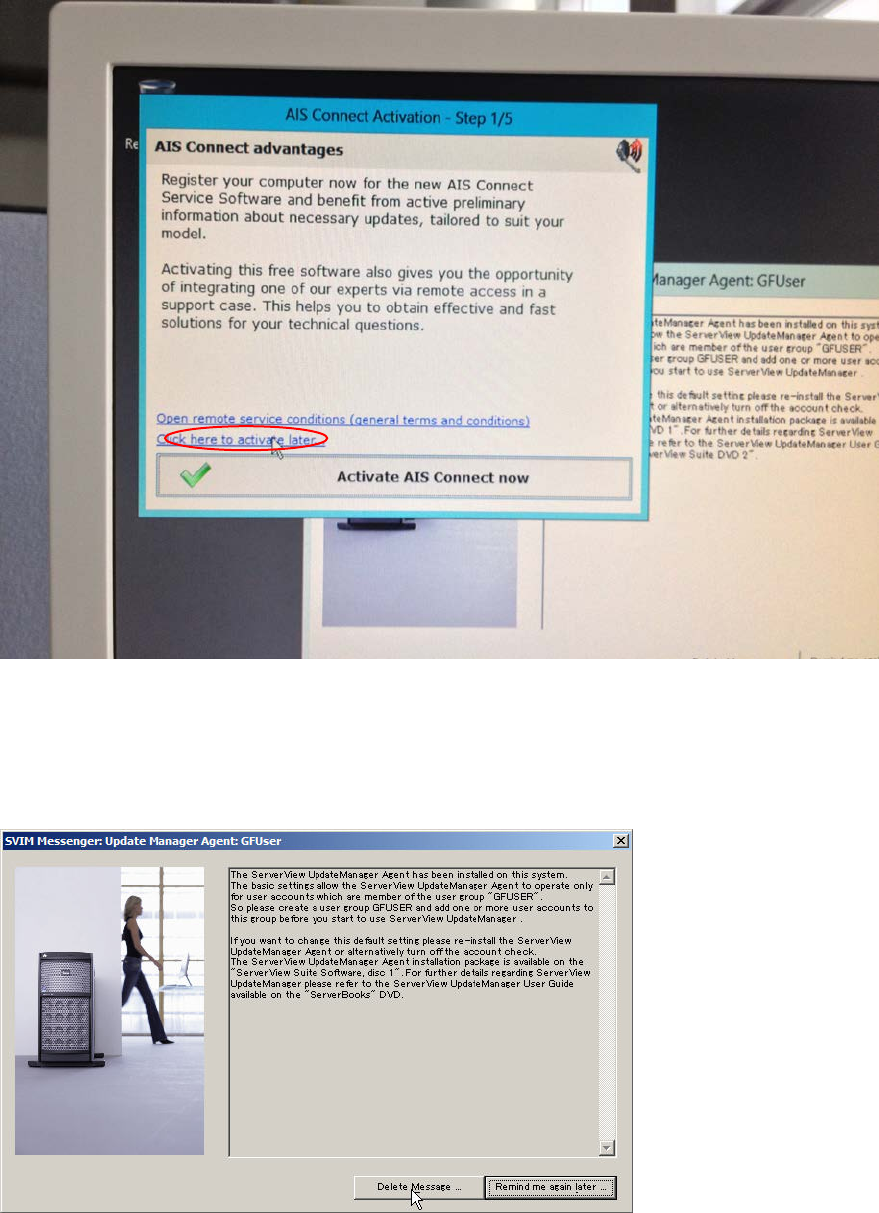
After login and some preparation, the following screens will appear (random order).
Figure 3-27: Reminder messages
► Click at the Click here to activate later… line to close the window.
The following window might appear.
Figure 3-28: SVIM Messanger message
► Click the Delete Message button.
The basic installation steps are now completed. Continue with the following chapter.
Installing Primergy TX150 S8 with Windows Server 2012 07/2012 Edition
40
4 Additional Finishing Steps
4.1 Uninstalling Fujitsu Automated Immune System (AIS)
Since the features of the Fujitsu Automated Immune System (AIS) are not used, it should be
uninstalled.
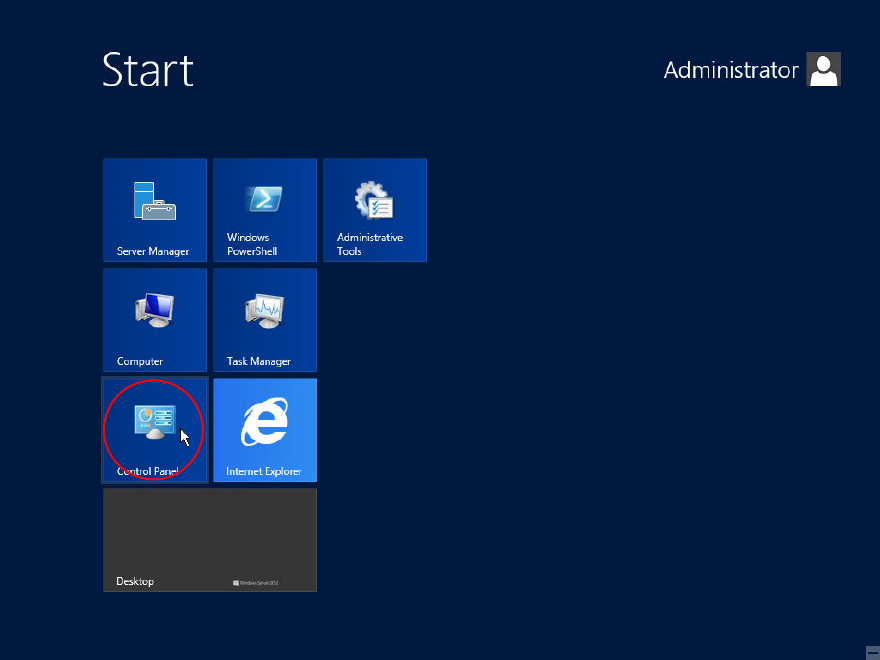
Figure 4-1: Opening Control Panel
► Press the Windows button on your keyboard and click at Control Panel.
The Control Panel appears.
Installing Primergy TX150 S8 with Windows Server 2012 07/2012 Edition
41
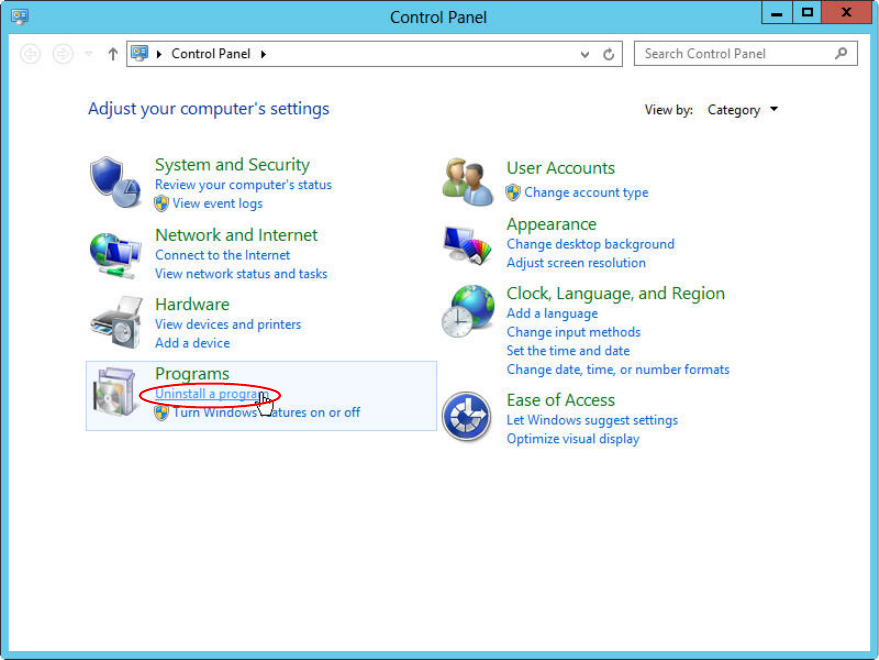
Figure 4-2: Control Panel – clicking on “Uninstall a program”
► Click on Uninstall a program.