00197455-01_IM_TX150SS8_en.pdf - 第49页
Installing Prim ergy TX 150 S8 with W indows S erver 20 12 07/2012 Edit ion 49 Figure 4- 18 : New Simple Volume Wizard – Completed ► Click the F inish butt on t o com plete the task . Form atting m ay take a c ouple of s…
Installing Primergy TX150 S8 with Windows Server 2012 07/2012 Edition
48
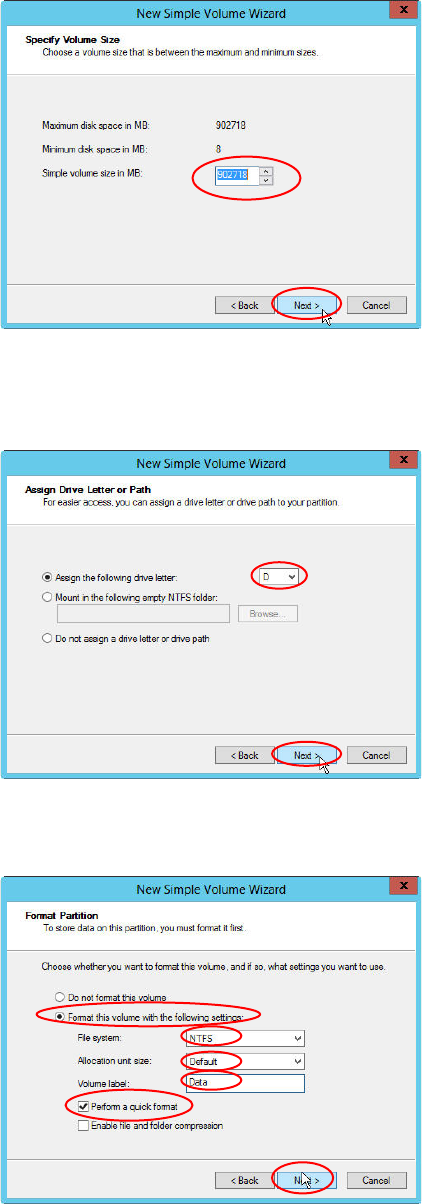
Figure 4-15: New Simple Volume Wizard – Specify Volume Size
► Leave the value for the simple volume size (using all remaining space) and click the Next >
button.
Figure 4-16: New Simple Volume Wizard – Assign Drive Letter or Path
► Ensure that drive D is selected in the dropdown menu and click the Next > button.
Figure 4-17: New Simple Volume Wizard – Format Partition
► Select the radio button besides Format this volume with the following settings.
► Select NTFS besides File system.
► Leave the default allocation unit size and enter a name for the new volume, e.g. “Data”.
► Select the Perform a quick format checkbox and click the Next > button.
Installing Primergy TX150 S8 with Windows Server 2012 07/2012 Edition
49
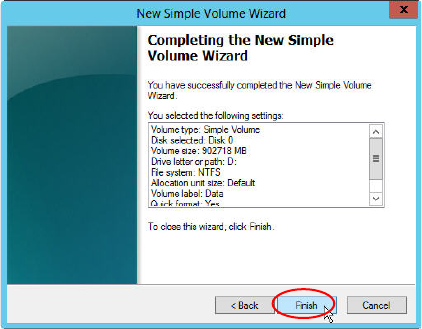
Figure 4-18: New Simple Volume Wizard – Completed
► Click the Finish button to complete the task. Formatting may take a couple of seconds.
Installing Primergy TX150 S8 with Windows Server 2012 07/2012 Edition
50
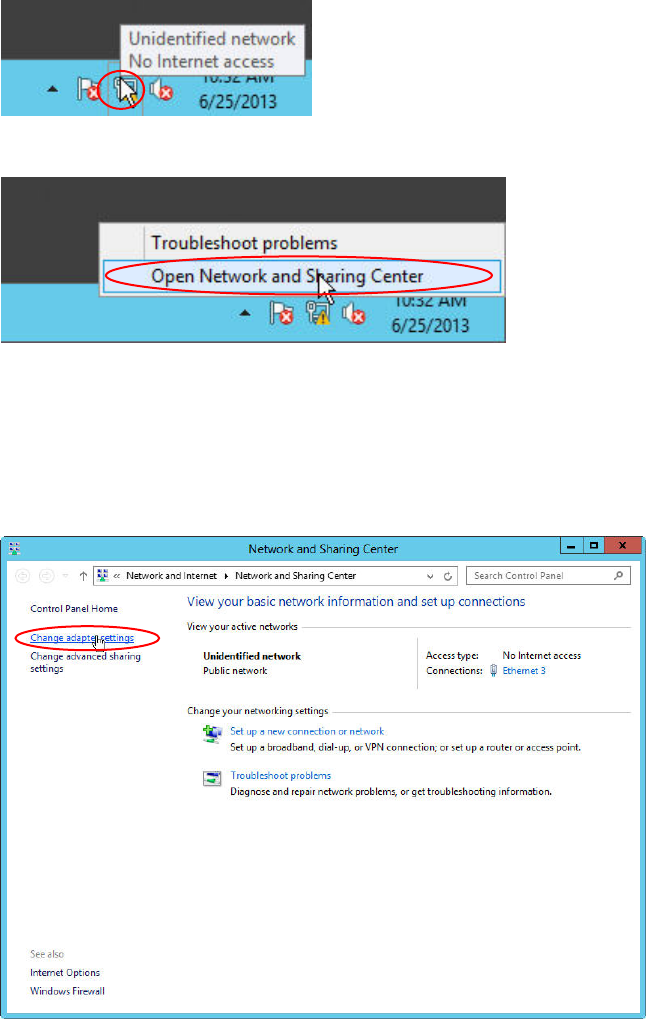
4.4 Removing Default Gateway
As mentioned before, you have to remove the dummy default gateway that was entered during the
Installation Manager guided setup.
Figure 4-19: Network Icon
Figure 4-20: Opening Network Settings
► Right-click on the Network Icon in the lower right corner and select Open Network and Sharing
Center.
The Network and Sharing Center opens.
Figure 4-21: Network Sharing Center – clicking change adapter settings
► Click on Change adapter settings on the left side.