DFD6361-Maintenance.pdf - 第222页
C-10 Before operati on Have on hand the following jigs for conditioning operation. [Conditio ning tools ] Conditioning jig Conditioning tip Chuck table for dres sing [Conditio ning tip] Purpos e Parts No. Color Shape Fla…
C-9
2-2. Executing Conditioning
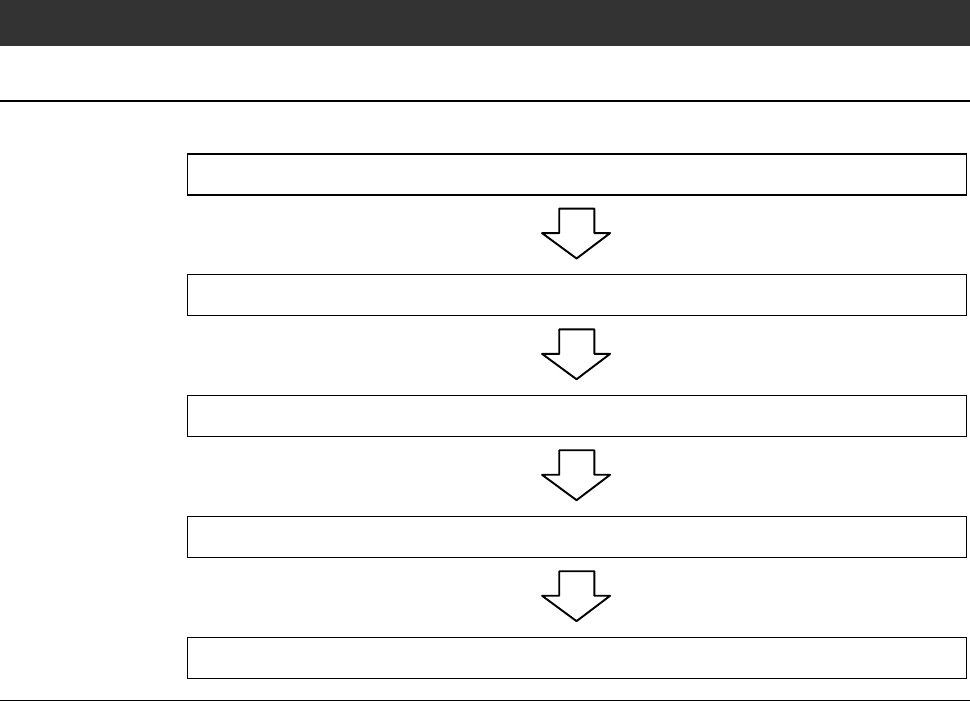
Operation flow
The procedure for executing conditioning consists of the following steps.
2-2-1 Replacing the chuck table
2-2-2 Verifying FRANGE DRESSING screen data
2-2-3 Executing conditioning
2-2-4 Checking the end face accuracy
2-2-5 Completion of conditioning
C-10
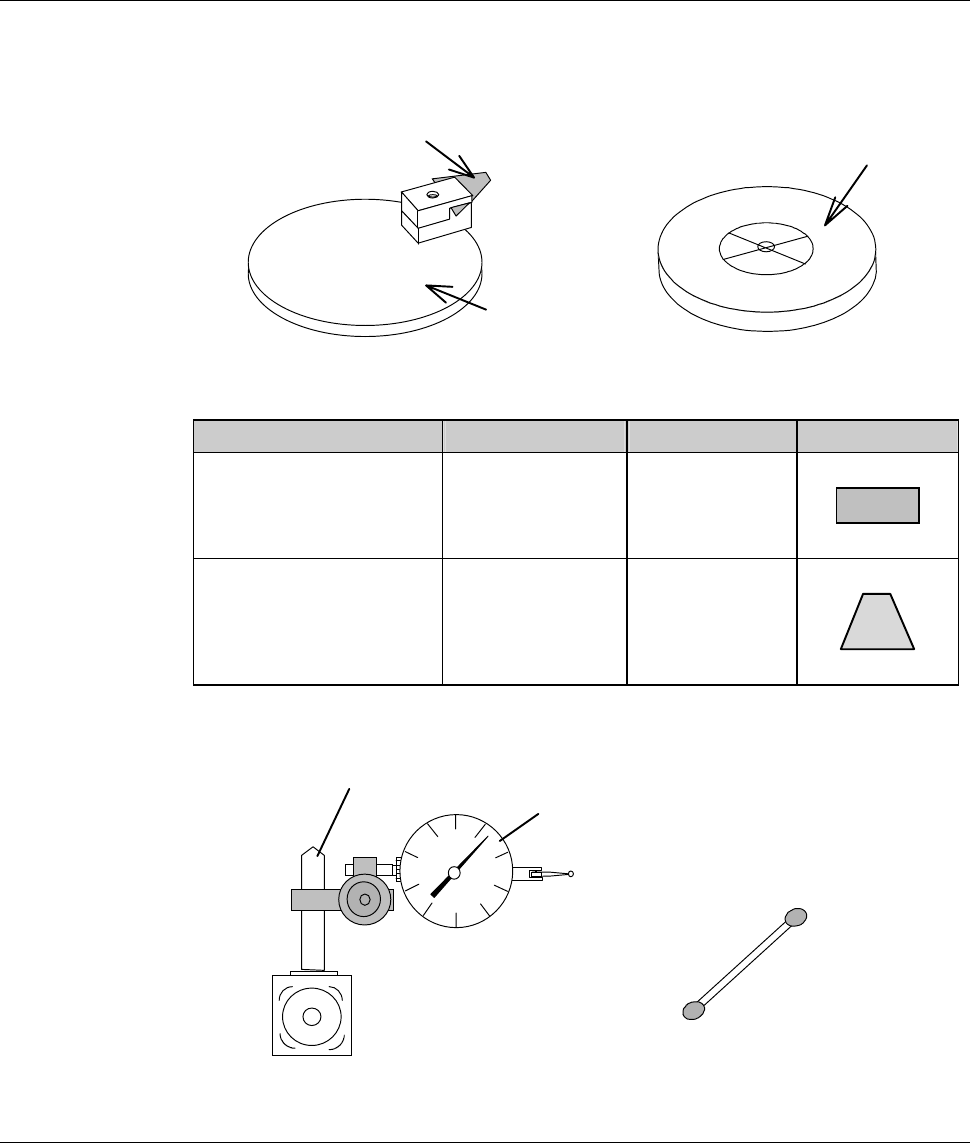
Before operation
Have on hand the following jigs for conditioning operation.
[Conditioning tools]
Conditioning jig
Conditioning tip
Chuck table for dressing
[Conditioning tip]
Purpose Parts No. Color Shape
Flange conditioning MODBN765 Black
Hub mount
conditioning
MODBN890 Dark brown
[Measuring equipment]
Magnet stand
Dial gauge
Cotton swab moistened
with alcohol
*) The dial gauge must be calibrated in increments of 2 µ m or less.
C-11
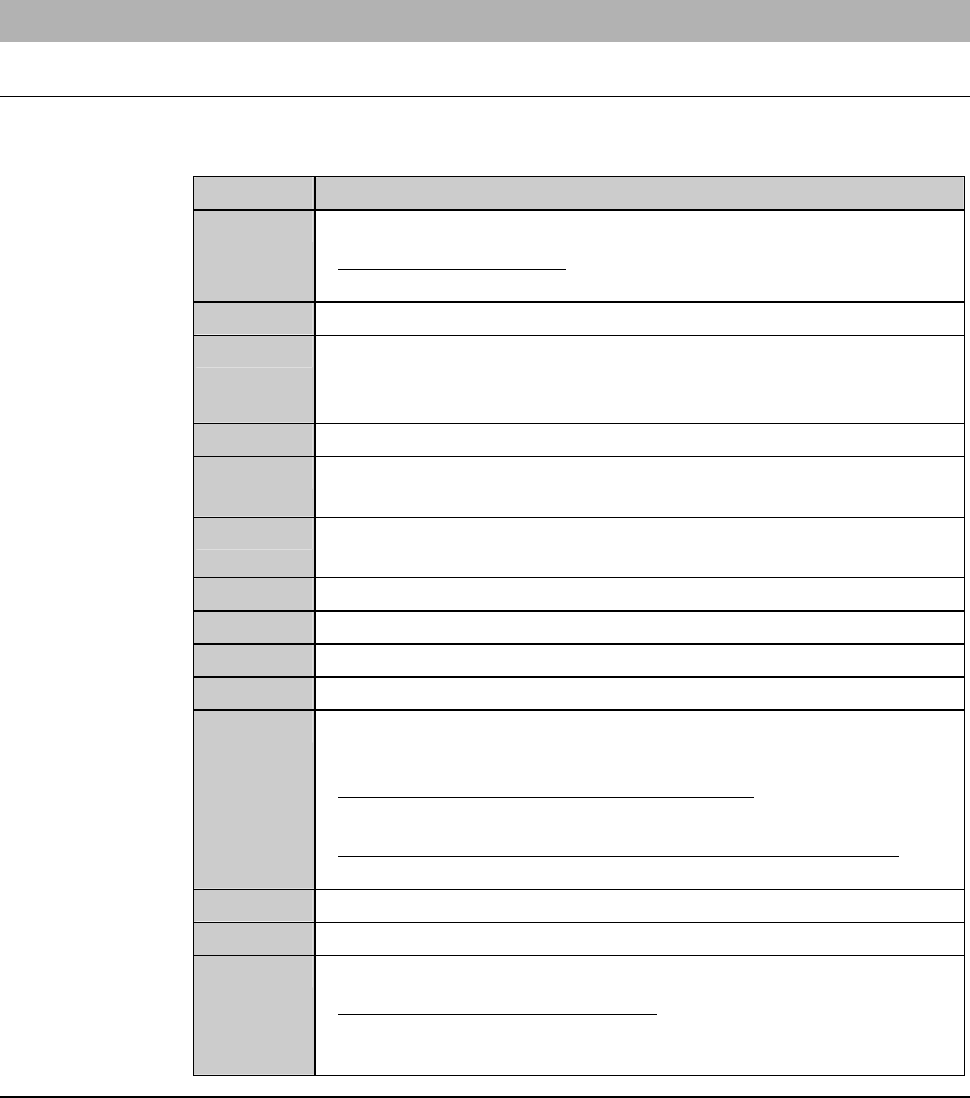
2-2-1. Replacing the chuck table
Procedures for replacing the chuck table
For conditioning purposes, replace the currently installed chuck table with the
chuck table for dressing.
Step No. Do This
1
Carry out the setup operation.
- For the setup operation;
See the section B-7, [Setup] of the Operation Manual.
2
Call up the MACHINE MAINTENANCE screen [screen 6.0].
3
From the MACHINE MAINTENANCE screen [screen 6.0],
press the <F1> button to call up the CHANGE FRAME SIZE
screen [screen 6.1].
4
Make sure that the spindle rotation and all axes stop.
5
If the wheel coolant water is ON, press the <Cutting Water>
buttontoturnitOFF.
6
From the CHANGE FRAME SIZE screen [screen 6.1], press the
<F3> button to turn OFF the vacuum of chuck table.
7
Open the front arm section cover.
8
Remove the chuck table.
9
Set the chuck table for dressing on the table base.
10
Verify the chuck table position.
11
Turn ON the vacuum system by pressing the <F3> button to
secure the chuck table.
- For the chuck table replacement procedure;
See the section B-1, [Chuck Table Replacement].
- For the MACHINE MAINTENANCE screen [screen 6.0];
See the section B-6-1 of the Data Maintenance Manual.
12
Close the front arm section cover.
13
Press the <System Initial> button to effect system initialization.
14
If any blade is installed over the Z1- and Z2-axis, remove them.
- For the blade removal procedure;
See the section B-6, [Blade Maintenance] of the Operation
Manual.
Continued in the next section.