DFD6361-Maintenance.pdf - 第228页
C-16 Procedur es for ex ecuting conditi oning ( Continued) NOTICE If splash cov er openin g is car ried out wi thout rotati ng the mainten ance swi tch, no axi s is operativ e. It al so makes it nec essary to effect syst…
C-15
2-2-3. Executing conditioning
Procedures for executing conditioning
WARNING
- When you adjust the conditioning jig setup position or set the
conditioning jigs, you have to disable the axis driver power supply
shutoff feature with the maintenance key and operate the X-, Y- and
Z-axes with the splash cover open. If your fingers or hands are
positioned in the drive section or under the spindle, they may be
caught or cut off.
Do not place your fingers or hands in the drive section or under the
spindle.
- For conditioning jig setup purposes, the axes can be operated with
the touch panel manual buttons even if the splash cover is open.
The maintenance personnel could be injured by an inadvertently
invoked unexpected machine operation.
While you don't use the touch panel, press the Disco's logo button
located at the upper left of the screen in order to lock up and
deactivate the touch panel.
- If the person other than the maintenance personnel touches the
machine, the machine operates and the maintenance personnel
may be injured.
Ensure that no person other than the maintenance personnel
touches the machine.
- If the spindle rotating speed is unduly high for the employed flange
diameter, spindle galling or flange separation may take place to
incur serious personal injury or death.
Before conducting conditioning, be sure to verify that the speed
rotating speed is appropriate for the flange diameter.
The maximum permissible spindle rotating speed is as follows:
60,000 min
-1
(60,000 rpm) for 2-inch blade
CAUTION
When the conditioning operation is started, the X-axis moves to the
rear side of the machine. Depending on the position of the
conditioning jigs, they may hit the wheel cover nozzle during
conditioning.
Before starting conditioning operation, make sure that the wheel
cover nozzle does not collide against the conditioning jigs.
C-16
Procedures for executing conditioning (Continued)
NOTICE
If splash cover opening is carried out without rotating the
maintenance switch, no axis is operative. It also makes it necessary
to effect system initialization after splash cover closure.
Step No. Do This
(Continued from the previous section)
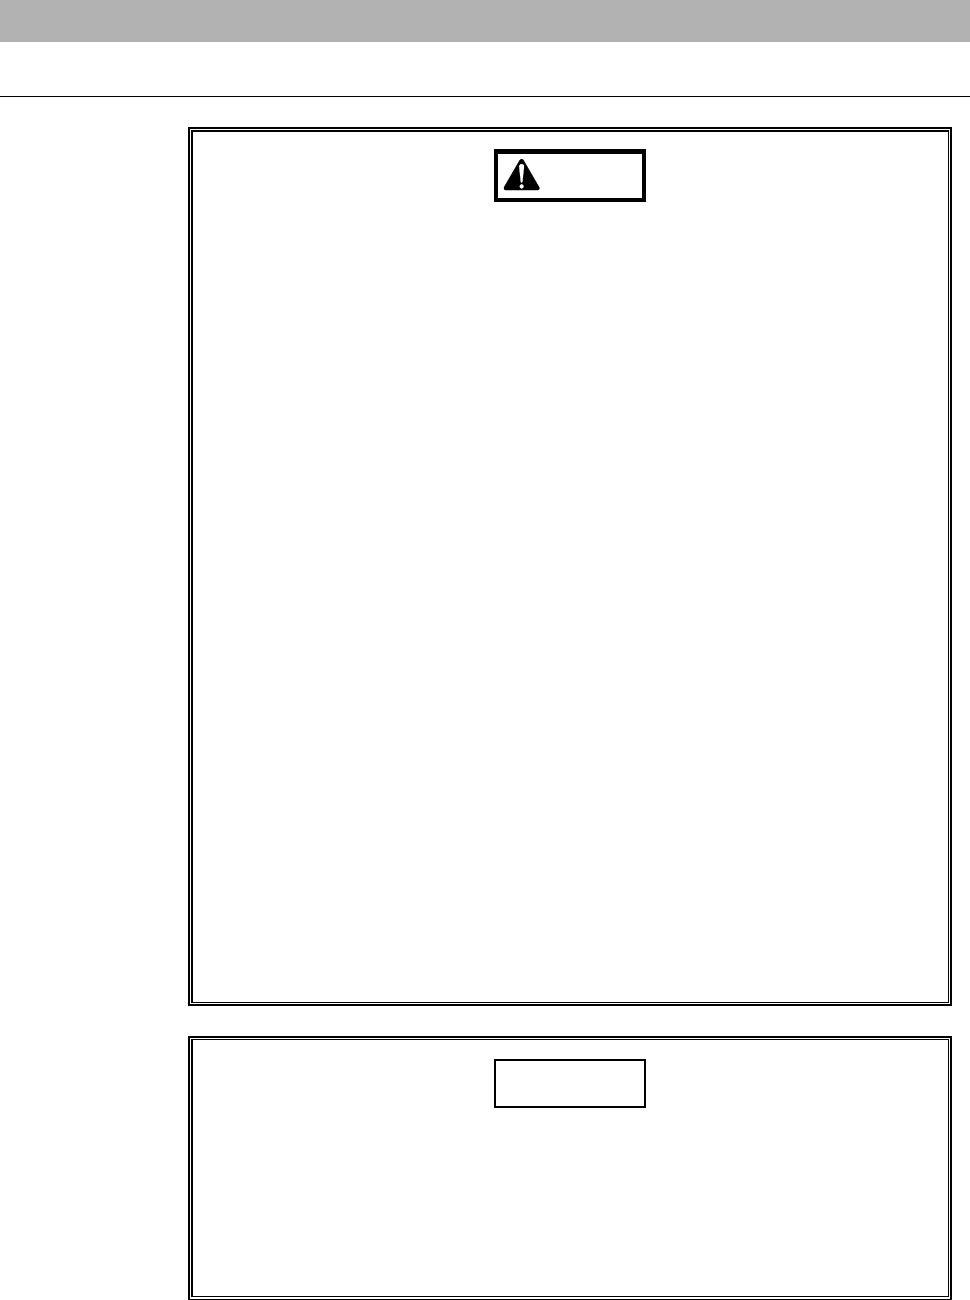
1
Insert the maintenance key into the maintenance switch. The
maintenance key is placed under maintenance personnel control.
Maintenance switch
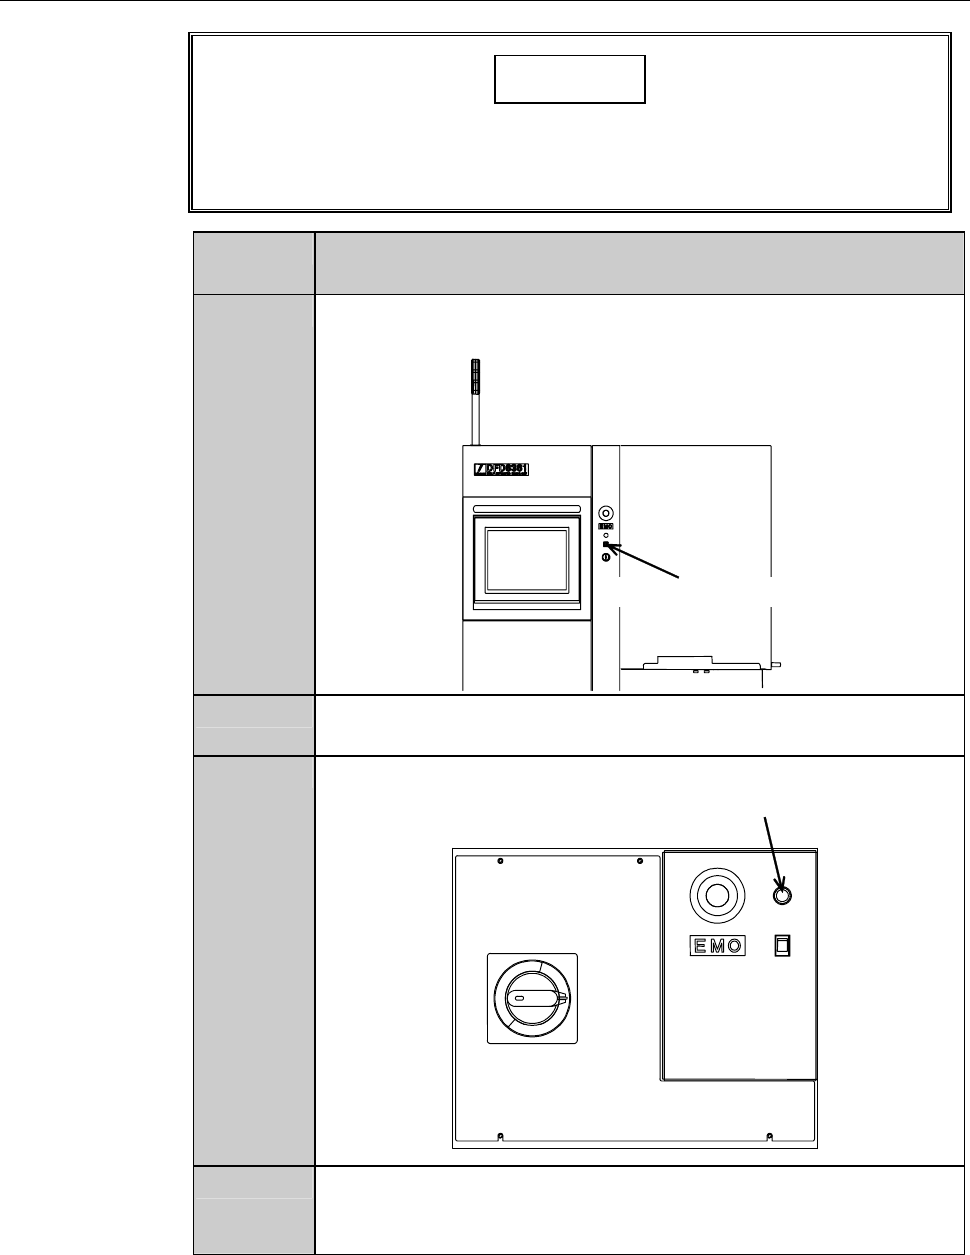
2
Rotate the maintenance key clockwise and placed in the
OVERRIDE position.
3
While pressing the override button, open the splash cover.
Override button
4
Turn the touch panel to the position where the operator can
control the touch panel with standing at the normal working
position.
C-17
Procedures for executing conditioning (Continued)
Step No. Do This
5
Mount the conditioning jig on the chuck table for dressing.
6
Move the Z-axis to the location shown below by using the axis
operation button.
Conditioning jig
Conditioning chip
Flange/Wheel mount
7
Using the axis operation button, move the Y-axis to the location
where the conditioning chip touches the flange or wheel mount
end face lightly.
8
Turn ON the vacuum system by pressing the <C/T Vacuum>
button to secure the conditioning jig.
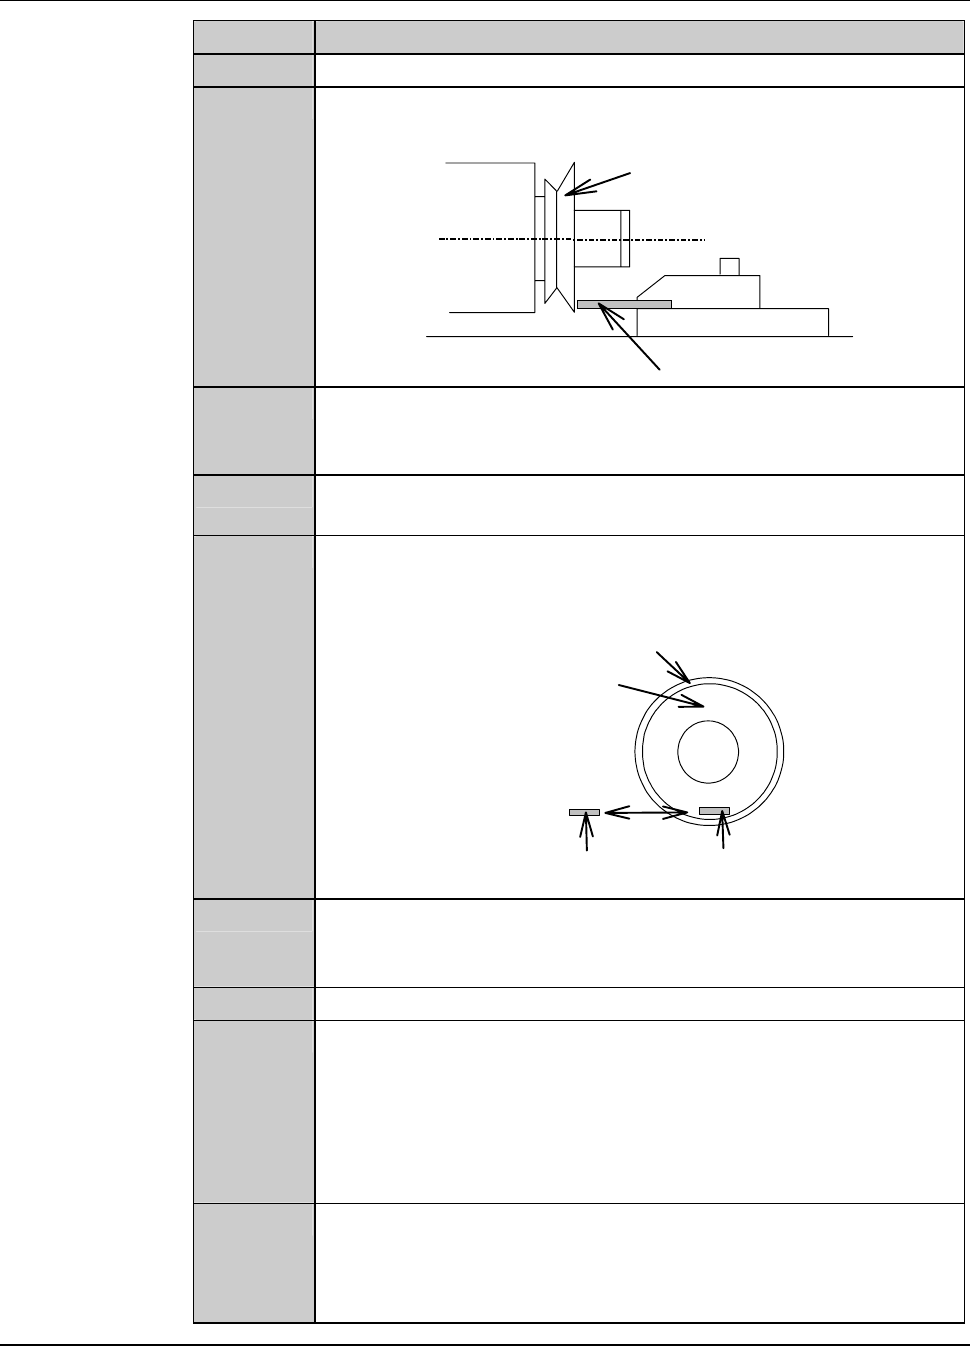
9
Move the X-axis to the conditioning start position shown below.
- The resultant axis position setup provides the conditioning start
position.
End face
Conditioning start
position
Conditioning chip
Flange/Wheel mount
10
Check the value of [X-stroke] on the FLANGE DRESSING
screen [screen 7.1] and make sure that the conditioning jigs do
not collide against the wheel cover nozzle.
11
Close the splash cover.
12
Press the <START> button.
- The spindle starts rotating to automatically initiate a
conditioning operation.
- The display goes back to the CONDITIONING IN PROGRESS
screen [screen 7.1.1].
- During a pause, the X-axis is at the conditioning start position.
13
When the operation has been executed the pre-selected number
of times, the spindle stops.
- The display goes back to the FLANGE DRESSING screen
[screen 7.1].
Continued in the next section.