DFD6361-Maintenance.pdf - 第485页
E-49 3-1-2. Cl eaning t he w ater c ase interi or Procedur es for cleani ng the water case i nterior W ARNING If an att empt is ma de to rem ove broken w orkpiece or clean th e work area w ith bare hands, your fingers ma…
E-48
Procedures for cleaning the water case (Continued)
Step No. Do This
6
With a cloth moistened with neutral detergent, wipe off any dirt
and water from the following sections.
- Around the chuck table
- Around the water case
- Splash cover inner surface
- Around the Z1- and Z2-axis spindles
- Wheel cover
- Microscope section cover
Clean thoroughly the wheel cover and splash cover front face
especially, because they are usually heavily contaminated with
the cutting particles or so on.
7
Remove water from the chuck table upper surface by blowing air
over it.
8
With a cloth moistened with alcohol, wipe clean the metal
portion on the upper surface of the chuck table, and blow air over
it to remove water.
9
If the upper surface of the table is soiled, scratched, burred or
otherwise flawed, smooth it out with a fine-grained oilstone.
10
Close the splash cover and arm section cover.
Continued in the next section.
E-49
3-1-2. Cleaning the water case interior
Procedures for cleaning the water case interior
WARNING
If an attempt is made to remove broken workpiece or clean the work
area with bare hands, your fingers may be cut, stuck or otherwise
injuredbybrokenworkpiece.Whenyouremovebrokenworkpieceor
clean the work area, use tweezers.
When you clean the work area, be sure to wear protective gloves and
safety goggles.
Before removing broken workpiece or cleaning the work area, make
sure that all axes come to a stop.
Step No. Do This
(Continued from the previous section)
1
Open the splash cover.
2
With a soft brush, clean the left-hand bellows.
- When any workpiece is stuck in the bellows, remove it with
tweezers, clean the affected area with alcohol and attach
waterproofing tape to it for touch-up purposes.
3
When there is a piece of broken workpiece within the left side of
the water case, remove it with tweezers.
E-50
Procedures for cleaning the water case interior (Continued)
Step No. Do This
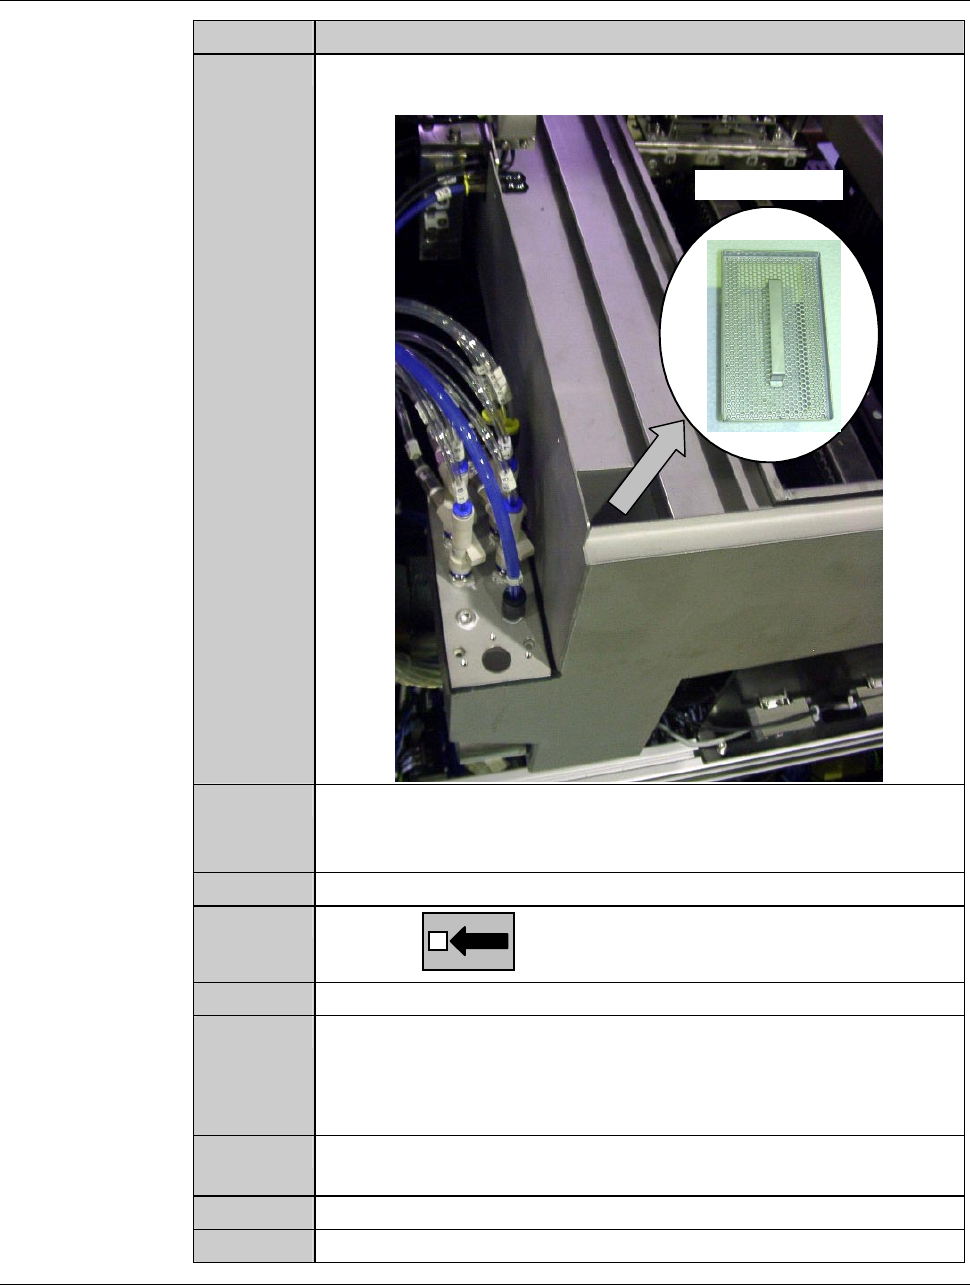
4
Remove the wastes strainer which is located at the rear left side
of the water case.
Wastes strainer
5
Positioning away from the machine, brush dirt and broken
workpiece away from the strainer. Reinstall the strainer in its
original position.
6
Close the splash cover.
7
With the button, move the X-axis to its leftmost end.
8
Open the arm section cover.
9
With a soft brush, clean the right-hand bellows.
- When any workpiece is stuck in the bellows, remove it with
tweezers, clean the affected area with alcohol, and attach
waterproofing tape to it for touch-up purposes.
10
When there is a piece of broken workpiece within the right side
of the water case, remove it with tweezers.
11
Close the arm section cover.
12
Press the <System Initial> button to effect system initialization.