DFD6361-Maintenance.pdf - 第500页
E-64 5-3-2. Greasi ng the linear g uide Procedur es for greasin g the line ar guide W ARNING W he n per f ormi ng the p rocedure set for th in thi s section, y ou have to place your hands in a driv e section. If y o u pe…
E-63
Procedures for preparation of greasing the frame centering axis (Continued)
Step No. Do This
4
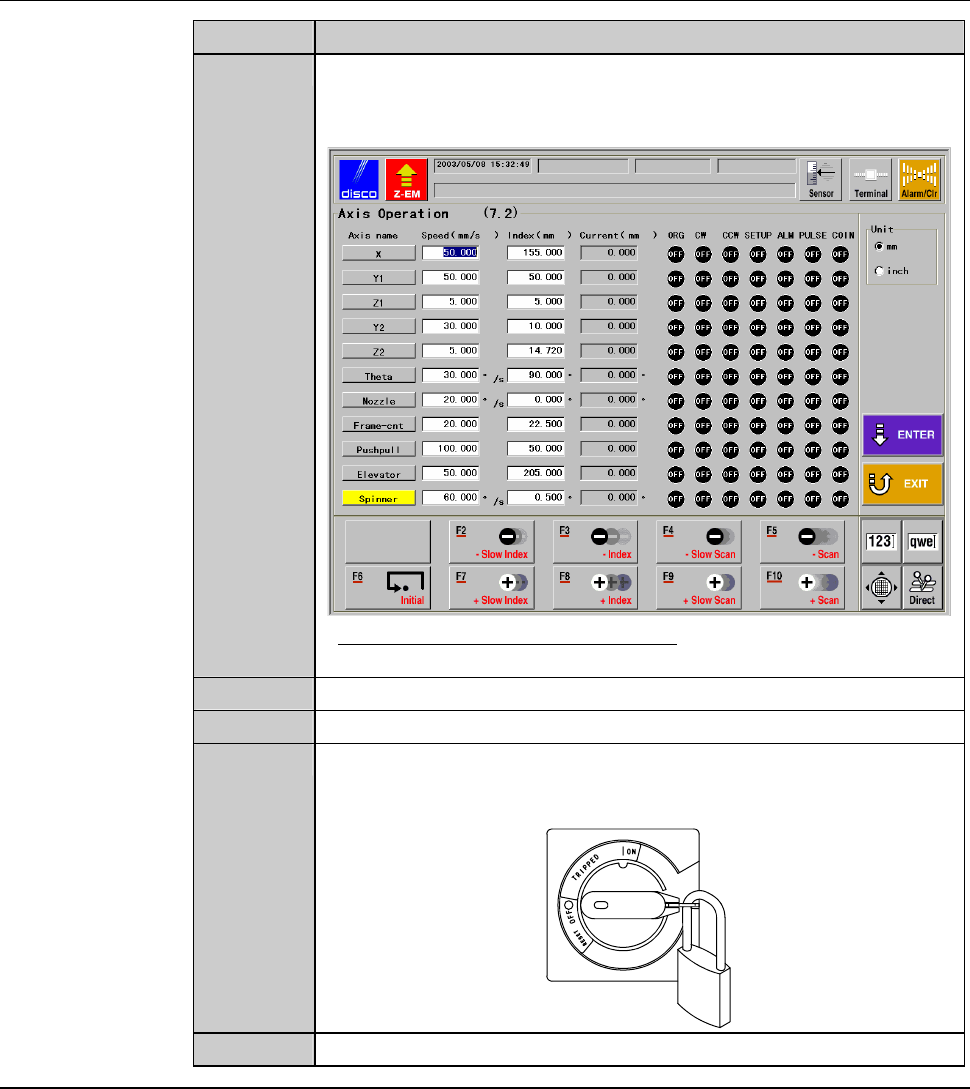
From the ENGINEERING MAINTENANCE screen [screen 7.0],
press the <F2> button.
- The AXIS OPERATION screen then appears.
- For the AXIS OPERATION screen
See the section C-3, [Axis Operation Check].
5
Move the push-pull arm to the rearward.
6
Turn OFF the main switch and remove the key.
7
Turn OFF the circuit breaker on the left of the machine. Lock out
the circuit breaker lever with a padlock or the like.
8
Shut off the facility power supply.
Continued in the next section.
E-64
5-3-2. Greasing the linear guide
Procedures for greasing the linear guide
WARNING
When performing the procedure set forth in this section, you have to
place your hands in a drive section. If you perform maintenance with
the power ON, your fingers or hands may be caught or cut off.
Turn OFF the machine and shut off the facility power supply before
starting this procedure.
Also, ensure that no other person touches the machine during
lubricating.
Step No. Do This
(Continued from the previous section)
1
Remove the elevator axis cover.
- For procedures removing the elevator axis cover;
See the section 5-2 of this chapter, [Greasing the Elevator
Axis]..
2
Open the front arm section cover.
3
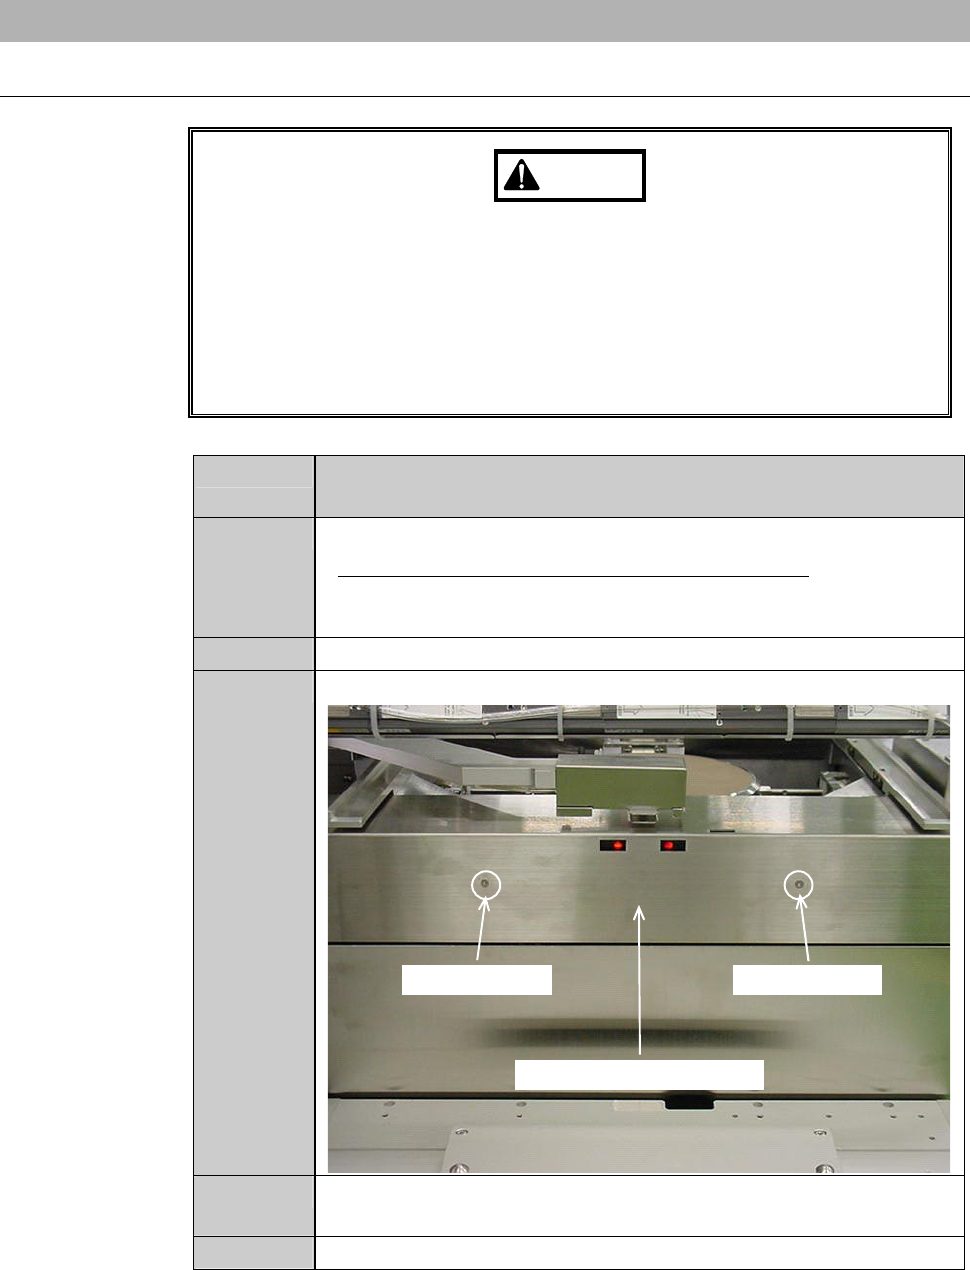
Remove the retaining screws of the frame centering axis cover.
Retaining screw
Frame centering axis cover
Retaining screw
4
Pull the frame centering axis cover to the direction of the front of
the machine, and then remove the cover.
5
Open the front arm section cover.
E-65
Procedures for greasing the linear guide (Continued)
Step No. Do This
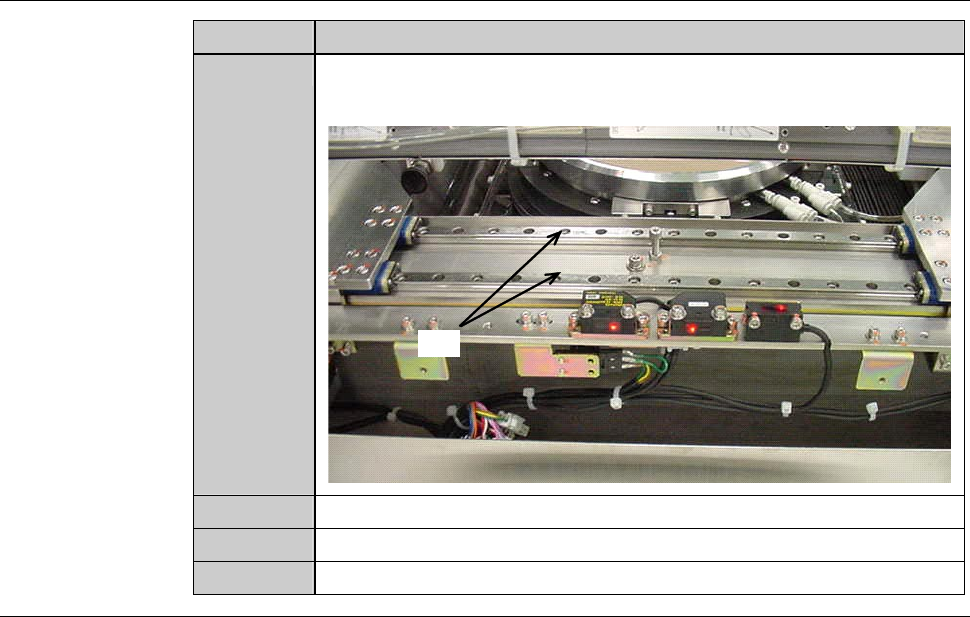
6
With a lint-free cloth, wipe off the dirty grease on the rail of the
front linear guide.
Rail
7
With a spatula, apply grease to the rail.
8
Close the front arm section cover.
9
Reinstall the frame centering axis cover to its original position.
Continued in the next section.