DFD6361-Maintenance.pdf - 第518页
E-82 6-2-1. Prep aration of greasi ng the X-axis Procedur es for prep aration of gr easing the X -axi s Step No. Do This 1 Press the <Sy stem Initial> button to effec t system initialization. 2 With the button, mov…
E-81
Before greasing
Have on hand the following tools before starting greasing.
For the MSDS;
See the section G-2, [Material Safety Data Sheet (MSDS)].
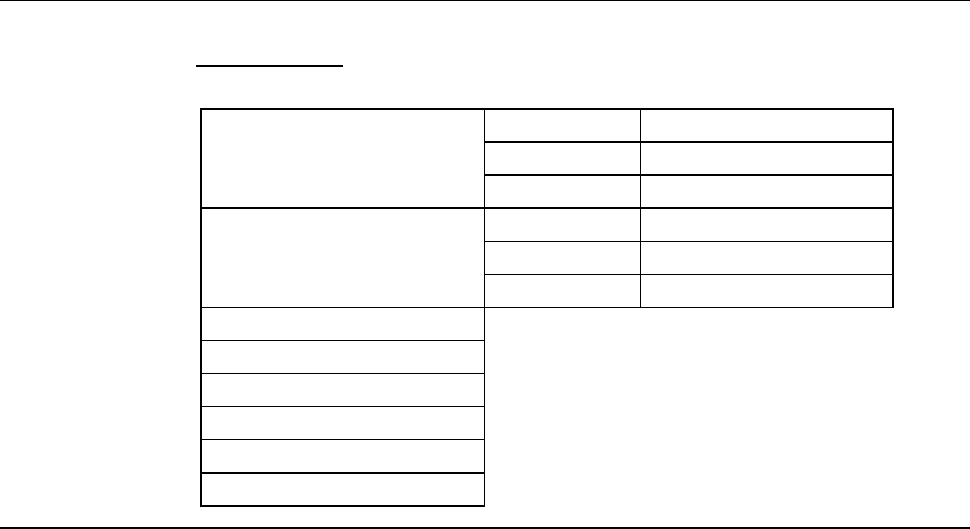
Grease Name AFC grease
Maker THK
Part No. MOELJ007
Grease gun unit Name MG-70
Maker THK
Part No. MOELJ006
Lint-free waste
Spatula (resin)
Flashlight
Protective gloves
3mm Allen wrench
Phillips screwdriver
E-82
6-2-1. Preparation of greasing the X-axis
Procedures for preparation of greasing the X-axis
Step No. Do This
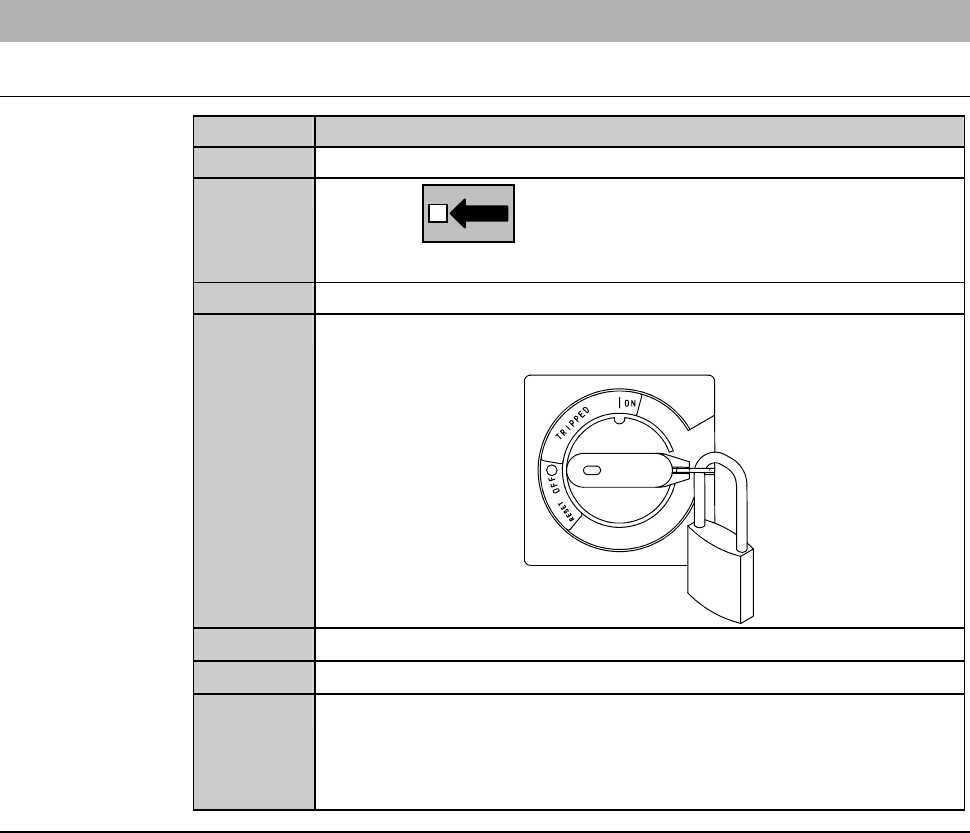
1
Press the <System Initial> button to effect system initialization.
2
With the button, move the X-axis to the position
about 300 mm away from the left end.
3
Turn OFF the main switch and then remove the key.
4
Turn OFF the circuit breaker. Lock out the circuit breaker lever
with a padlock or the like.
5
Shut off the facility power supply.
6
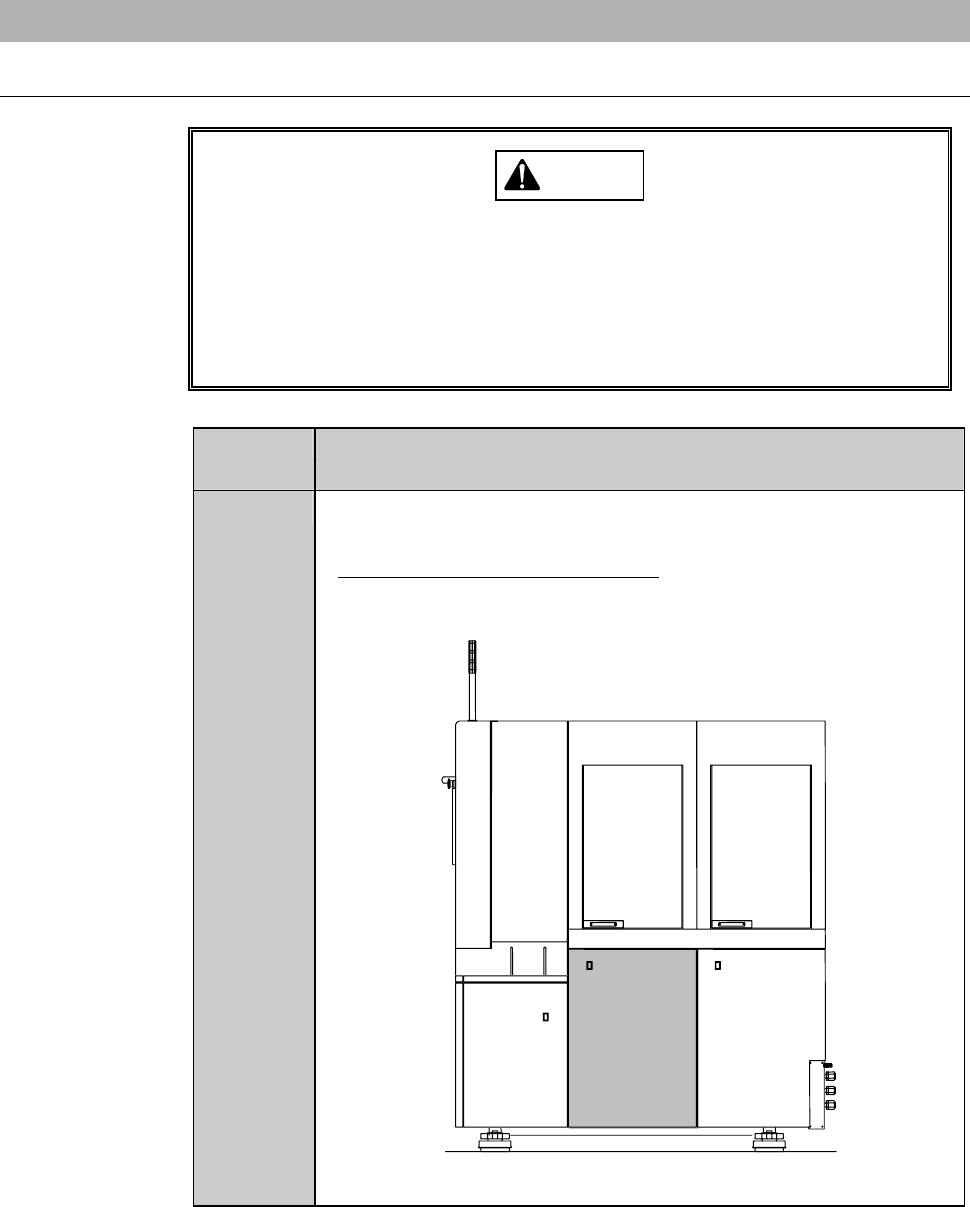
Open the splash cover and front arm section cover.
7
Make sure that there is no water in the water case.
If there is any water in the water case, let dry completely. Also,
water in the bellows section must be wiped away with a lint-free
cloth.
Continued in the next section.
E-83
6-2-2. Cleaning the right-hand X-axis and its periphery
Procedures for cleaning the right-hand X-axis and its periphery
CAUTION
When you perform maintenance with the outer cover removed,
observe the following precaution. If you stand the removed outer
cover against the machine, you may receive injury by the cover if it is
toppled by the earthquake or like that.
After taking off the outer cover for maintenance purposes, store it
sufficiently away from the working area.
Step No. Do This
(Continued from the previous section)
1
Remove the cover [D]. Then store it sufficiently away from the
working area.
- For the cover removal procedure;
See the section B-2-2, [Removing the Machine Outer Cover and
Status Indicator] of the Installation Manual.
[D]
RIGHT SIDE