DFD6361-Maintenance.pdf - 第559页
E-123 6-7-3. Greasi ng the rear of the Y-a xis Procedur es for greasin g the rear of t he Y-axi s Step No. Do This (Continued from the previous section) 1 Insert the grease gun into t he grease nippl es located at the t …
E-122
6-7-2. Cleaning the front and rear edge of the Y-axis
Procedures for cleaning the left and right edge of the Y-axis
Step No. Do This
(Continued from the previous section)
1
Turn ON the facility power source.
2
Open the circuit breaker lever lockout and then turn ON the
circuit breaker.
3
Insert the key into the main switch and then turn ON the main
switch.
4
Press the <System Initial> button to effect system initialization.
5
With the button, move the Y1-axis until it stops at the
front end.
6
From the ENGINEERING MAINTENANCE screen [screen 7.0],
press the <F2> button.
- The AXIS OPERATION screen then appears.
7
Move the Y2-axis to the right so that the tip of the Z2-axis
spindle comes to around the center of the X-axis.
8
Turn OFF the main switch and then remove the key.
9
Turn OFF the circuit breaker at the rear of the machine, and then
lock out the circuit breaker lever with a padlock or the like.
10
Shut off the facility power supply.
11
Remove the partition (left). Then store it sufficiently away from
the working area.
- For the removal procedures of the partition (left);
See the section 1-2-3-2 of this chapter, [Removing the partition
(left)].
12
With a lint-free cloth, wipe off the dirty grease on the rails and
ball-bearing leadscrew of the linear guide section, which is
located the rear side of Y1-axis.
13
With a lint-free cloth, wipe off the dirty grease on the rails and
ball-bearing leadscrew of the linear guide section, which is
located the front side of Y2-axis.
Continued in the next section.
E-123
6-7-3. Greasing the rear of the Y-axis
Procedures for greasing the rear of the Y-axis
Step No. Do This
(Continued from the previous section)
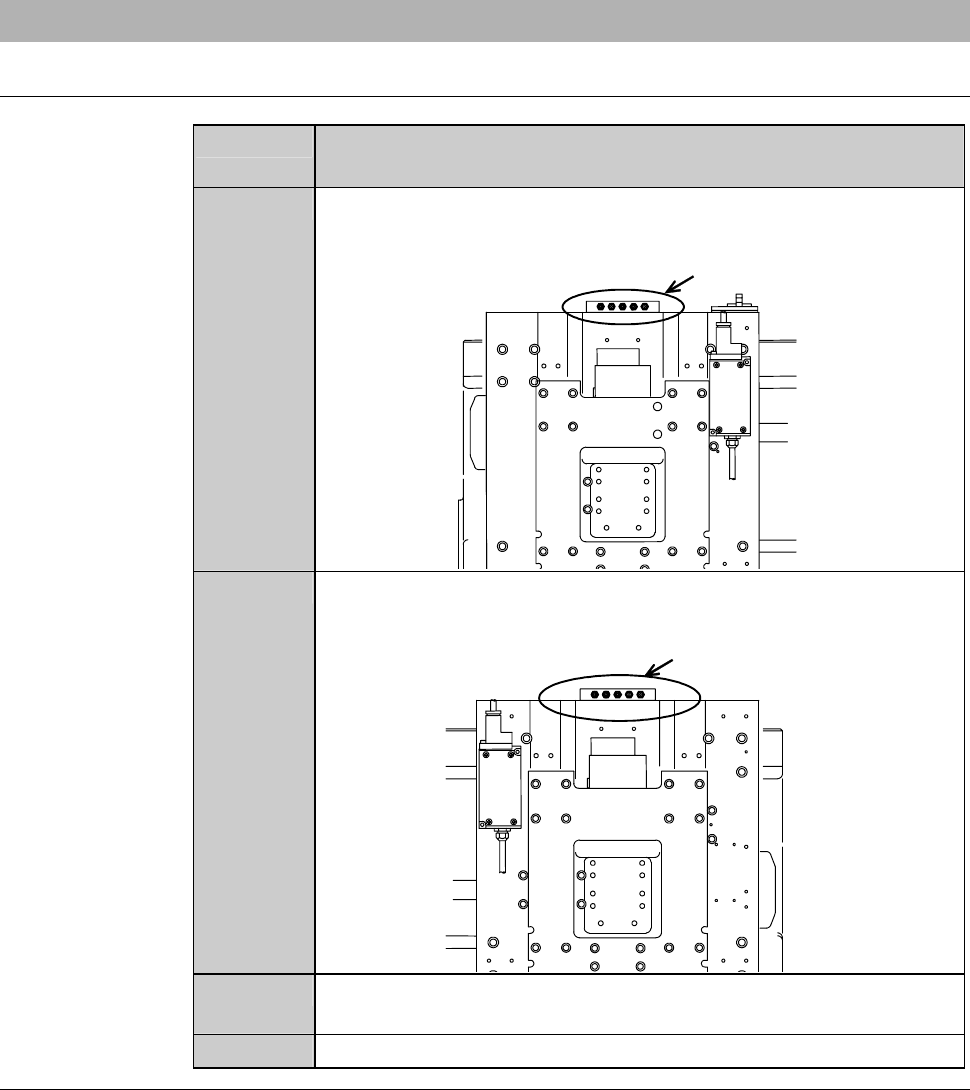
1
Insert the grease gun into the grease nipples located at the top of
the Y1-axis base, and inject grease equally to five nipples.
Grease nipples of Y1-axis
2
Insert the grease gun into the grease nipples located at the top of
the Y2-axis base, and inject grease equally to five nipples.
Grease nipples of Y2-axis
3
With a lint-free cloth, wipe off any grease that protrudes from the
slider.
4
Reinstall the partition (left).
Continued in the next section.

E-124
6-7-4. Completion of greasing the Y-axis
Procedures for completion of greasing the Y-axis
Step No. Do This
(Continued from the previous section)
1
Turn ON the facility power source.
2
Open the circuit breaker lever lockout and then turn ON the
circuit breaker.
3
Insert the key into the main switch and then turn ON the main
switch.
4
Press the <System Initial> button to effect system initialization.
5
On the AXIS OPERATION screen [screen 7.2], shuttle Y1- and
Y2-axis between the front and rear end at least three times to
apply the grease uniformly to the entire axis.