DFD6361-Maintenance.pdf - 第570页
E-134 6-8-5. Com pletion of greasi ng the Z -axis Procedur es for compl etion of g reasing the Z-ax is Step No. Do This (Continued from the previous section) 1 Turn ON the facility power source. 2 Open the circuit breake…
E-133
6-8-4. Greasing the Z2-axis
Procedures for greasing the Z2-axis
WARNING
When you perform the procedure set forth in this section, you have to
place your hands in a drive section. If you perform maintenance with
the power ON, your fingers or hands may be caught or cut off.
Turn OFF the machine and shut off the facility power supply before
starting this procedure.
Also, ensure that no other person touches the machine during
lubricating.
Step No. Do This
(Continued from the previous section)
1
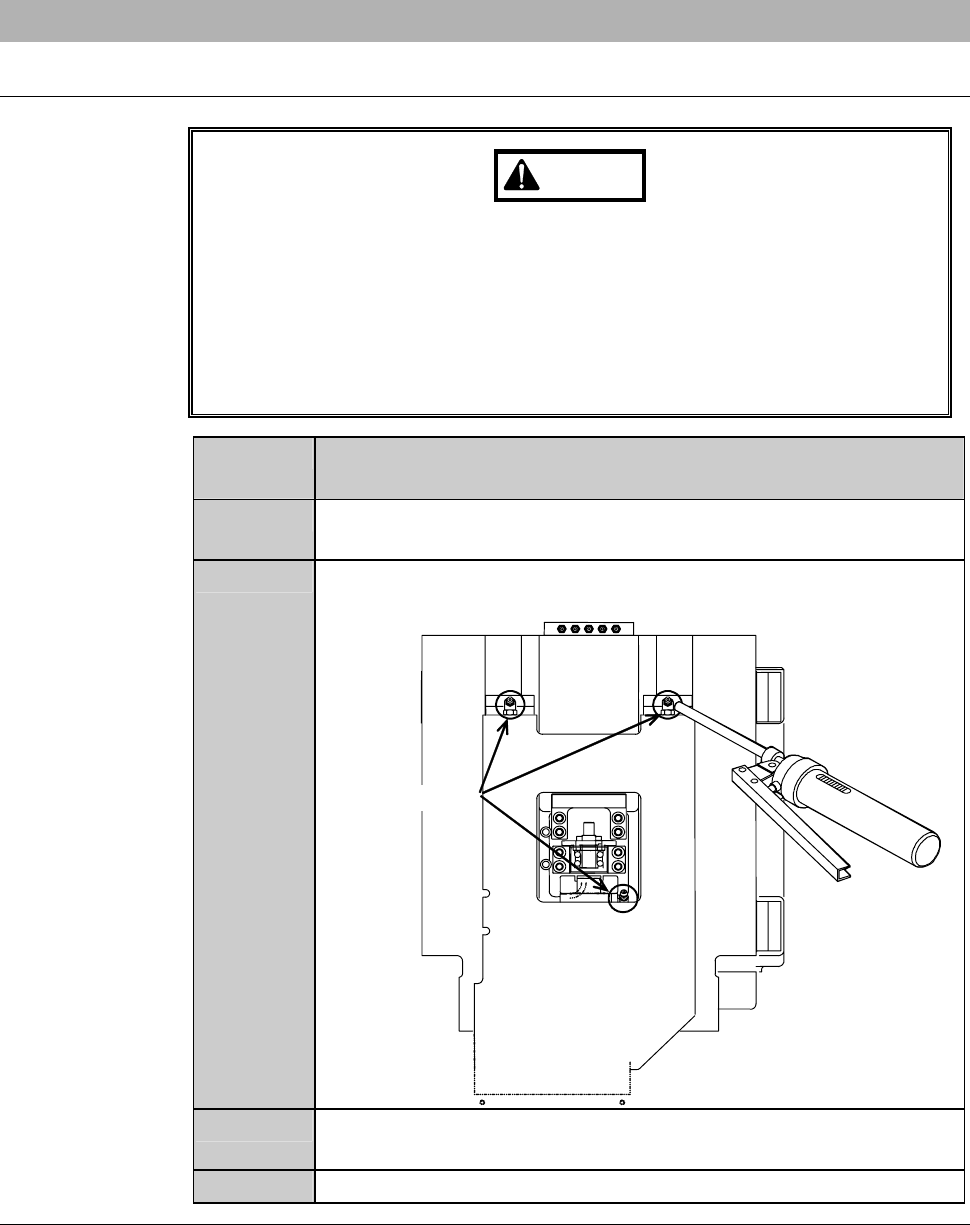
With a lint-free cloth, wipe off the dirty grease on the rails and
ball-bearing leadscrew of the Z2-axis linear guide.
2
Insert the grease gun into the grease nipples of the Z2-axis and
inject grease. Note that there are three grease nipples.
Grease nipples
Grease gun
3
With a lint-free cloth, wipe off any grease that protrudes from the
slider.
4
Reinstall the partition (left).
Continued in the next section.

E-134
6-8-5. Completion of greasing the Z-axis
Procedures for completion of greasing the Z-axis
Step No. Do This
(Continued from the previous section)
1
Turn ON the facility power source.
2
Open the circuit breaker lever lockout and then turn ON the
circuit breaker.
3
Insert the key into the main switch and then turn ON the main
switch.
4
Press the <System Initial> button to effect system initialization.
5
On the AXIS OPERATION screen [screen 7.2], shuttle the Z1-
and Z2-axis between the upper and lower end at least three times
to apply the grease uniformly to the entire axis.
F-1
F. CONSUMABLE PARTS REPLACEMENT
Contents of this chapter
This chapter describes consumable parts replacement by their replacement intervals.
Section
No.
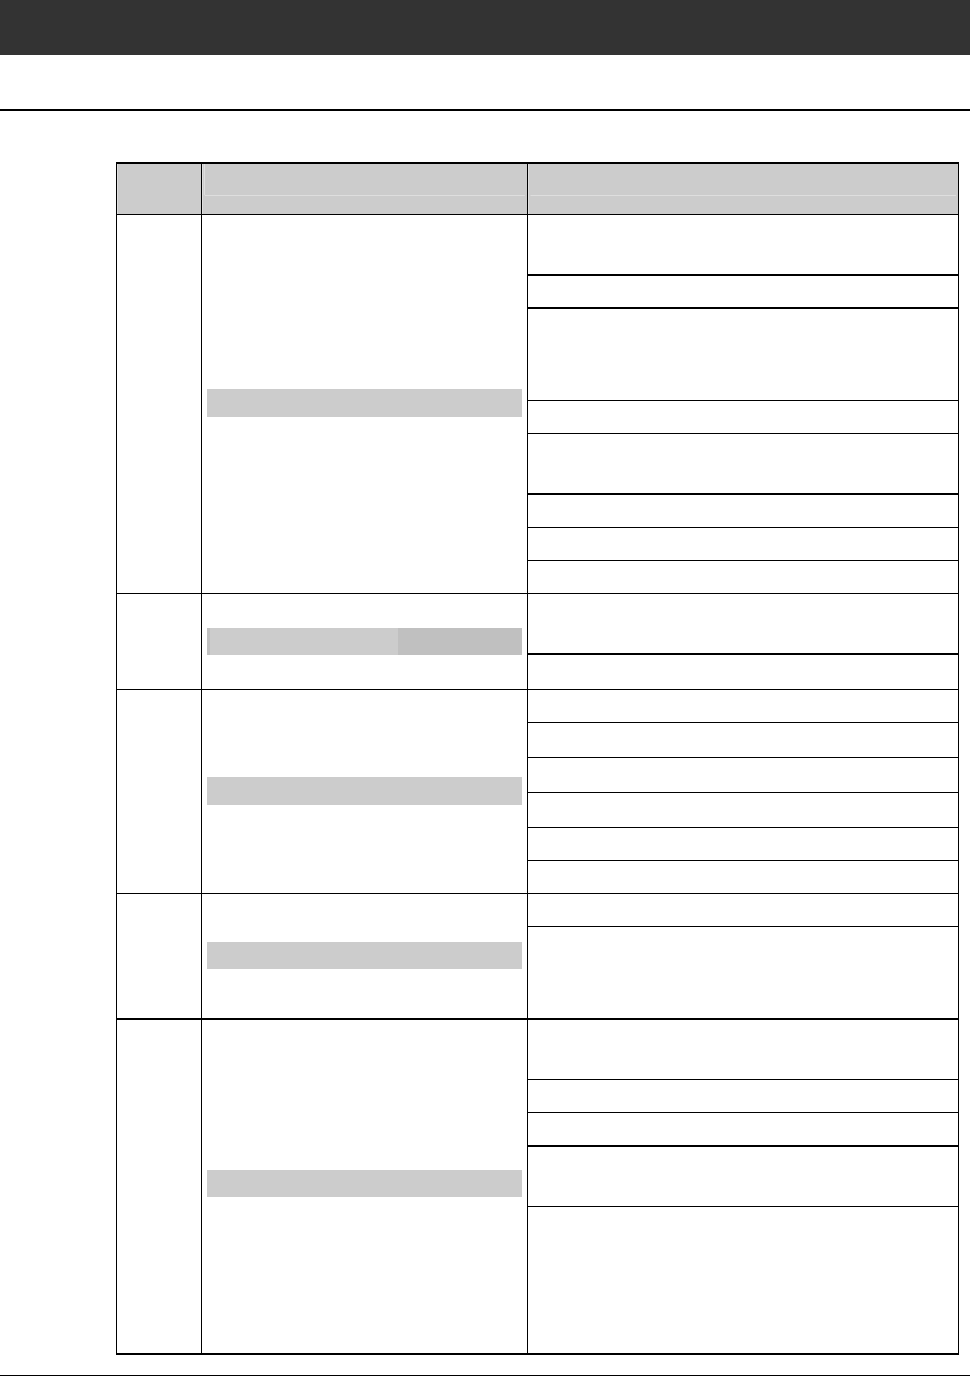
Title Contents
Replacing the air clean unit consumable
part
Replacing the halogen lamp
Replacing the microscope LED light
(Contact your nearest Disco Service
Office.)
Replacing the spindle carbon brush
Replacing the spray tip of the spinner
section
Replacing the pad of the upper arm section
Replacing the pad of the lower arm section
1
Consumables to Be Replaced at
365-Day Intervals
(Recommended)
Replacing the spinner section roll cover
Replacing the spindle coolant water flow
rate sensor
2
Consumables to Be Replaced at
700-Day Intervals
(Recommended)
Replacing the solenoid valve
Replacing the bellows
Replacing the waterproof cover of θ-axis
Replacing the O-ring for θ-axis
Replacing the V-ring for θ-axis
Replacing the chuck table center ring
3
Consumables to Be Replaced at
1000-Day Intervals
(Recommended)
Replacing the spinner table O-ring
Replacing the flowmeter
4
Consumables to Be Replaced at
1800-Day Intervals
(Recommended)
Replacing the hard disk drive
(Contact your nearest Disco Service
Office.)
Replacing the spinner high- pressure pump
consumable part
Replacing the fluorescent lamp
Replacing the UV irradiation lamp
Replacing the controller of the wheel
coolant water
5
Consumables Whose
Replacement
Intervals Differ
Depending on the Machine Use
Conditions
Replacing the circuit board of the
electrical system due to life end of its
battery
(Contact your nearest Disco Service
Office.)