DFD6361-Maintenance.pdf - 第647页
F-77 Procedur es for re moving the fra me clu mp (Conti nued) Step No. Do This 7 Wear protecti ve gloves. 8 Put a mark clip on the tube to g ive a guide for installation position of Y-type joint. OPEN CLOSE OPEN CLOSE Y-…
F-76
3-2-2. Removing the frame clump
Procedures for removing the frame clump
Step No. Do This
(Continued from the previous section)
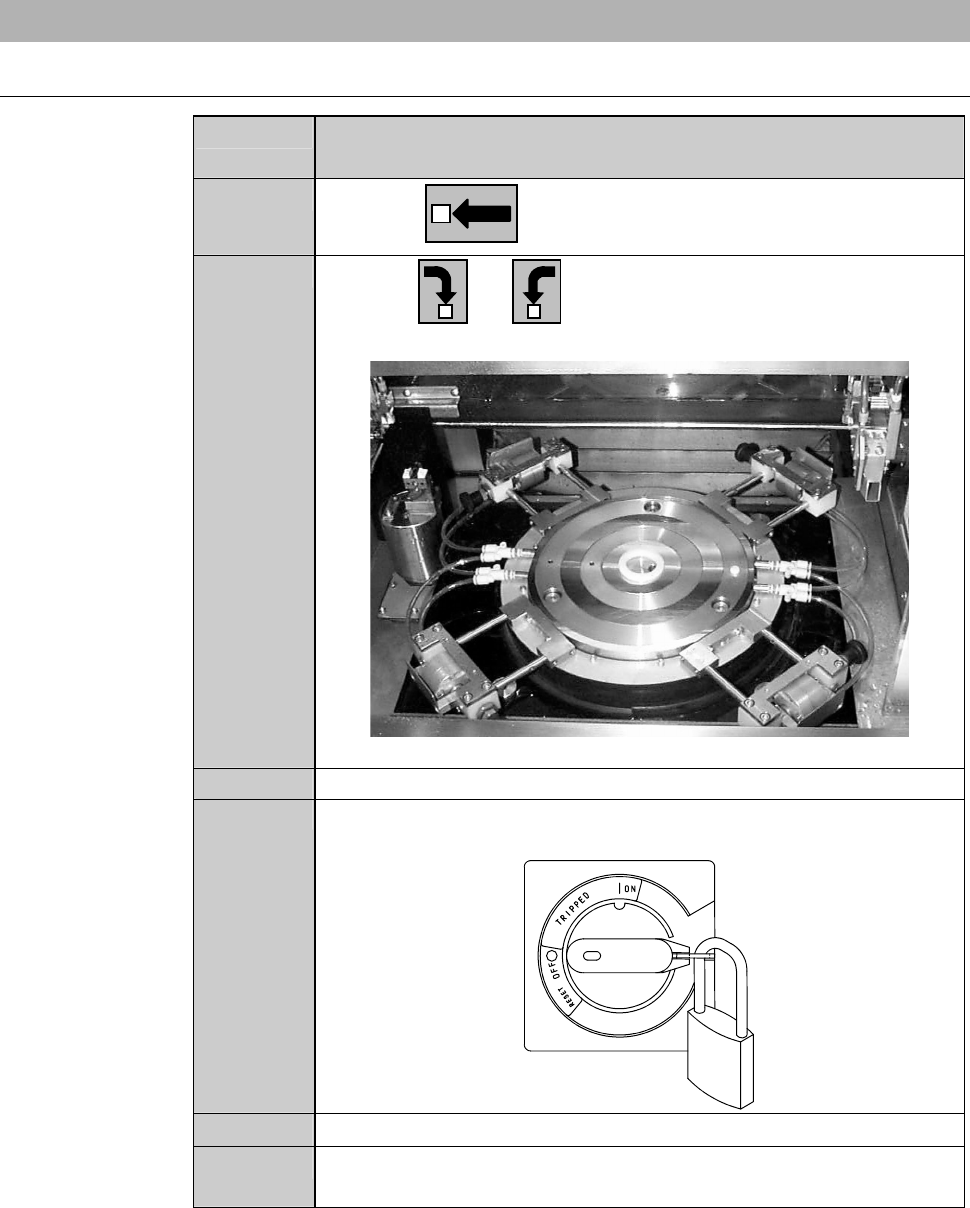
1
Press the button to move the X-axis to the left.
2
With the or button, turn the chuck table so that its
orientation will be as shown below.
Machine left side
3
Turn OFF the main switch and then pull out the key.
4
Turn OFF the circuit breaker. Lock out the circuit breaker lever
with a padlock or the like.
5
Shut off the facility power supply.
6
Close the facility main valves of air, wheel coolant water and
spindle coolant water.
F-77
Procedures for removing the frame clump (Continued)
Step No. Do This
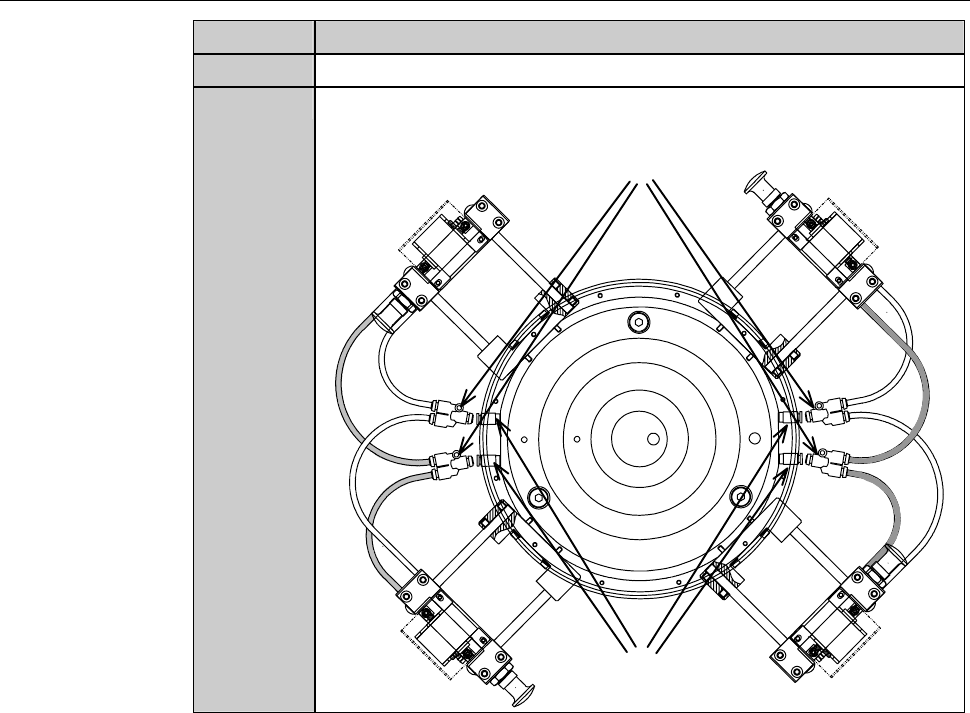
7
Wear protective gloves.
8
Put a mark clip on the tube to give a guide for installation
position of Y-type joint.
OPEN
CLOSE
OPEN
CLOSE
Y-type joint
Parallel joint
F-78
Procedures for removing the frame clump (Continued)
Step No. Do This
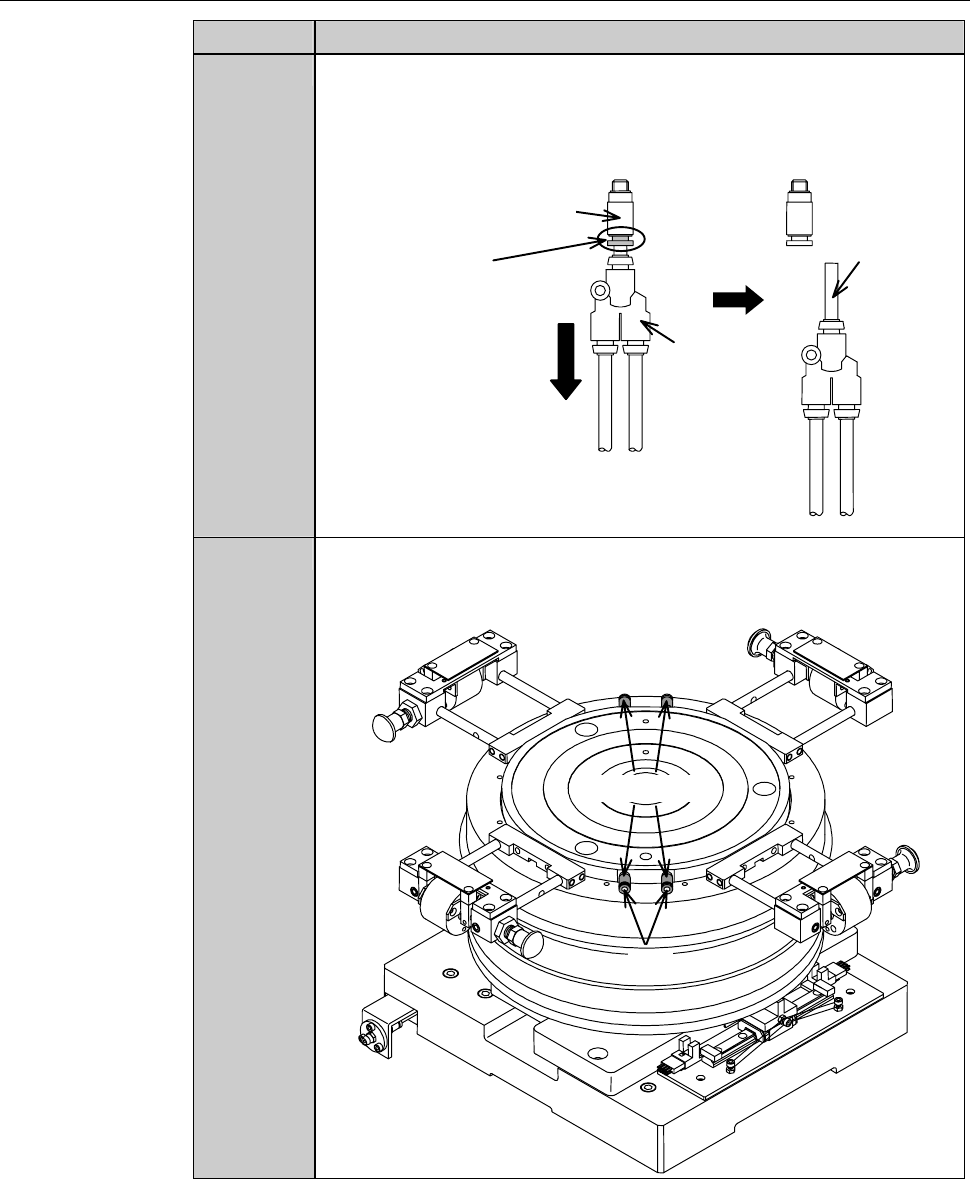
9
Hold the Y-type joint and pull out the tube while pushing the end
of the parallel joint toward the chuck table, as shown below.
- The tube is got out of the outlet of the parallel joint.
- There are four parallel joints.
Tube
1. While
pusing here
2. Hold Y-type joint
and pull out its tube.
Parallel joint
Y-type
j
oint
10
Insert the Allen wrench (2.5 mm) into the hole of the parallel
joint and rotate it counterclockwise. Then the parallel joint comes
off.
Hole
Parallel joint