DFD6361-Maintenance.pdf - 第655页
F-85 Procedur es for compl etion of r eplacing the waterpr oof cover /O-ring/V- ring (C ontinued) Step No. Do This 4 Reinstall the tubes o f the Y-type joint, being ca reful with their original positions. OPEN CLOSE OPEN…
F-84
Procedures for completion of replacing the waterproof cover/O-ring/V-ring (Continued)
Step No. Do This
(Continued from the previous section)
1
Make sure that there is no water leakage inside the machine.
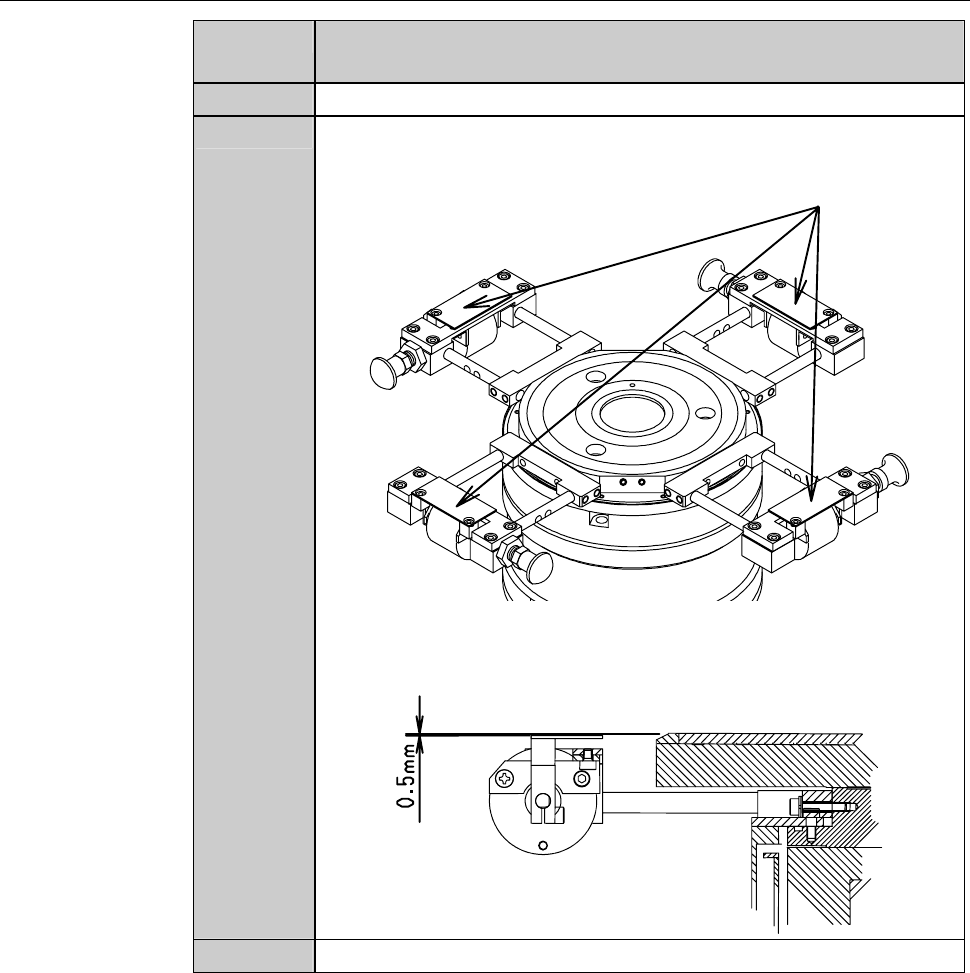
2
Reinstall the frame clumps, being careful with their original
positions.
Frame clump
- Mount the frame clump so that its top surface comes 0.5mm
lower than the chuck table top surface.
Chuck table
3
Reinstall the parallel joints to their original positions.
F-85
Procedures for completion of replacing the waterproof cover/O-ring/V-ring (Continued)
Step No. Do This
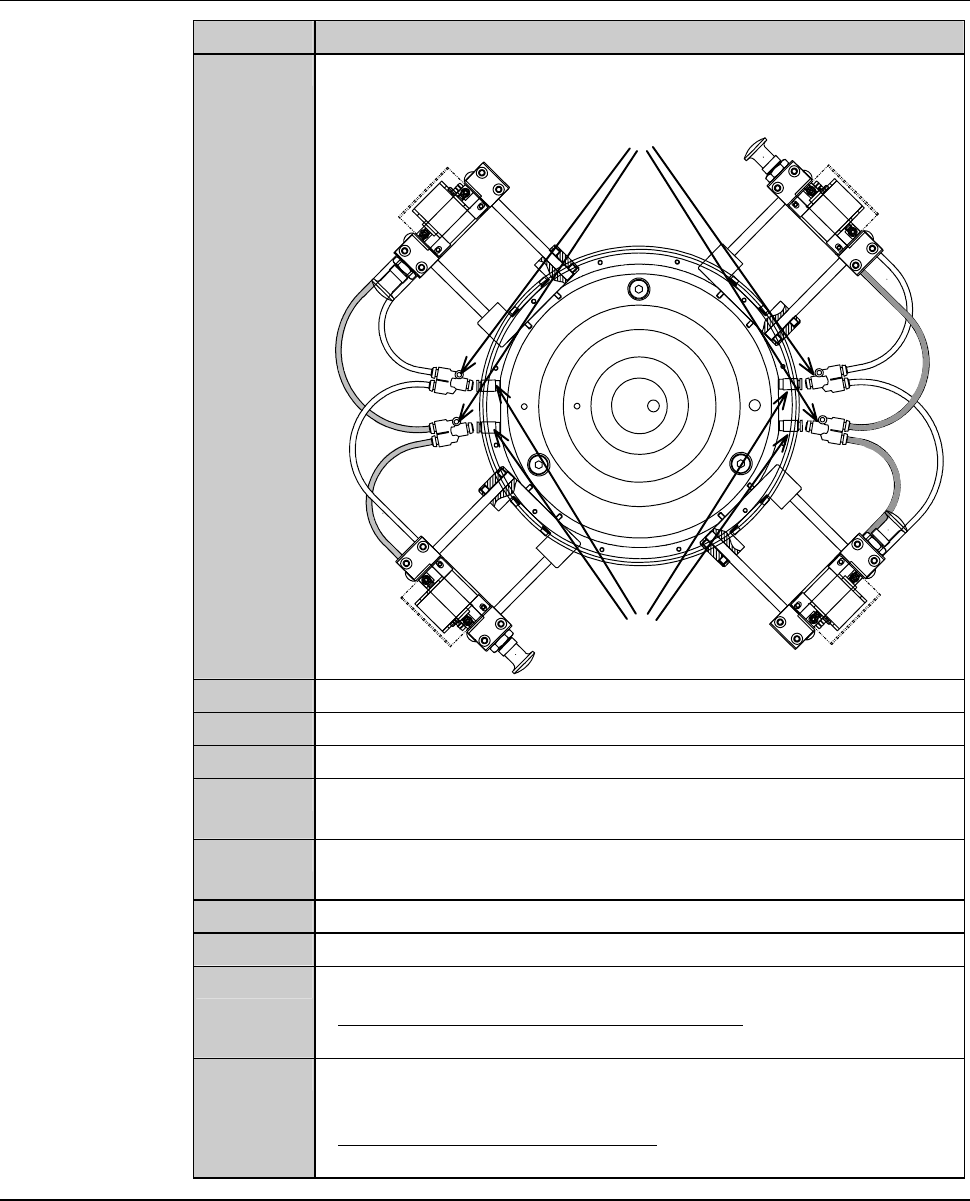
4
Reinstall the tubes of the Y-type joint, being careful with their
original positions.
OPEN
CLOSE
OPEN
CLOSE
Y-type joint
Parallel joint
5
Remove the mark clips attached on the tube.
6
Close the splash cover.
7
Turn ON the facility power source.
8
Open the facility main valves of air, wheel coolant water and
spindle coolant water.
9
Open the circuit breaker lever lockout and turn ON the circuit
breaker.
10
Insert the key into the main switch and turn ON the main switch.
11
Press the <System Initial> button to effect system initialization.
12
Mount the chuck table on the table base.
- For the chuck table installation procedure;
See the section B-1, [Chuck Table Replacement].
13
Start the machine and conduct dummy cutting for more than 30
minutes.
- When there is any water leakage;
Repeat the steps 3-2-1 through 3-2-4 of this chapter.
F-86
3-3. Replacing the Chuck Table Center Ring
Procedures for replacing the chuck table center ring
Step No. Do This
1
From outside of the splash cover, visually make sure that the
spindle is completely stopped.
2
Make sure that there is no water in the water case.
If there is any water in the water case, allow it to thoroughly dry.
Also, water in the bellows section must be wiped away with a lint-
free cloth.
3
Remove the chuck table.
- For the chuck table removal procedure;
See the section B-1, [Chuck Table Replacement].
4
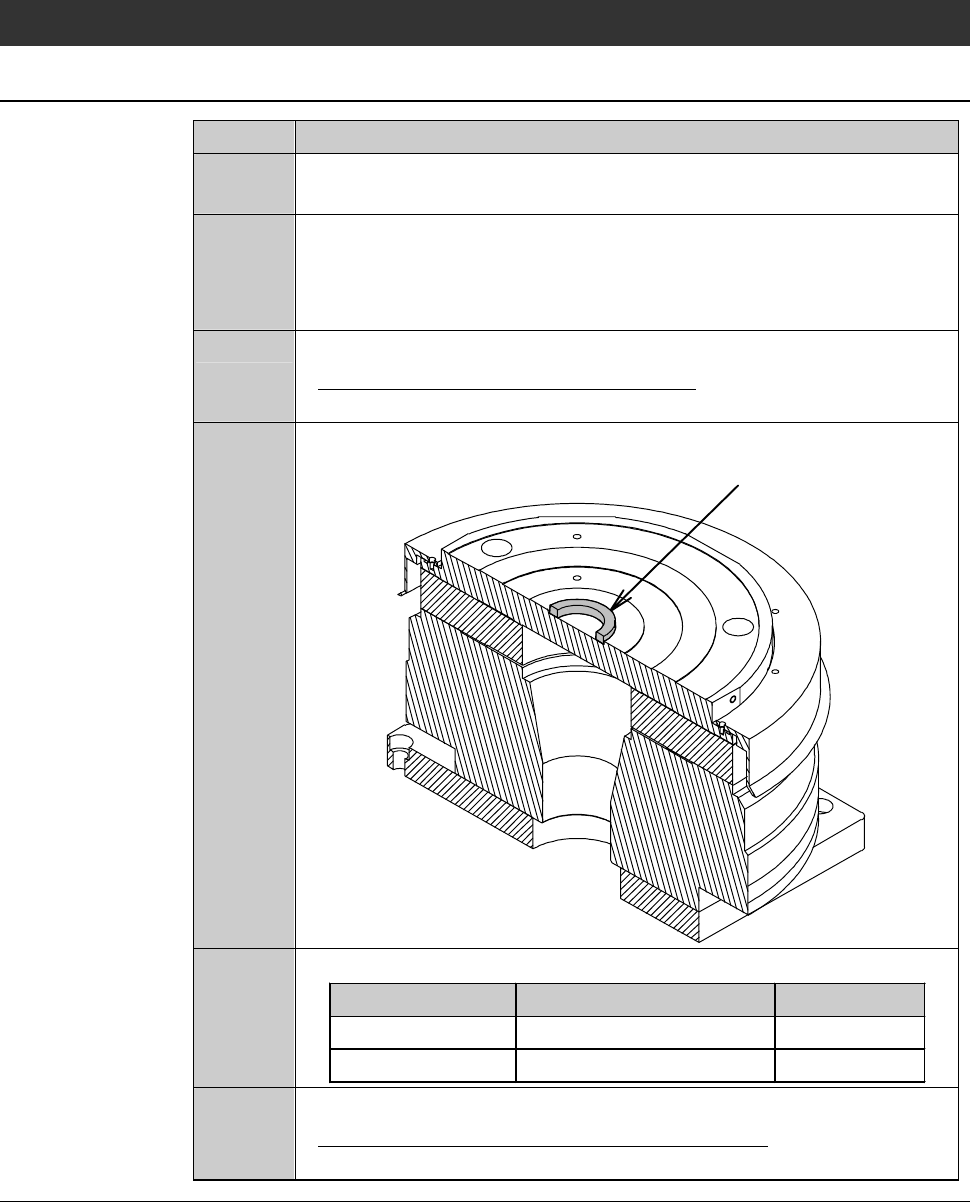
Remove the center ring.
Center ring
5
Install a new center ring.
Model Part Name Part No.
DFD6351 Chuck table center ring MODDX146
DFD6361 Chuck table center ring MOJER029
6
Set the chuck table on the table base.
- For the procedure for securing the chuck table;
See the section B-1, [Chuck Table Replacement].