DFD6361-Maintenance.pdf - 第676页
F-106 5-1-3-2. Replacing the consumable parts Procedur es for replaci ng the consumable par ts Step No. Do This (Continued from the previous section) 1 Remove the wear ring [11] from the piston collar [10]. 2 Replace the…
F-105
Procedures for disassembling the spinner high-pressure pump
Step No. Do This
(Continued from the previous section)
1
Remove the hex nut [25].
2
Pull the end cap [1] and take it out.
3
Remove the cylinder [8].
- Do not touch the cylinder inner surface directly by hand.
4
Remove the lock nut [2].
5
Remove the piston lock nut [9] from the piston rod [13]. In
removal, be careful to keep the piston rod [13] from contact with
the retainer [14], so that they do not receive flaws.
- Since the employed lock nut is a double nut, loosen the two nuts
with two wrenches.
6
Remove the piston collar [10] from the piston rod [13].
7
Remove the piston [12] from the piston rod [13].
Continued in the next section.
F-106
5-1-3-2. Replacing the consumable parts
Procedures for replacing the consumable parts
Step No. Do This
(Continued from the previous section)
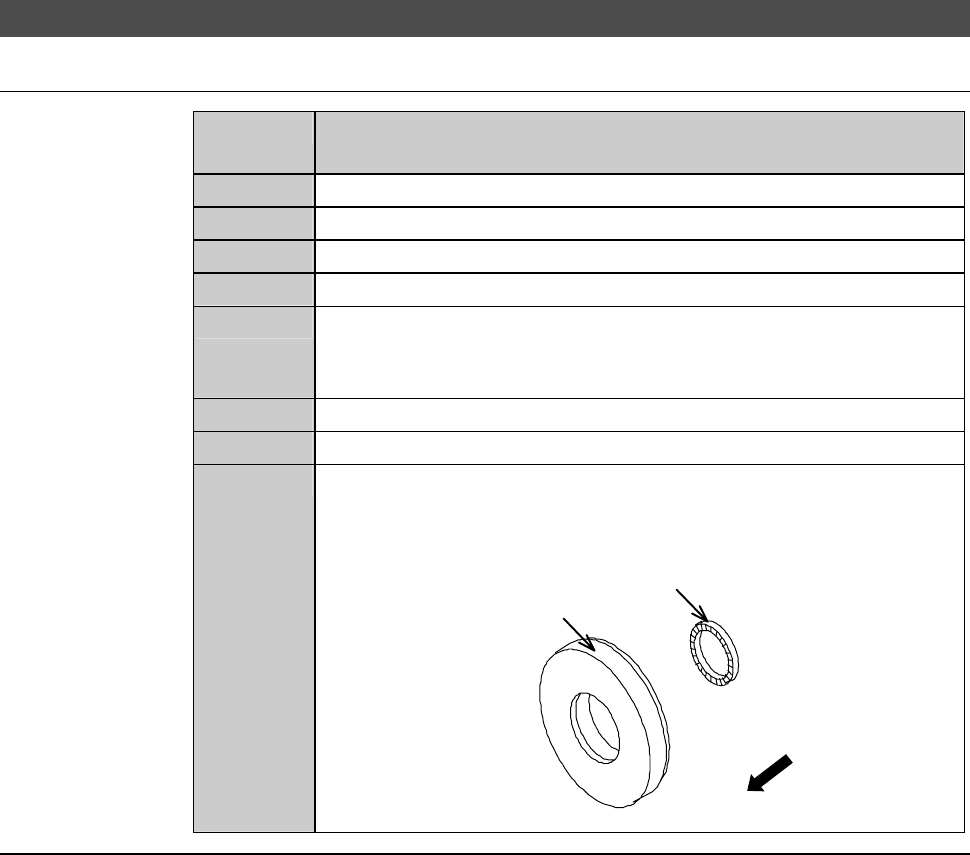
1
Remove the wear ring [11] from the piston collar [10].
2
Replace the wear ring [11] with a new one.
3
Remove the cap seal [31] from the piston [12].
4
Replace the cap seal [31] with a new one.
5
Pull the retainer [14] out of the piston rod [13].
- Make sure to pull the retainer [14] straight out to prevent the
piston rod [13] from being scratched.
6
Remove the backup ring [23] from the retainer [14].
7
Remove the U-packing [33] from the retainer [14].
8
Replace the U-packing [33] with a new one. Attach the U-
packing with its spring side facing upward.
- Mount the U-packing in proper orientation.
[33] U-packing
Upward
[14] Retainer
Continued in the next section.
F-107
5-1-3-3. Assembling the spinner high-pressure pump
Procedures for assembling the spinner high-pressure pump
Step No. Do This
(Continued from the previous section)
1
Apply the methanol or deionized water to the mating surface
between the cap seal [31] and U-packing [33] to improve slip.
2
Mount the backup ring [23] to the retainer [14].
3
Mount the retainer [14] to the piston rod [13].
- Make sure to mount the retainer straight in to prevent the piston
rod [13] from being scratched.
4
Mount the cap seal [31] to the piston [12].
5
Mount the piston [12] to the piston rod [13].
6
Mount the piston collar [10] to the piston rod [13].
7
Mount the piston lock nut [9] to the piston rod [13].
- Since the employed lock nut is a double nut, tighten the two
nuts with two wrenches.
- Tighten the nut horizontally and uniformly.
- In mounting the piston lock nut [9], be careful to keep the
piston rod [13] from contact with the retainer [14], so that they
do not receive flaws.
8
Mount the lock nut [2].
9
Mount the cylinder [8].
- Do not touch the cylinder inner surface directly by hand.
- The inside of the cylinder is non-oil specification. Do not apply
grease.
10
Mount the end cap [1].
11
Tighten and secure the hex nut [25].
Continued in the next section.