00194385-01.pdf - 第34页
Installation of retaining clamp f or lifting axis/alignment of spindle/check of gear fixing for spindle, MT C2 06/2004 Edition 34 2.5 Checking the gear whe el on the spindle 2 2 2 2 : Check that the screws used to fix th…
Installation of retaining clamp for lifting axis/alignment of spindle/check of gear fixing for spindle, MTC2
06/2004 Edition
33
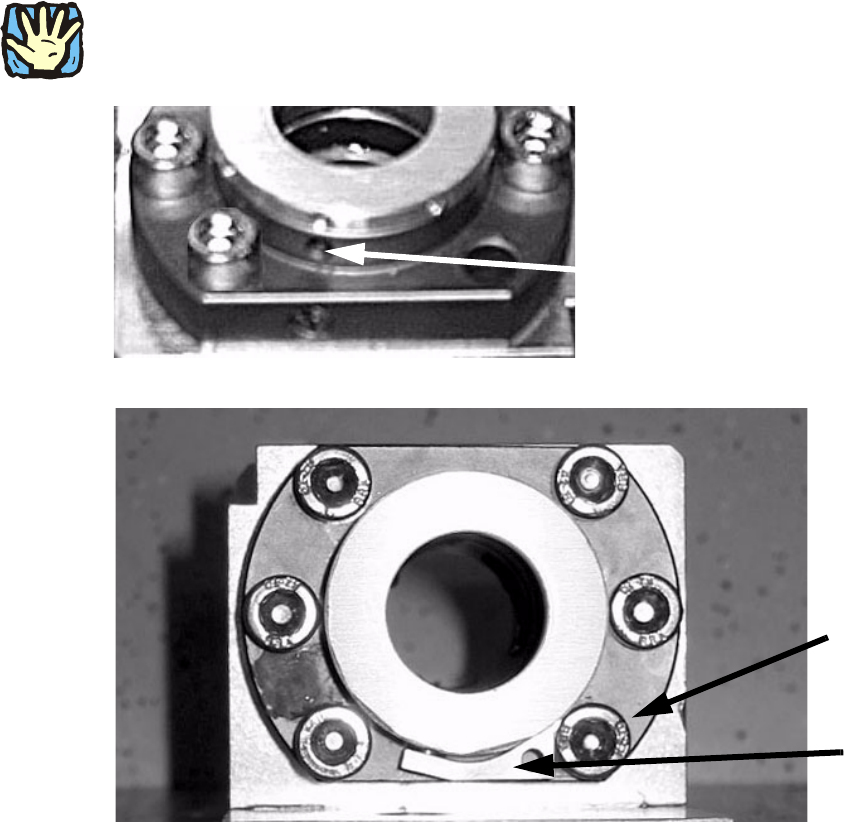
: Guide the pin of the retaining clamp into the flanged nut at the position shown in the picture.
2
Do not introduce into the stripper sleeve. 2
2
2
2
: Fix the retaining clamp using the screw (see top picture).
2
: Line up the docking plate with the marks you made earlier in order to screw in place, then fix
using the six screws.
2
2
2
Retaining
clamp
Hole for the pin of the retaining clamp
Screw

Installation of retaining clamp for lifting axis/alignment of spindle/check of gear fixing for spindle, MTC2
06/2004 Edition
34
2.5 Checking the gear wheel on the spindle
2
2
2
2
: Check that the screws used to fix the gear wheel onto the spindle are seated firmly.
Tighten the screws using a diagonal sequence.
2
2
2
CAUTION DANGER OF TIPPING 2
: Move both tray supplies into the penultimate refill position for the tray supply.
: Crank the MTC up as high as possible to allow better access to the screws.
DO NOT raise the MTC using lifting equipment (such as a fork-lift) and then stand underneath
the MTC to work. 2
2
Check that the screws are seated firmly
and tighten using a diagonal sequence
Installation of retaining clamp for lifting axis/alignment of spindle/check of gear fixing for spindle, MTC2
06/2004 Edition
35
2.6 Aligning the spindle
During the alignment process, it will be necessary to dock the MTC in and out of the placement
machine several times. 2
2
: Carry out a reference run for the MTC2.
It moves right up.
: Remove all the cassettes.
: Move the MTC roughly to the penultimate pick-up position so that the lifting axis is as far as
possible in the bottom position.
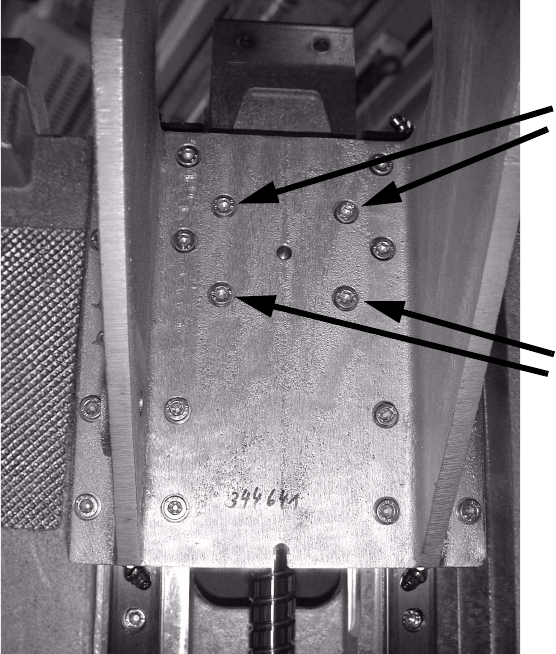
: Loosen the four screws as shown in the picture.
The aluminum block should now be in the correct position on the spindle nut.
2
2
: Tighten the screws using a diagonal sequence.
2
Screws
Screws