SMN-Tape Feeder Manual(Eng Ver5).pdf - 第49页
Operation of the T ape Feeder 2-19 and part length may be helpful for the st able part supply . When there is a job change, the part loss is minimized because the number of parts whose vinyl cover is removed in the feede…
Samsung SM-Series Pneumatic Tape Feeder Users' Manual
2-18
2.2.3. Changing the pitch of the SM 24~88mm tape feeder
For the SM 24~88 mm tape feeder, either 4mm, 8mm, 12mm, 16mm or 20mm pitch can
be used depending on the component types. (If the user wants the transport pitch to be
24mm, 32mm, or 40mm, set the pitch to 12mm, 16mm, or 20mm respectively and rotate
the cylinder of the component placer twice.)
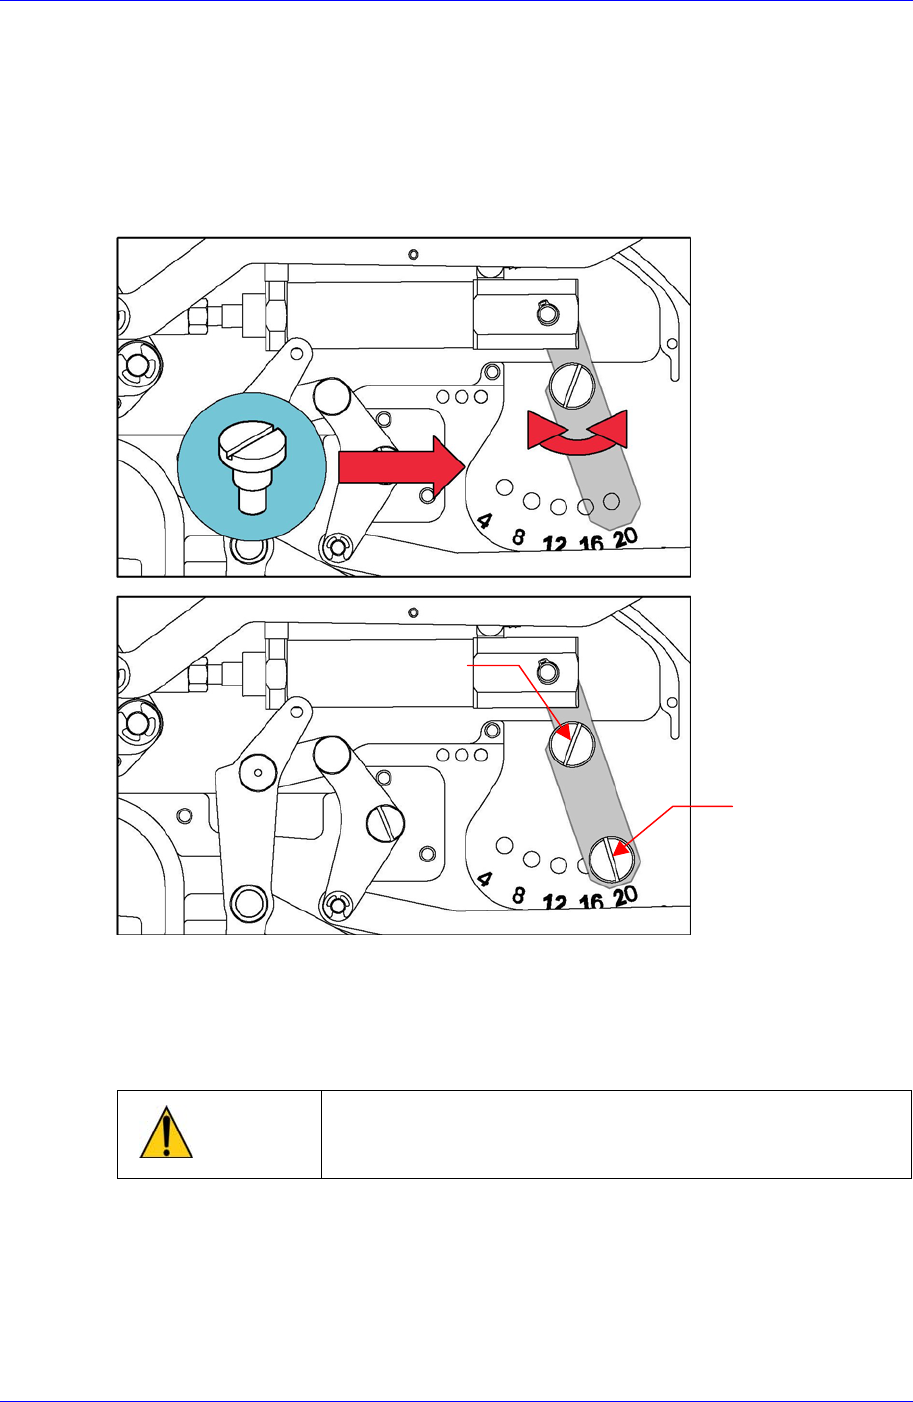
Method of changeover: Set up on the cylinder bracket with the adjusting screw located on
the main frame as shown in the figure.
Figure 2-23. Setting the pitch for the SM 16mm tape feeder
Unscrew Bolt A slightly using a screwdriver with a ‘-’ shaped tip and remove Bolt B
completely. Then set the cylinder bracket pitch to the desired pitch (match the pitches of
4, 8, 12, and 16 with the bolt). Then tighten Bolt B and secure Bolt A.
Caution
Pitch change must be done in a clean place using proper
tools. Also, pay attention to safety and try not to damage
or lose components.
2.2.4. Changing the pitch of the 24~88mm tape feeder
Unlike the 8~16mm feeder, the shutter of the 24~88mm feeder does not always perform
reciprocating movement during feeding but it determines and fixes the position at which
vinyl tape is removed when changing the vinyl removal position. Generally, minimizing
the exposure of a part by adjusting the vinyl tape removal position considering the pitch
Volt B
Volt A
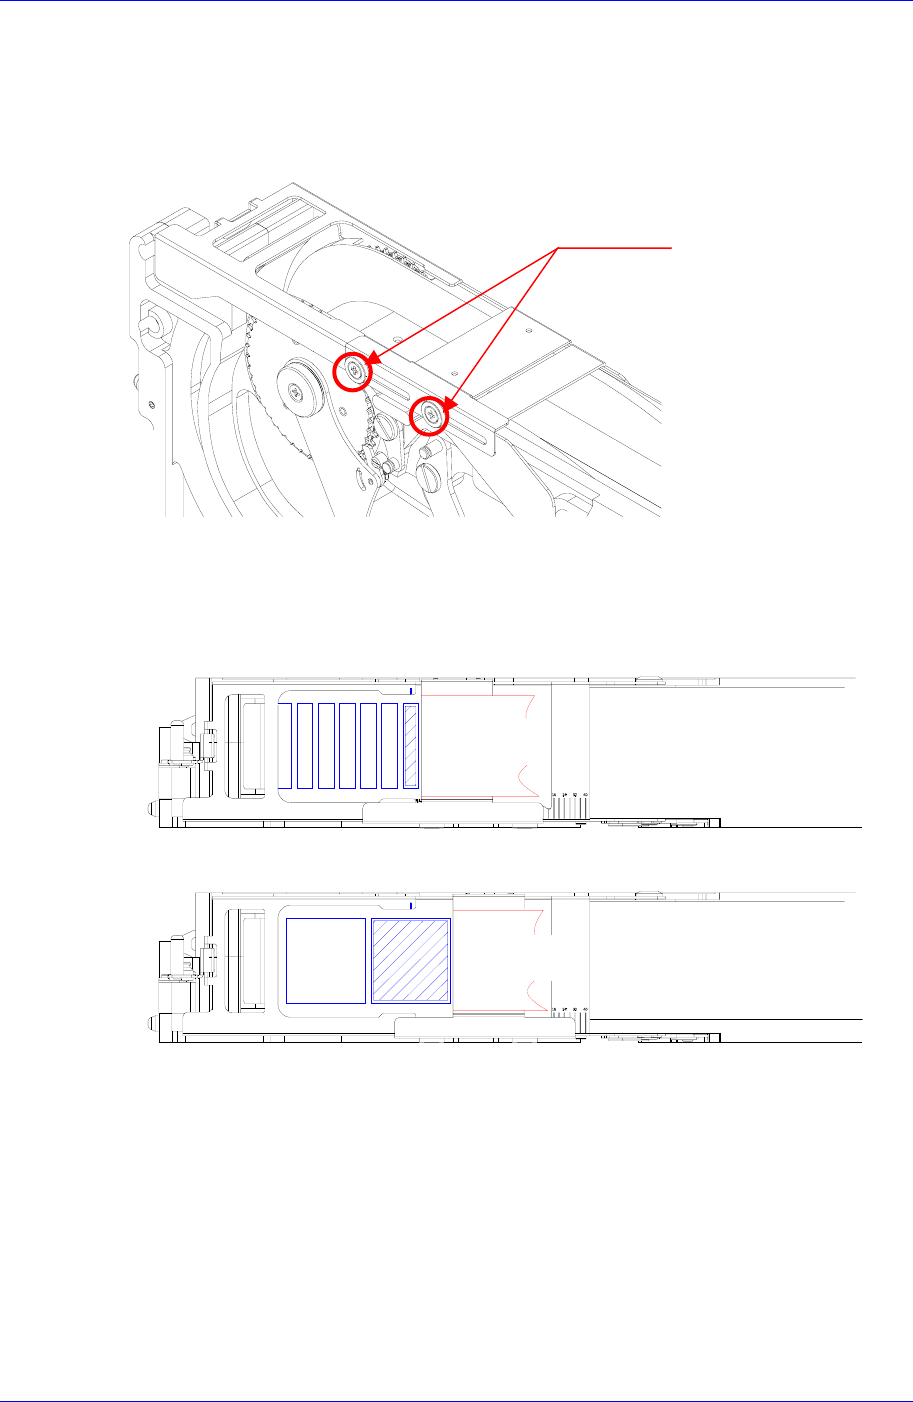
Operation of the Tape Feeder
2-19
and part length may be helpful for the stable part supply. When there is a job change, the
part loss is minimized because the number of parts whose vinyl cover is removed in the
feeder is reduced. When adjusting the shutter position, unscrew the bolts (2 sets) at one
side of the feeder slightly as shown in the following figure and adjust the shutter position
by hand. Then secure the bolt again.
Secure the shutter by maintaining appropriate distance between the part and shutter so
that a part is not caught by vinyl tape during part pickup considering the pitch and part
size as shown in the following figure.
폐비닐
폐비닐
(1) For Part with 8mm Pitch
(2) For Part with 32mm Pitch
Shutter Fixing Bolt
Waste Vinyl
Waste Vinyl
Samsung SM-Series Pneumatic Tape Feeder Users' Manual
2-20
2.3. Installing the tape feeder on the feeder base
Contact the feeder at the desired slot of the feeder base, and insert the feeder keeping the
installation guide accurately inserted in the feeder base slot. At this time, when the feeder
location pin located at the lower front of the feeder and vertical plate of the feeder base is
contacted, fix to the feeder base inserting grip.
Warning
When installing the feeder on the feeder base of the
machine, not checking whether the machine is in idle
status could cause severe injury. Be sure to check to see
if the machine operation mode is idle before installing the
feeder.
Caution
Since a large feeder is relatively heavy, special care is
required when transporting, installing, and removing it.
When installing the feeder in the feeder base or removing
it from the feeder base, use both hands. When
transporting and moving the feeder, exercise care to avoid
colliding with any object or person.
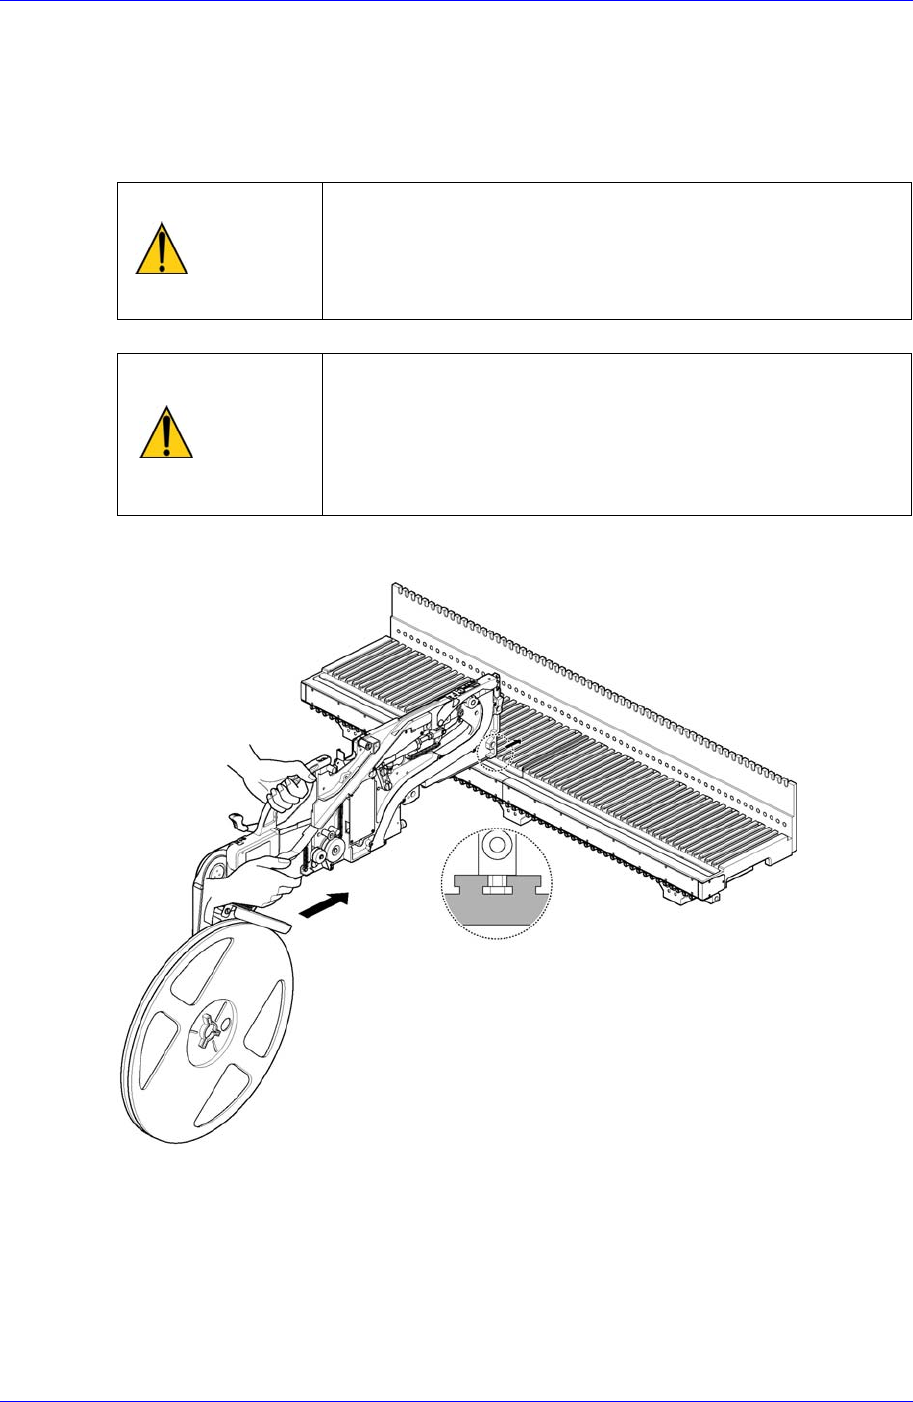
The method of installing SM 8mm~16mm feeder at the feeder base is as follows.
Figure 2-24. Inserting on the feeder base of the 8mm~16mm tape feeders
Each slot of the feeder base has its own slot number. After confirming the slot number of
the required feeder base, insert the SM feeder into the slot, and push the feeder with
adequate force until the location pin at the lower front of the feeder and vertical plate of
the feeder base contact each other..
When inserting the SM feeder into the feeder base, hold the rear part of the handle and
push the SM feeder as shown in the above figure.