00193688-04.pdf - 第29页
In st alla tio n an d Co nf igur at ion G uide SI P LACE E xpl ore r 3 I ns tal li ng SIP LAC E Ex plor er Edi tio n 12 /200 5 EN 3.1 In iti al In stal la tio n of S IPL ACE E xpl ore r 2. 0 SP1 29 3 Fig. 3 - 3 Insta lla…

3 Installing SIPLACE Explorer Installation and Configuration Guide SIPLACE Explorer
3.1 Initial Installation of SIPLACE Explorer 2.0 SP1 Edition 12/2005 EN
28
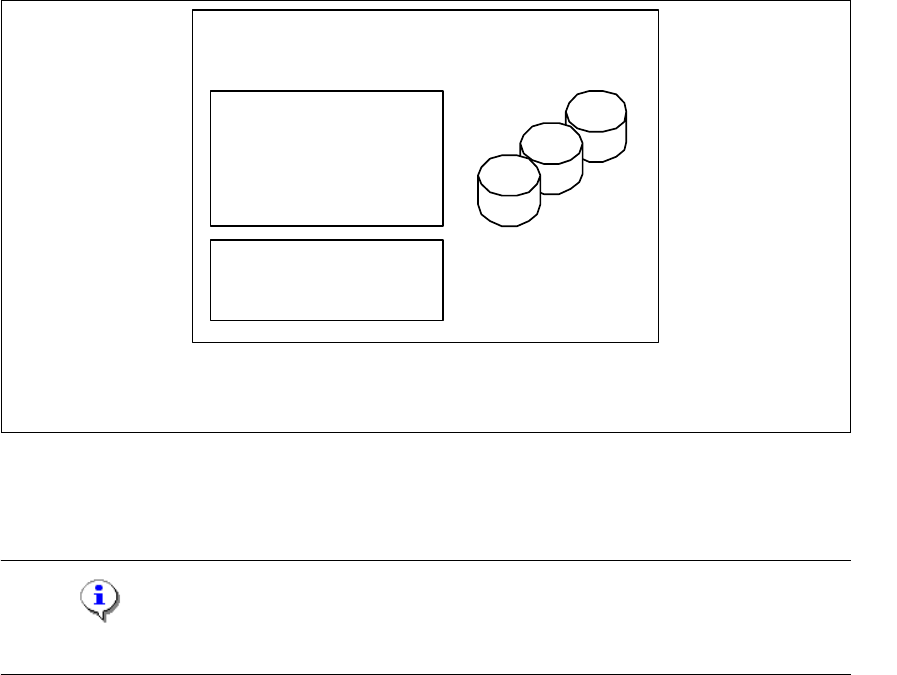
3.1.1.4 Island Installation
In this installation variant, SIPLACE Explorer with all system components can be installed on the
existing SIPLACE line server.
3
Software Requirements SIPLACE Line Server:
– System environment - one of the following versions:
– Windows 2000 Workstation with SP3 or SP4
– Windows XP Professional with SP2
– MSDE 2000
– Explorer installation:
– Runtime Environment
– Tomcat Web server
– Java 2 JRE
– Factory Configuration
3
Hardware Requirements SIPLACE Line Server:
– all requirements of the existing SIPLACE Line Server
– Computer with 2.4 GHZ CPU
– 2 GB memory
– 10 GB available hard drive capacity
3
NOTE
Please note that one line can only be used for one application in this installation variant. 3
Installation and Configuration Guide SIPLACE Explorer 3 Installing SIPLACE Explorer
Edition 12/2005 EN 3.1 Initial Installation of SIPLACE Explorer 2.0 SP1
29
3
Fig. 3 - 3 Installation variants: Island installation
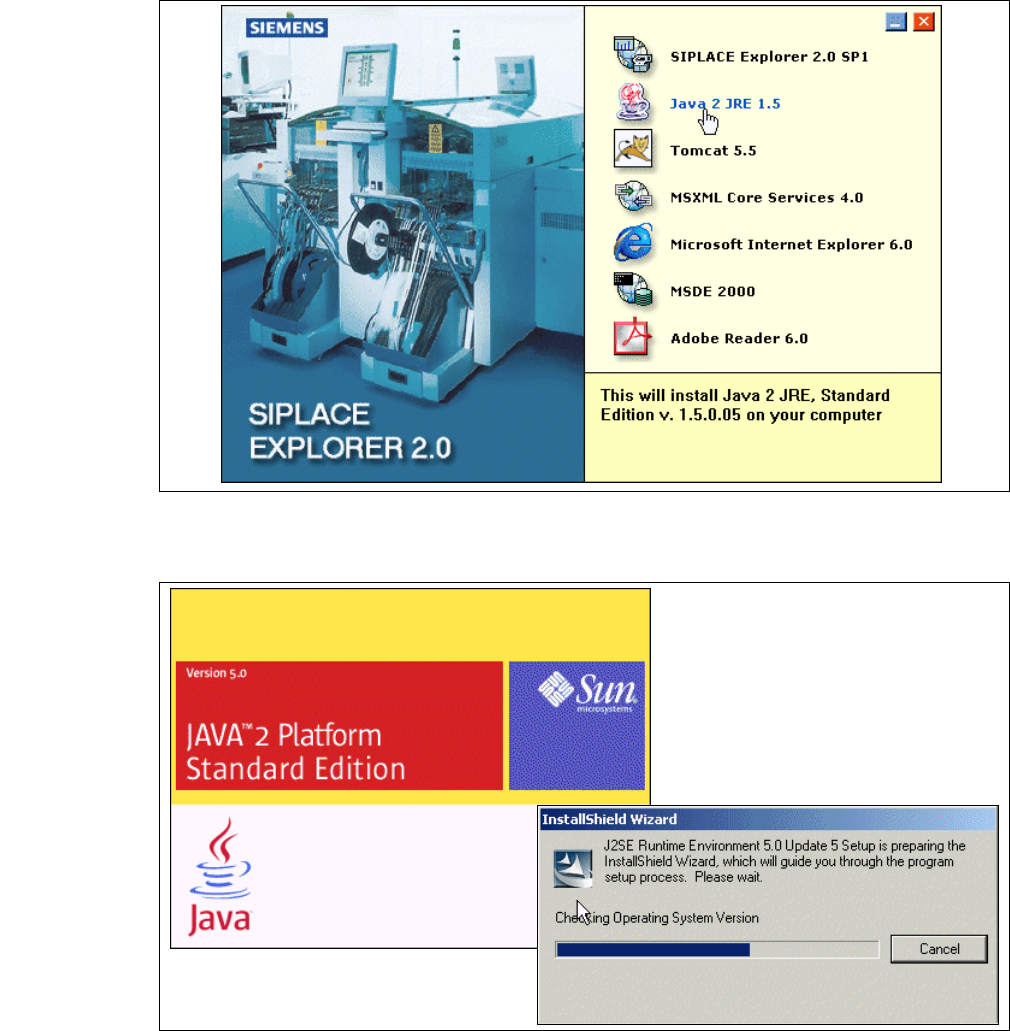
3.1.2 Java 2 JRE 1.5 Installation Procedure
NOTE
You must have Windows 2000 administrator privileges to perform installation. 3
→ Place the SIPLACE Explorer CD in your CD-ROM drive.
only for 1 application
per line
- MSDE 2000
- Tomcat
- Factory Configuration
- Java 2 JRE
- RTE per Linie
Report Generation:
- MSXM
- Excel
all databases, all line
databases
SIPLACE Line Server
(existing)
3 Installing SIPLACE Explorer Installation and Configuration Guide SIPLACE Explorer
3.1 Initial Installation of SIPLACE Explorer 2.0 SP1 Edition 12/2005 EN
30
→ The Start screen will appear.
3
Fig. 3 - 4 SIPLACE Explorer setup - Start screen
→ Select Java 2 JRE 1.5. You will be guided through the Java 2 JRE installation procedure.
3
Fig. 3 - 5 Install shield wizard - preparing the installation