00193688-04.pdf - 第77页
Ins t a llat ion and Con figu rat i on Guid e S IPLA CE Ex plo rer 4 Co nfig ura t i on Edi tio n 12/200 5 EN 4.1 St an dar d Mo ni to rin g A pp lica tio n (SM A) 77 4.1. 1.5 Step 4 - Set Up Production Li ne Schedule Th…

4 Configuration Installation and Configuration Guide SIPLACE Explorer
4.1 Standard Monitoring Application (SMA) Edition 12/2005 EN
76
4.1.1.4 Step 3 - Review Application Features
A list of Features will be presented in the left box. If you chose custom configuration, any feature
can be selected from the list. Otherwise, a minimum or maximum list of features will be shown.
4
A list of machines for the chosen feature will be shown in the box on the right. An icon next to the
machine name indicates whether the selected feature is implemented for this machine or not. The
Available for window shows a comment for the selected feature. 4
4
Fig. 4 - 6 Step 3: review application features
→ From the list in the left box, you can select the application features you want to add to the
application to be generated. To select a feature, mark the check box next to the feature name.
→ Check the functions for the relevant machines of all available lines and add other functions,
where necessary.
→ After selecting all the features for the machines and lines, click Next to continue with the next
step.
Installation and Configuration Guide SIPLACE Explorer 4 Configuration
Edition 12/2005 EN 4.1 Standard Monitoring Application (SMA)
77
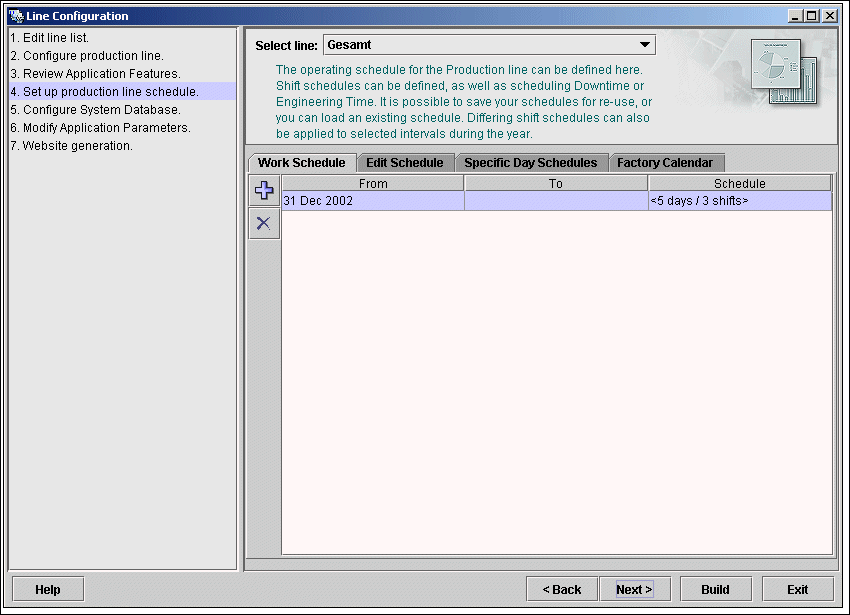
4.1.1.5 Step 4 - Set Up Production Line Schedule
The SIPLACE Explorer Calendar allows you to specify a production line schedule: 4
– Define a weekly shift schedule,
– Plan engineering and scheduled downtime for machines in the line and
– Apply the schedule to a time interval.
4
Fig. 4 - 7 Step 4: set up production line schedule
→ When the schedule for the production line as been defined, click on Next to continue with the
next step.

4 Configuration Installation and Configuration Guide SIPLACE Explorer
4.1 Standard Monitoring Application (SMA) Edition 12/2005 EN
78
4.1.1.6 Step 5 - Configure System Database
→ Now you can configure the SIPLACE Explorer System database settings:
– Database type;
– Driver name;
–Host;
–Port;
– Database name;
– Login (click on the corresponding cell button to call-up a dialog box in which you can specify
login information, i.e. user name and password).
→ For MS SQL Server database the default port '1433' will be offered, which you will not usually
need to change.
NOTE
If you have installed MSDE 2000, you must now enter the port number shown during the
installation procedure. 4