00193688-04.pdf - 第90页
4 Co nfi gura tion Ins tall ati on and Con figu rat ion Guid e SI PLA CE Exp lo rer 4.1 Stan da rd Moni tor ing Appl ic atio n ( SMA ) Ed iti on 12 /2 00 5 EN 90 → In order to open the applic ation wizar d you mu st sele…
Installation and Configuration Guide SIPLACE Explorer 4 Configuration
Edition 12/2005 EN 4.1 Standard Monitoring Application (SMA)
89
4.1.2 Development Environment: Creating an SMA with the Application Wizard
In order to create an SMA with the application wizard, you must have SIPLACE Explorer
Development Environment installed on your computer. SMA creation consists of the following
steps:
4
– Application wizard (wizard with 8 steps)
– Establishing a connection to the database (wizard with 3 steps)
4.1.2.1 Starting the Application Wizard
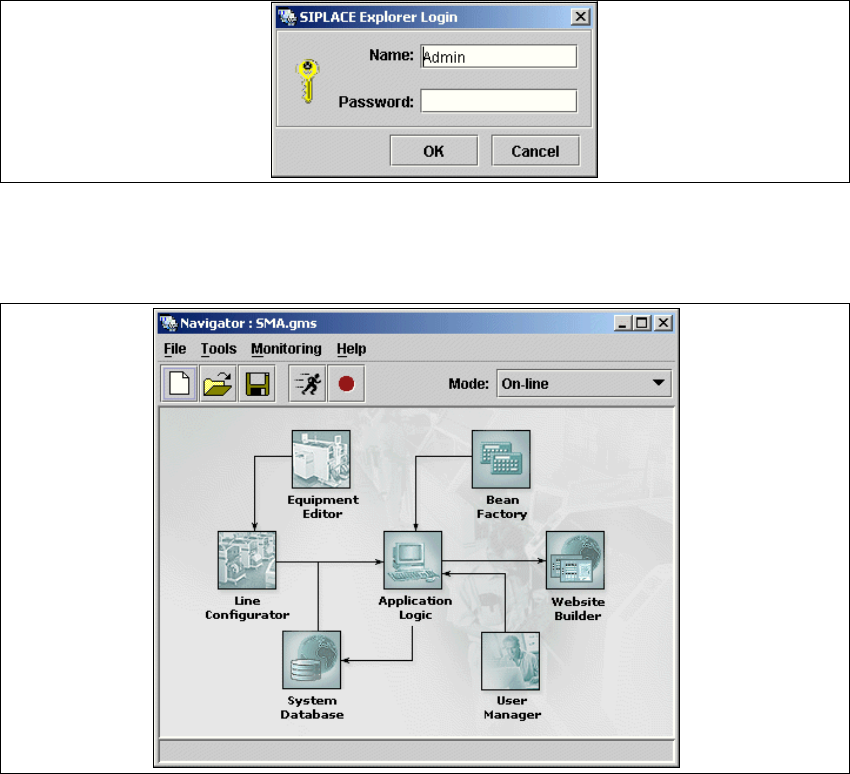
→ Start the SIPLACE Explorer Developer Studio by selecting Programs → SIPLACE Explorer
2.0 → Developer Tools → SE Developer Studio
from the menu in Windows. The login dialog
will appear:
4
Fig. 4 - 21 Login
→ Register yourself as Admin with an empty password and click on the OK button. The SIPLACE
Explorer navigator will appear.
4
Fig. 4 - 22 SIPLACE Explorer navigator
4 Configuration Installation and Configuration Guide SIPLACE Explorer
4.1 Standard Monitoring Application (SMA) Edition 12/2005 EN
90
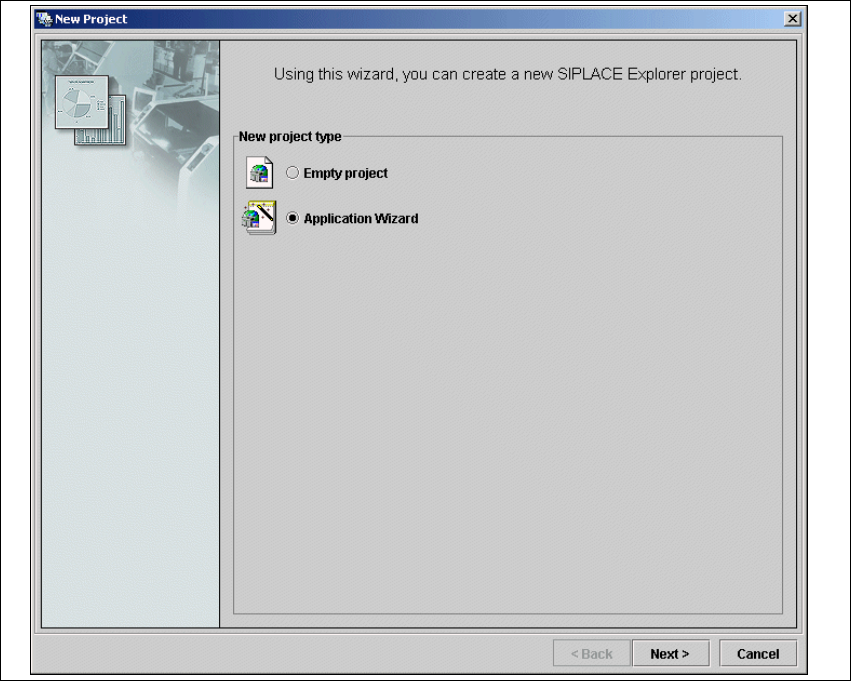
→ In order to open the application wizard
you must select
File / New Project from the menu or click on the corresponding button in the
SIPLACE Explorer navigator toolbar.
→ The New Project dialog box will open.
4
Fig. 4 - 23 'New project' dialog box
→ There are two ways to create an SMA:
–Select
Empty Project to build your application from scratch or
– Application Wizard to customize and configure a pre-built application.
→ In this section we will discuss the second option.
→ Once you have selected Application Wizard and clicked Next, you will be presented with a
eight-step wizard that will help you to create SIPLACE Explorer customized for your production
line.
Installation and Configuration Guide SIPLACE Explorer 4 Configuration
Edition 12/2005 EN 4.1 Standard Monitoring Application (SMA)
91
NOTE
Follow these steps and note that you may skip steps 5-8 and do the required configurations
later. 4
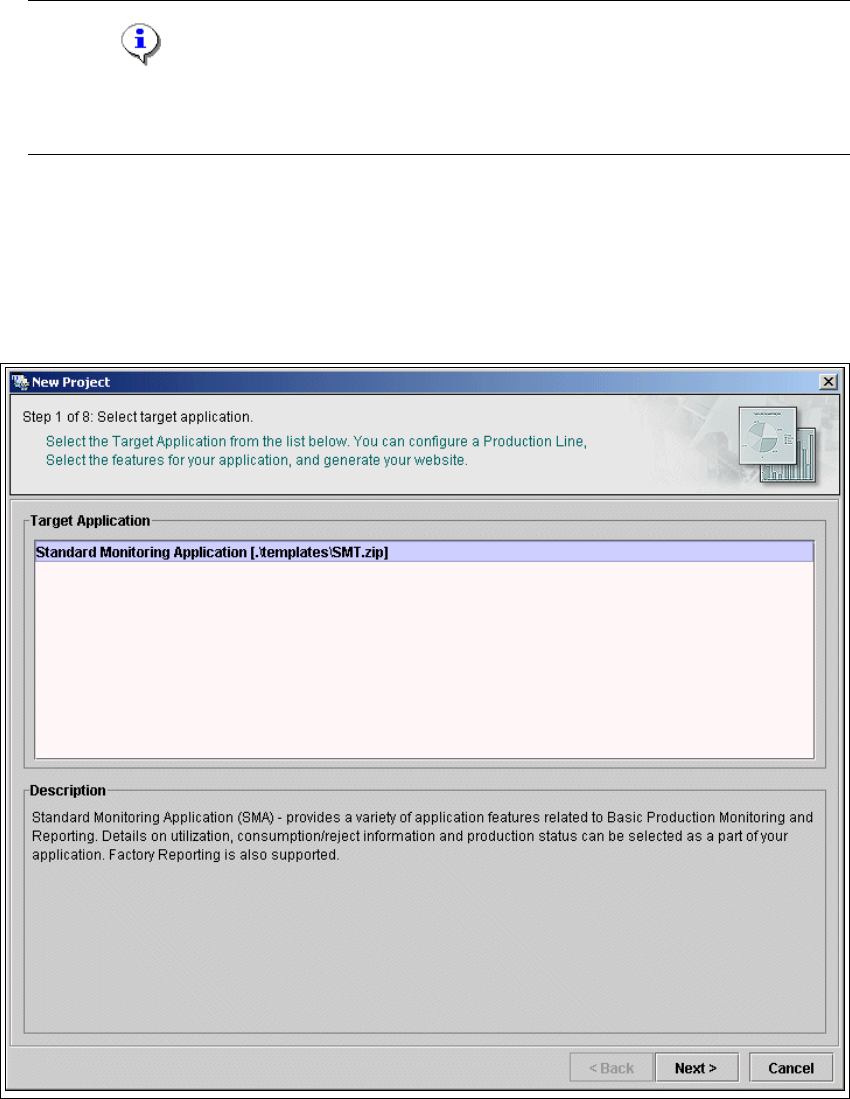
4.1.2.2 Step 1- Select Target Application
→ Select the required target application (this defines a set of templates needed to create a
customized application). The description field provides an explanation of the target application
concerned, helping you to make your selection from the list of
Target Applications.
4
Fig. 4 - 24 Step 1: Select target application
→ Once you have selected the desired application click on the Next button to continue with the
next step.