ACT - Accuracy Check Tool.pdf - 第204页
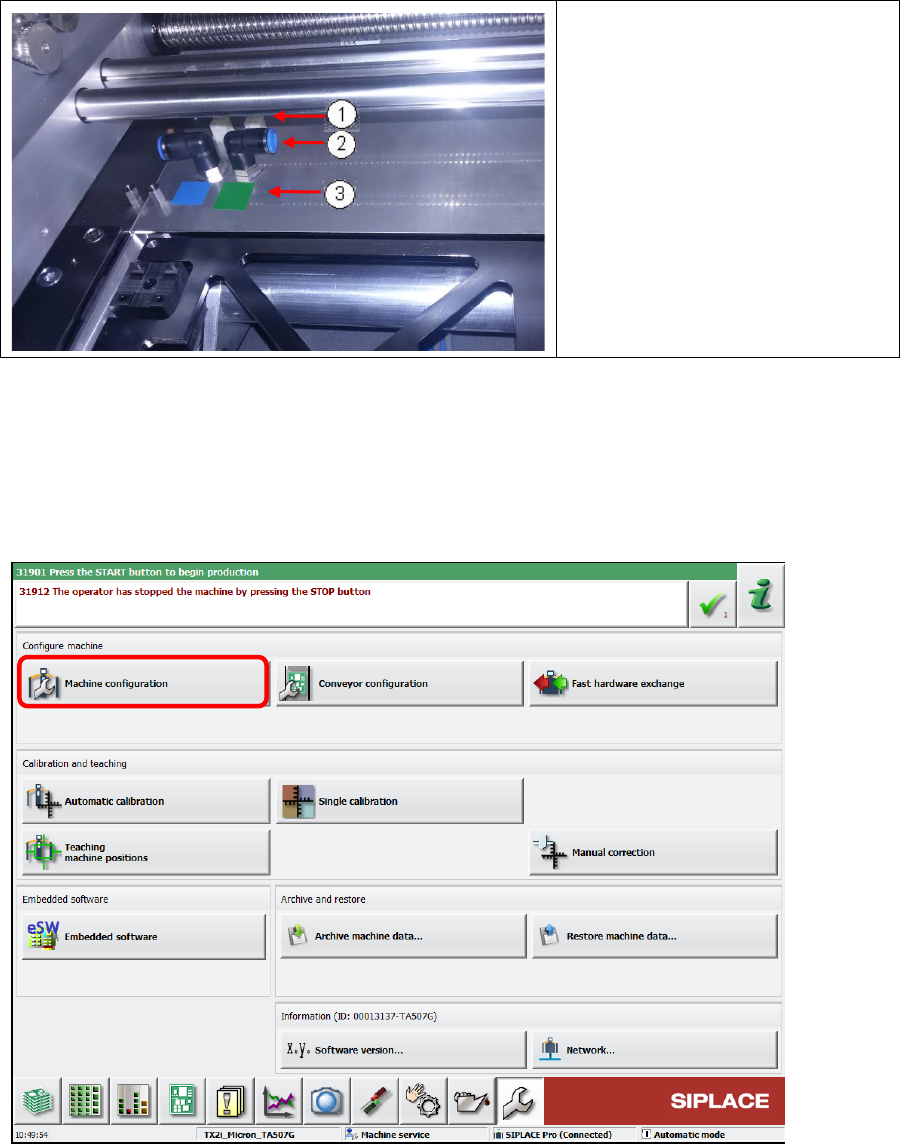
ACT with SSW 7xx / User Manual 07/2017 Edition 96 1. Connector 2. Vacuum hose conn ection 3. Color coding: Green = Lane 1 Blue = Lane 2 ► Connect the comp ressed air hose and the cable of each vacuum tooling acco rding t…
ACT with SSW 7xx / User Manual 07/2017 Edition
95
6.1.3.1 Installing the ACT Vacuum Tooling
► Switch off the machine.
► If necessary, uninstall the customer vacuum tooling.
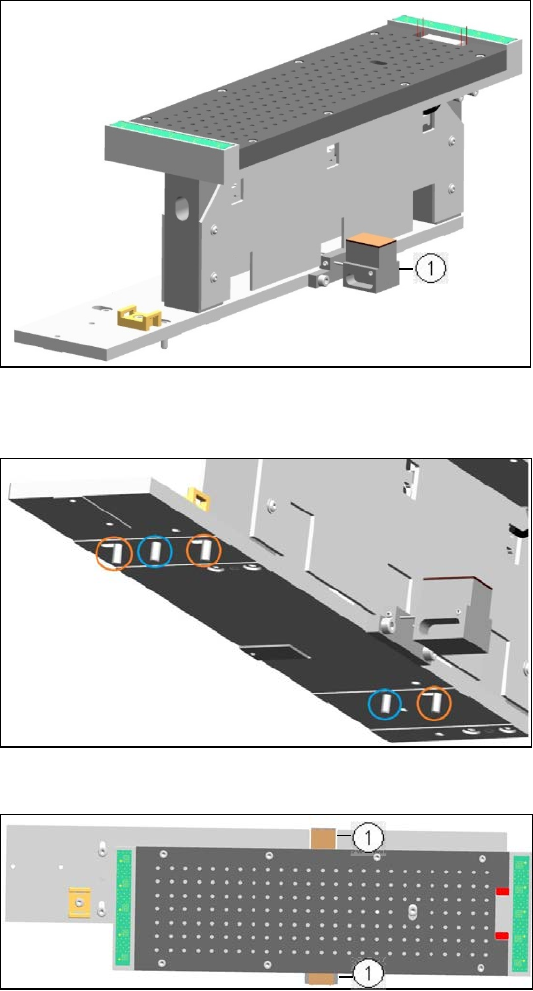
The set includes a vacuum tooling for each conveyor lane.
"VacTool ACT SP1 cpl." [03156327-01] for conveyor lane 1 und "VacTool ACT SP2 cpl."
[03156332-01] for conveyor lane 2.
1. Lifting table limitation
Figure 6-3: Example vacuum tooling for ACT 15 µm, Lane 1
On the underside of the base plate there are 2 pins (blue circles) and 3 screws (orange circles).
► Position the vacuum tooling on
the lifting table plate with the 2
pins.
► Fasten the vacuum tooling with
3 screws to the lifting table
plate.
Figure 6-4: Installing vacuum tooling at lifting table. 2 pins3 screws
1. Lifting table limitation
► Ensure that the two metal
blocks of the lifting table
limitation are below the
conveyor rails.
Otherwise, the vacuum tooling
cannot be used.
Figure 6-5: Installing vacuum tooling at lifting table. 3 screws
ACT with SSW 7xx / User Manual 07/2017 Edition
96
1. Connector
2. Vacuum hose connection
3. Color coding:
Green = Lane 1
Blue = Lane 2
► Connect the compressed air
hose and the cable of each
vacuum tooling according to the
color coding.
Figure 6-6: Connecting vacuum tooling
6.1.3.2 Software Settings of the ACT Vakuum Toolings
► Switch on the machine.
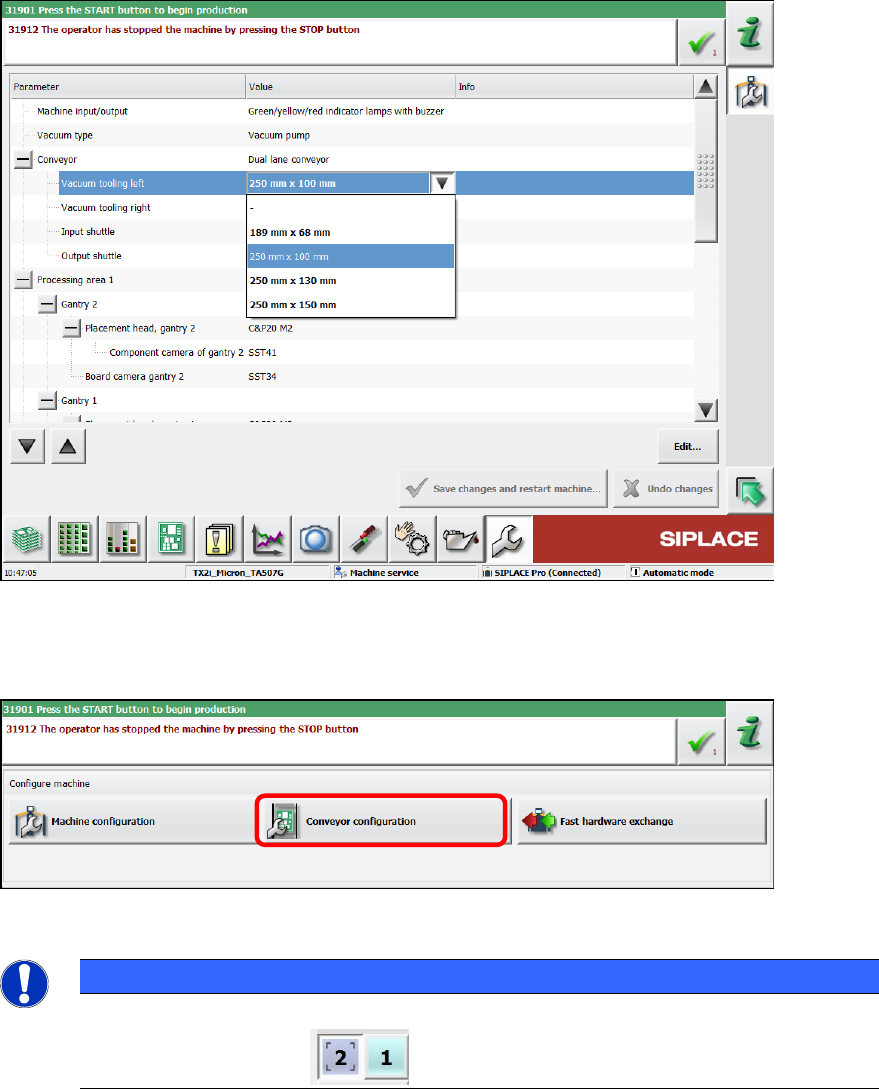
► Log in as Machine service user.
► Select Machine Configuration.
Figure 6-7: Machine configuration
ACT with SSW 7xx / User Manual 07/2017 Edition
97
► Select "250 mm x 100 mm" under Conveyor – Vacuum tooling left.
► Select "250 mm x 100 mm" under Conveyor – Vacuum tooling right.
Figure 6-8: Machine configuration, transport
► Click the Save changes and restart machine button.
► Switch over to Conveyor configuration after the restart.
Figure 6-9: Conveyor configuration
NOTICE
► For the following settings, please observe that you always have to perform them on
both conveyor lanes !