Maintenance Reference(CP45FV) Eng.pdf - 第40页
Samsung Component Placer CP45FV Series Maintenance Refer ence 3.1.2. Flying V ision Inspection If there is any contamination on t he top of the mirror , the vision might not recognize shapes properly . Check the top of t…
Weekly Inspection
Chapter 3. Weekly Inspection
3-1
3.1. Weekly Inspection
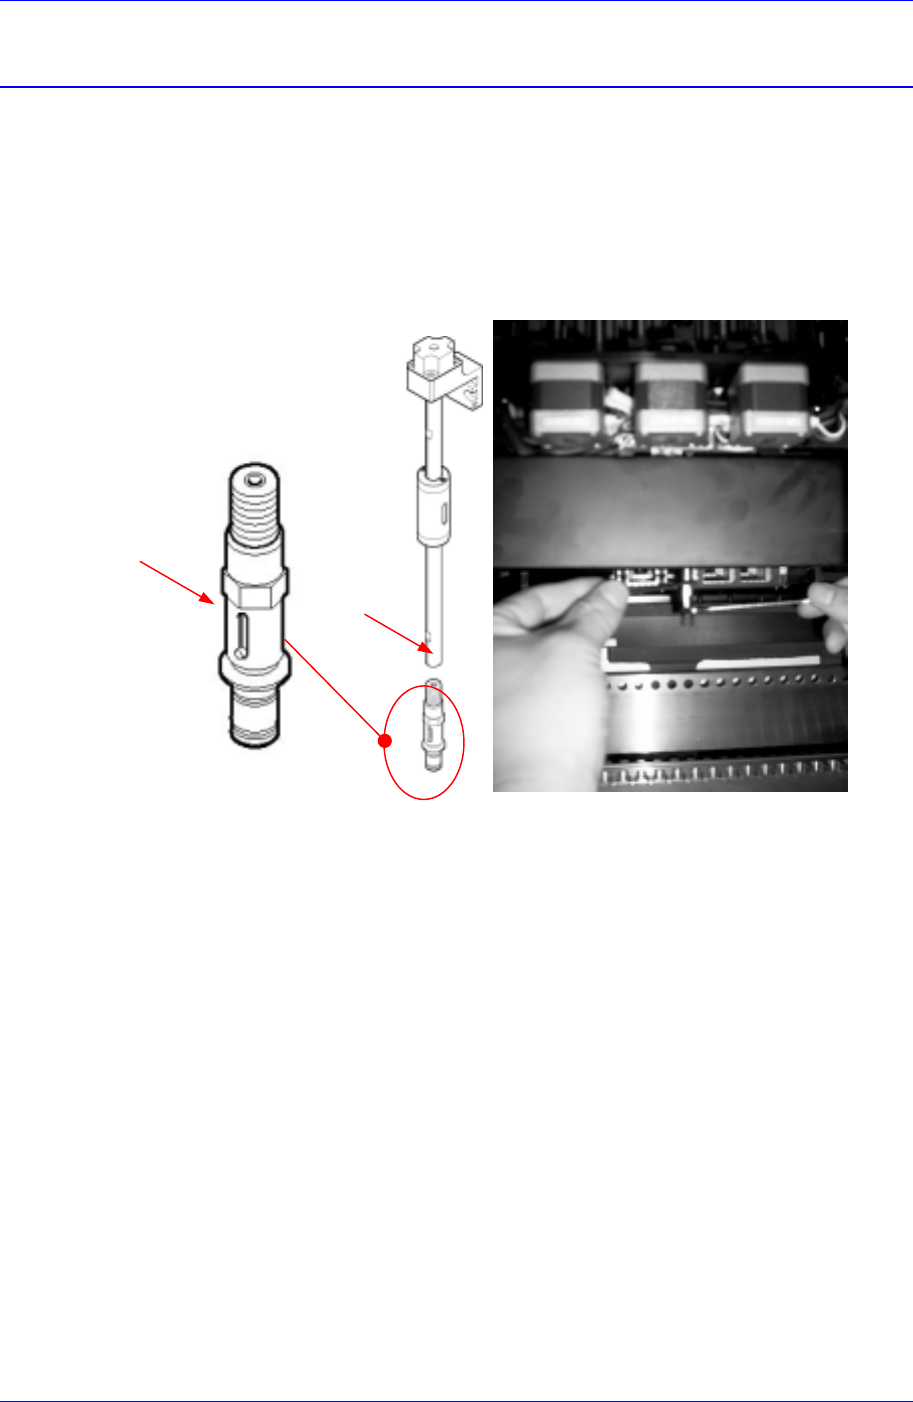
3.1.1. Nozzle Holder
Inspection
The nozzle holder could be damaged or bent. Check the nozzle holder to make sure
there is no bent.
Touch nozzle holder with a finger to check if the nozzle holder spring work well.
Figure 3-1. Nozzle Holder
A
B
Solution
Disassemble the damaged nozzle holder from the spindle using 7mm and 8mm spanners,
and mount the nozzle holder in the adverse order in which it was disassembled.
When disassembling the nozzle holder from the head (refer to Figure. 3-1)
Grip the head spindle at the groove (A) using a 7mm spanner.
Turn to loosen the nozzle holder gripping it at the hex shaped portion (B) using
an 8mm spanner until it can be loosened by hand.
Loosen and remove the nozzle holder by hand.
When fixing the nozzle holder to the head
Tighten the nozzle holder in the adverse order in which it was loosened.
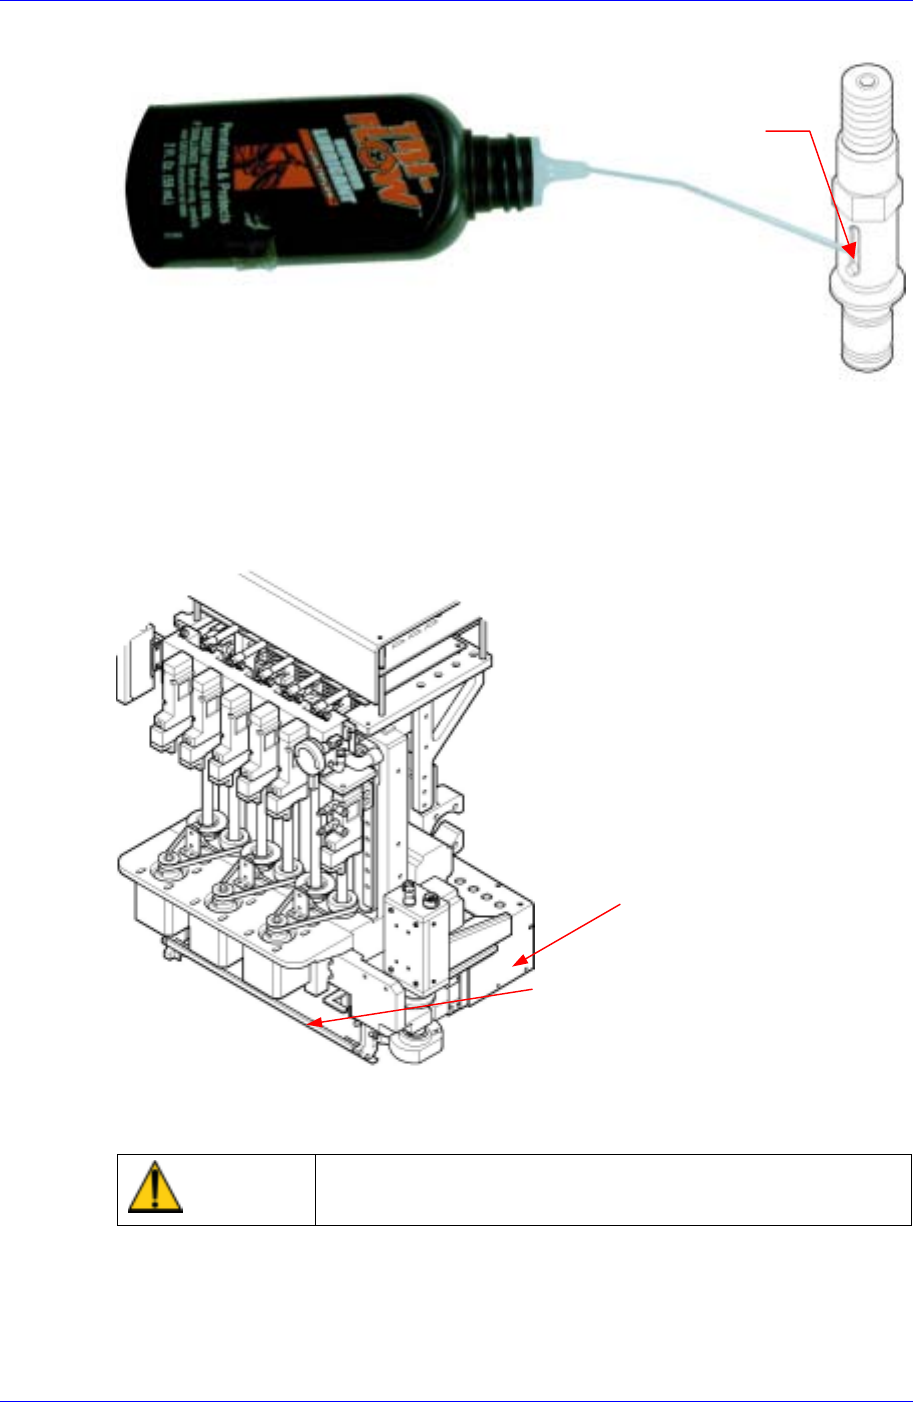
If the nozzle holder spring doesn’t work well, inject the provided nozzle cleaning liquid
into points of injection referring to the following figures.
Samsung Component Placer CP45FV Series Maintenance Reference
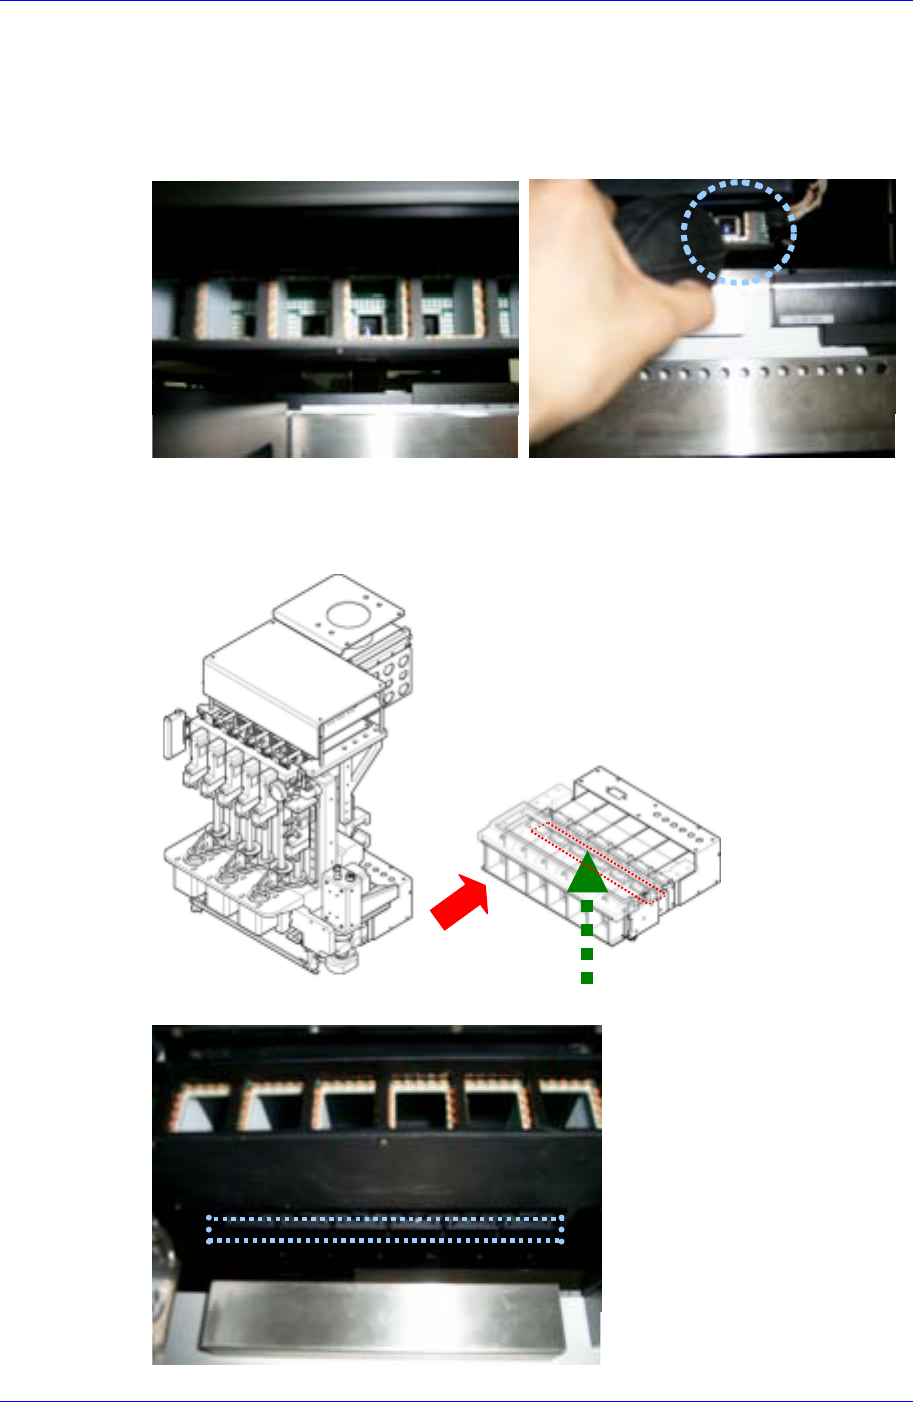
3.1.2. Flying Vision
Inspection
If there is any contamination on the top of the mirror, the vision might not recognize
shapes properly. Check the top of the mirror for any dust or contamination frequently.
Mirror
Flying Vision
Nozzle Holder Spring
Figure 3-2.Flying vision
Caution
At this time, be careful not to leave any fingerprints and
wipe the mirror and the lens carefully with the cleaning kit.
Solution
Stop the machine and move the head assembly as far forward as possible.
Move the mirror up.
3-2
Weekly Inspection
3-3
Turn off power supply to the machine. If necessary, turn off power supply to the
machine and then pull and move the X-frame further forward.
Remove dust on the mirror surface using the brush in the cleaning kit provided.
Blow off lens dust from its front side using the air spray contained in the cleaning kit
provided by Samsung Techwin.
If viewed from below, there is an approximate 1cm gap between the lighting
assembly bracket and the lens. Clean any lens dust with a swab by inserting it through
the gap. If necessary, dip the swab in alcohol to moisten and then use it to clean the
lens.
Eject air
Cleaning with swab